Mid 2010
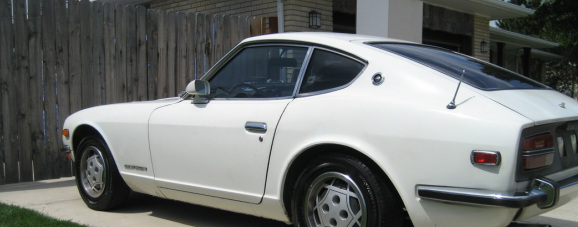
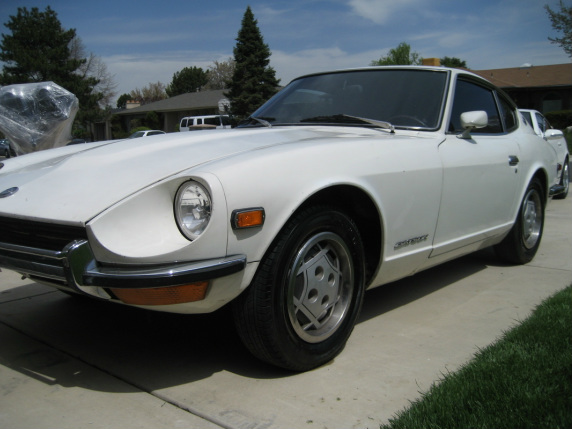
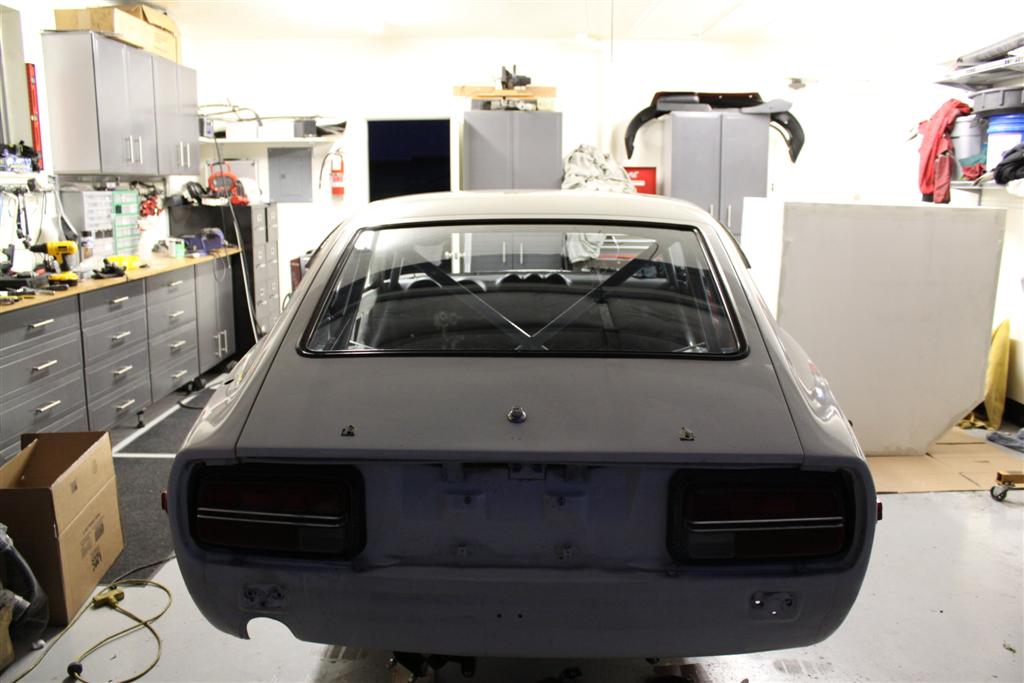
Hi all, my name is Tom and i live in SLC, UT. I have always like the old Z car, but the factory performance left much to be desired mostly since i am used to driving relatively fast cars on a daily basis. I found this car here locally and mostly bought it for its body condition, i knew going into it i will find rust, but a car in this good of condition in this part of the country is difficult to find and im sure it will be minimal.
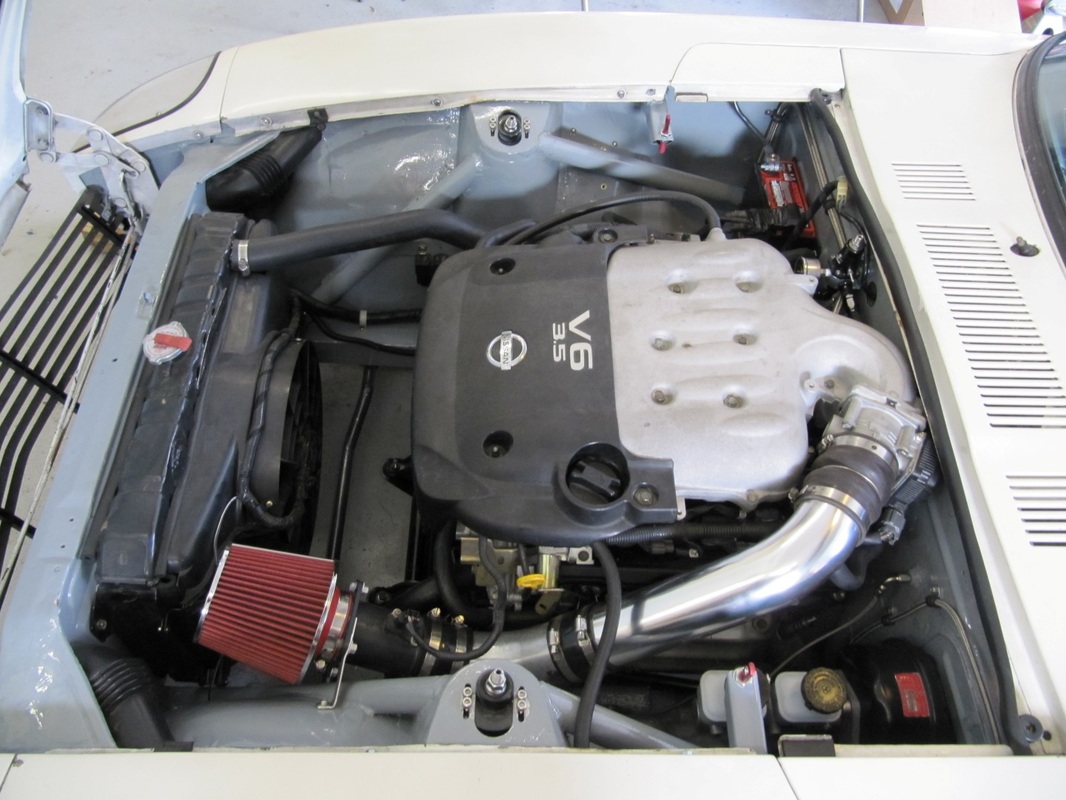
A lot has happened since i got the car. It sat in storage for a while until late 2011. While it was sitting, I went through several tough decisions regarding what i want to do with it. Race car or nice street car? Keep the stock L24 or go with a completely different engine? What i decided was to do a slight "resto-mod" with a vq35de +6spd from a 350z. By resto-mod i mean i want to restore the car body-wise but then basically modify everything else at the same time. This car is now 40 years old and i dont want to just go throw a bunch of HP into it and not expect bad things to happen. So the first part of this build is mostly dedicated to getting it prepared to handle 260 RWHP. That may not sound like a lot, but these cars were built for 110HP, so a lot of things need to happen to the existing unibody to make me confortable driving it on a race track without constant fear of it falling apart....The main goal for the car is to compete in NASA time attack events at Miller Motorsports park where i currently run my 300zx doing HPDE's and WinterX.
November 2011 through March 2012:

Late 2011 were the days where i started changing little things on the car to make it look better, and i was indecisive about the engine swap. i was more concentrated on fixing rust along with tearing it all down to find any rust or any other small issues to fix.
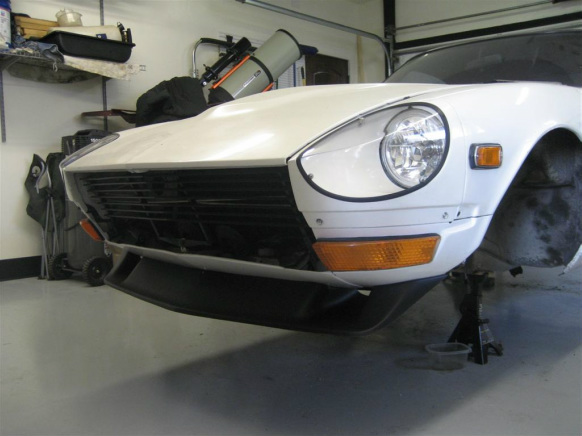
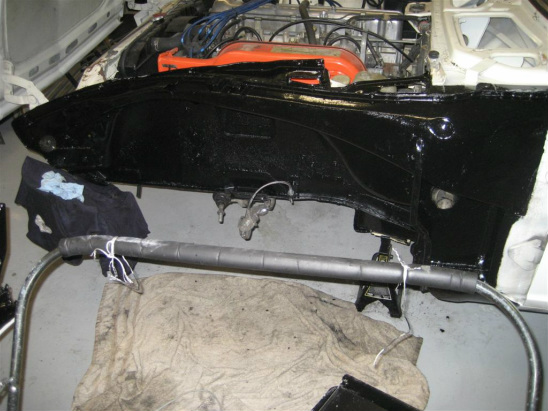
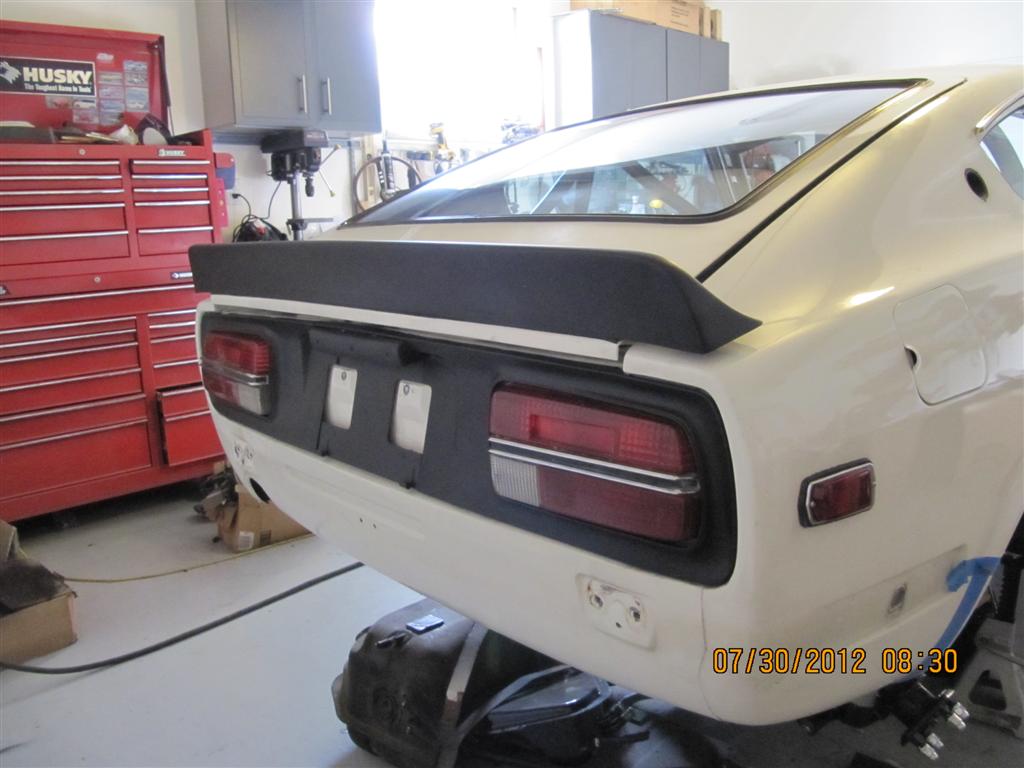
i started with cleaning up and repainting the front facia parts and using a POR15 like product on the inside to prevent future rust issues. i want to be able to drive this car mostly year around and i dont want to be afraid of rust on the roads.
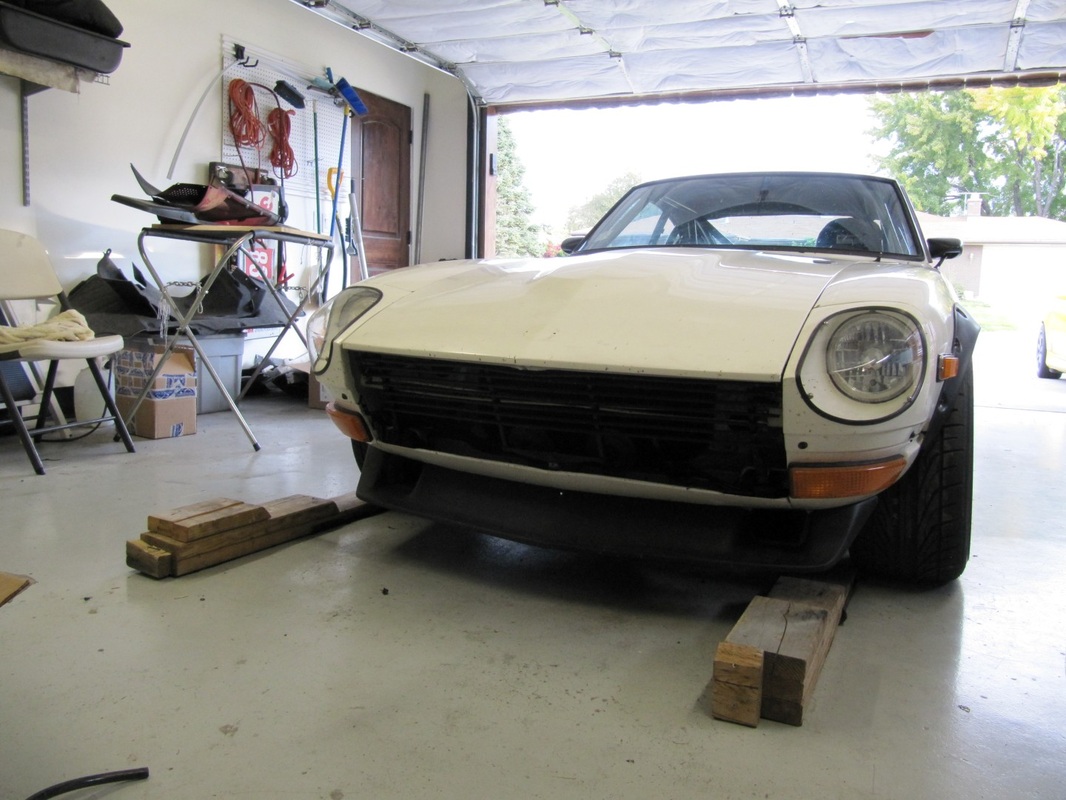
i then added some headlight bucket covers to improve airflow over the car, along with adding a BRE lower valence to help direct air around the car instead of underneath it., and also painted grill black.
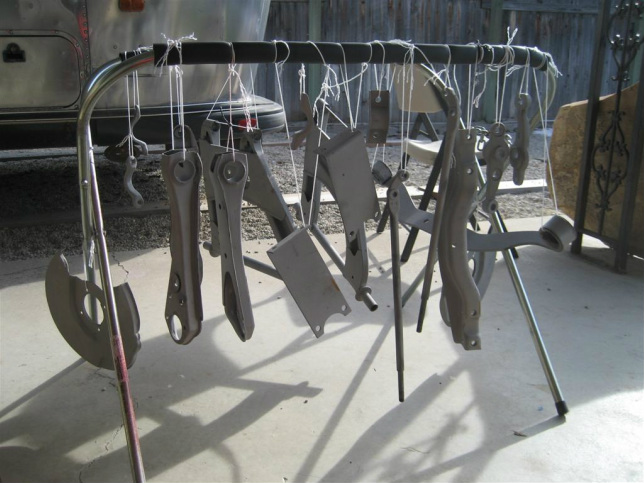
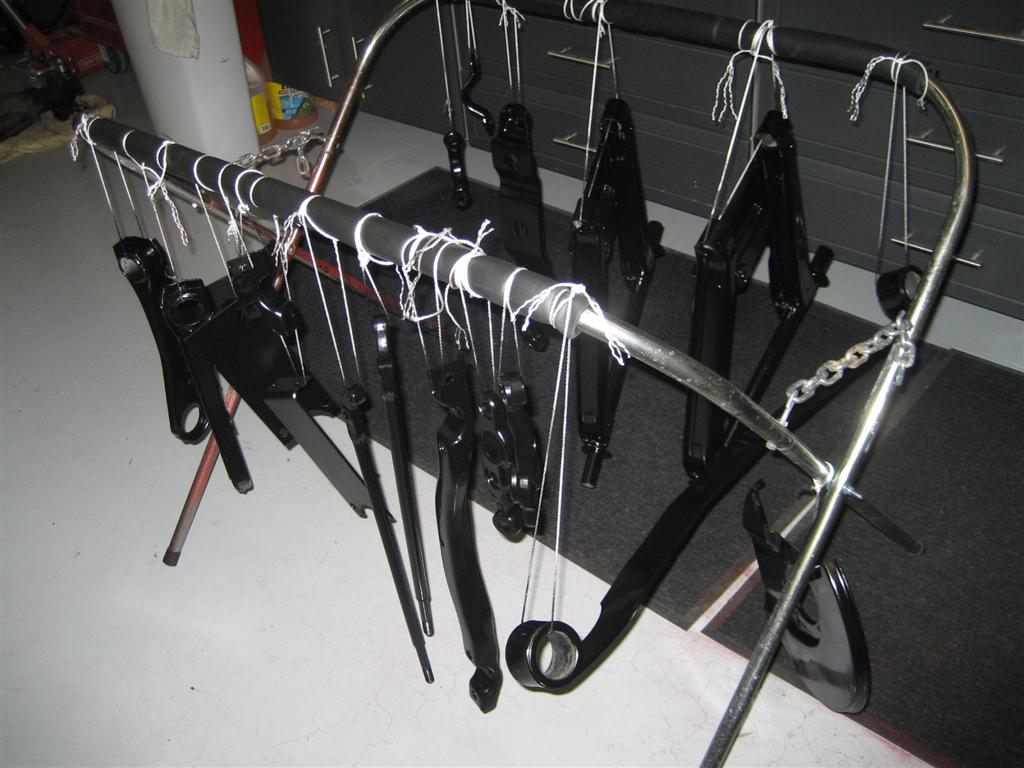
The next phase was tear apart the entire suspension system and get it sand blasted. After this, i painted in POR15 gloss black, then top coat with eopxy undercoat.
|
|
Cont'd
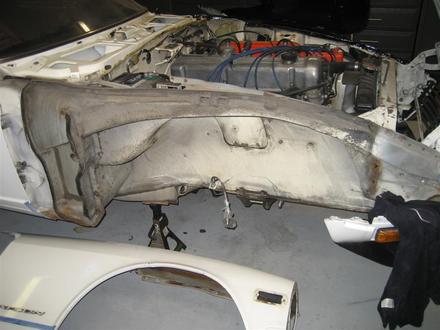
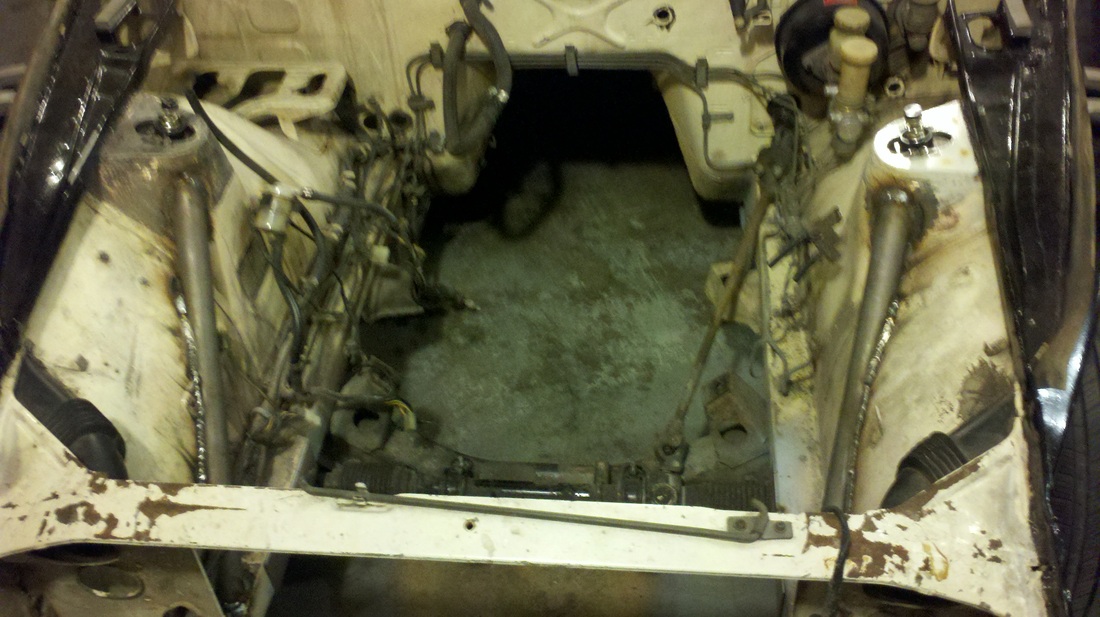
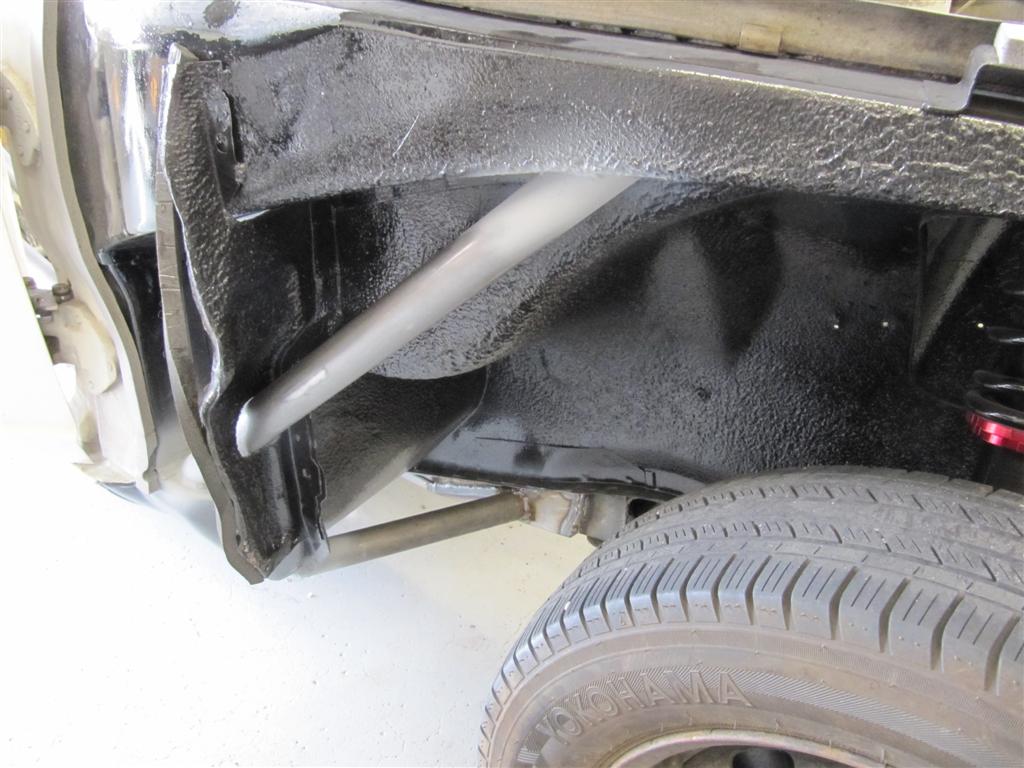
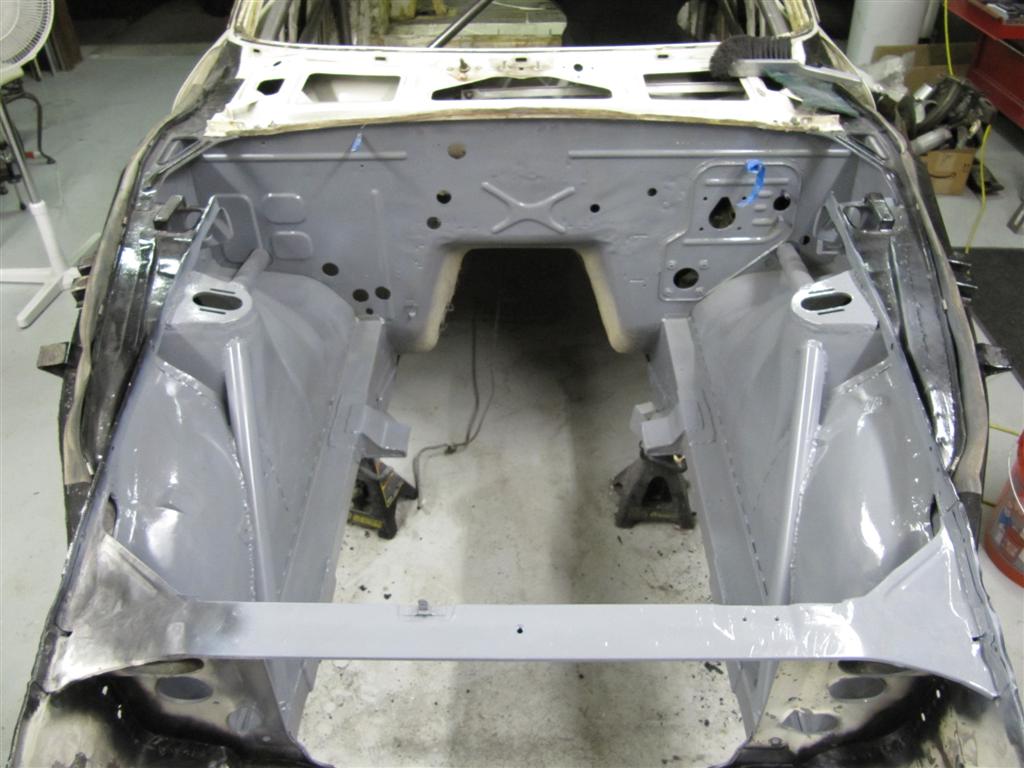
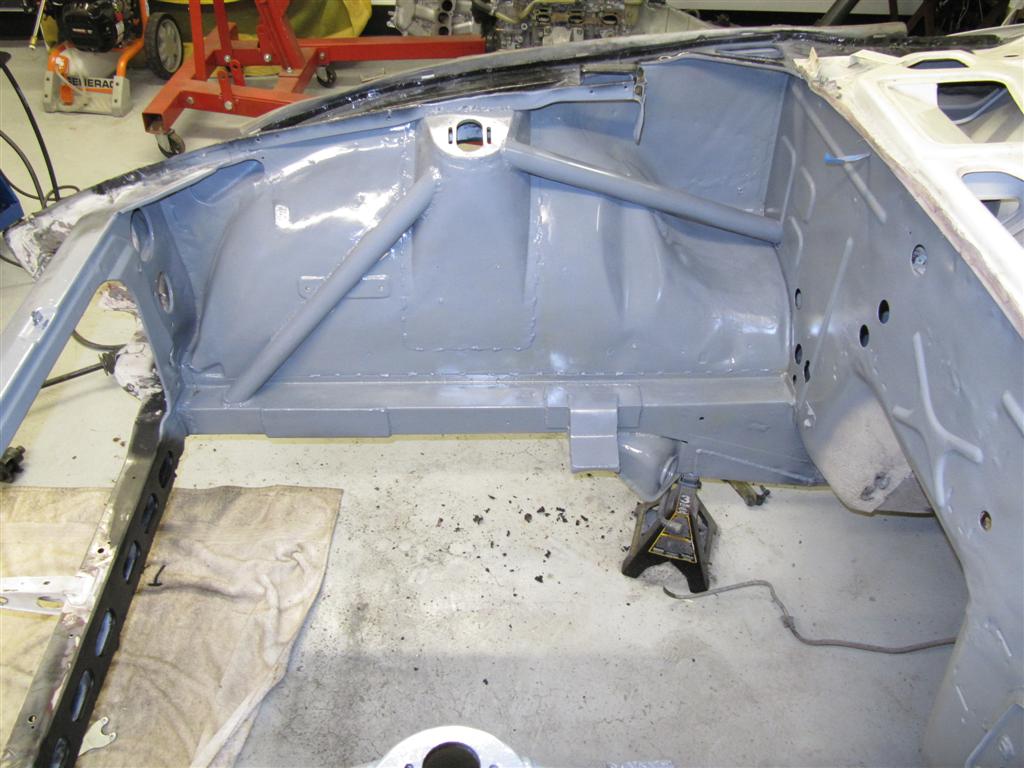
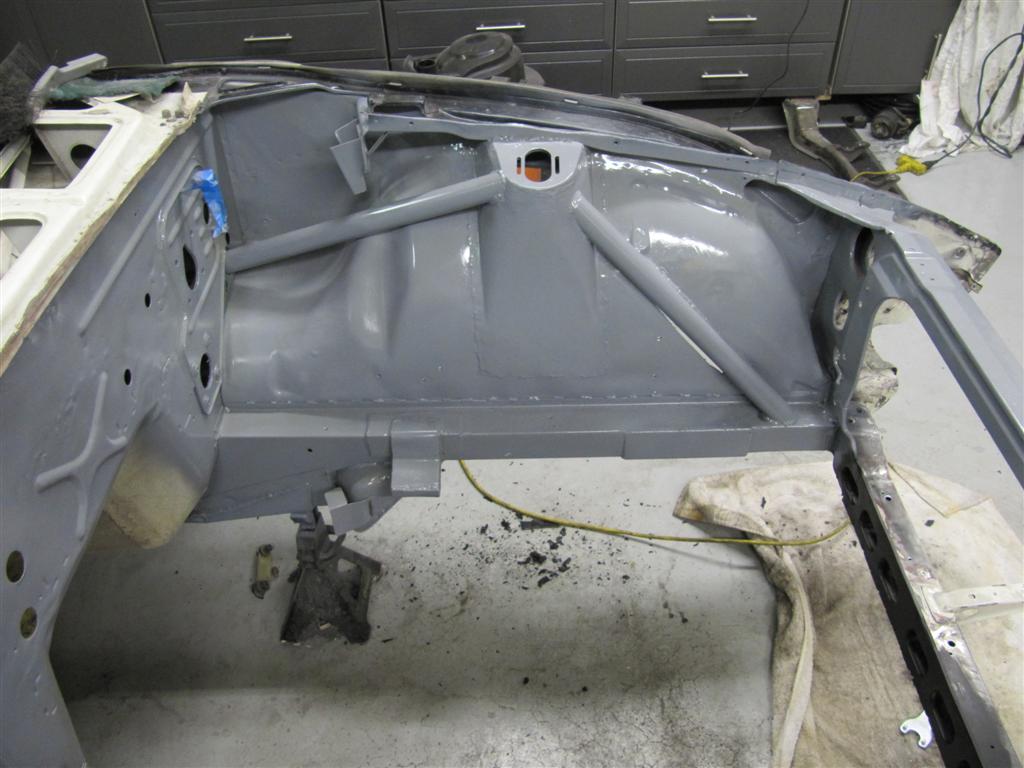
Next was the painstaking task of removing the fenders and cleaning underneath them. I always dread this because these cars are 40 years old and they can collect a bunch of nasty stuff. This one was not too bad.
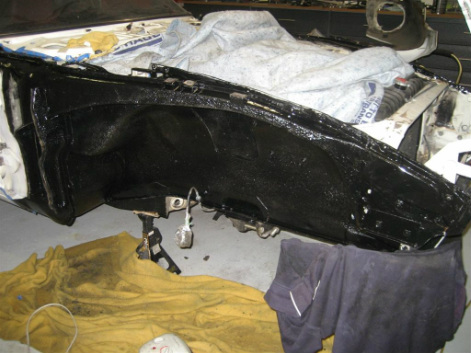
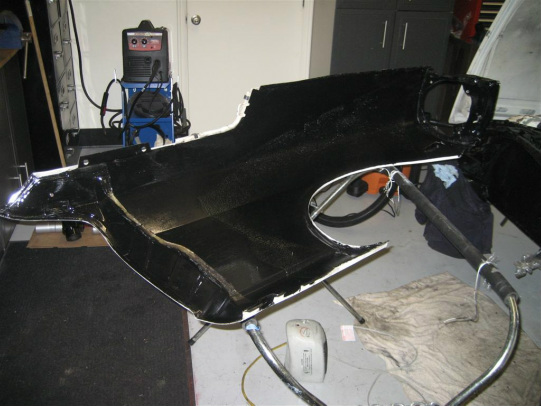
I spent at least a weekend, cleaning and prepping the surface for POR15 to be used to protect any exposed metal from rust. There is factory undercoat on the car, most of which was in good shape, but where it wasnt, it was stripped off and new coating was applied.
I spent at least a weekend, cleaning and prepping the surface for POR15 to be used to protect any exposed metal from rust. There is factory undercoat on the car, most of which was in good shape, but where it wasnt, it was stripped off and new coating was applied.
|
|
Cont'd
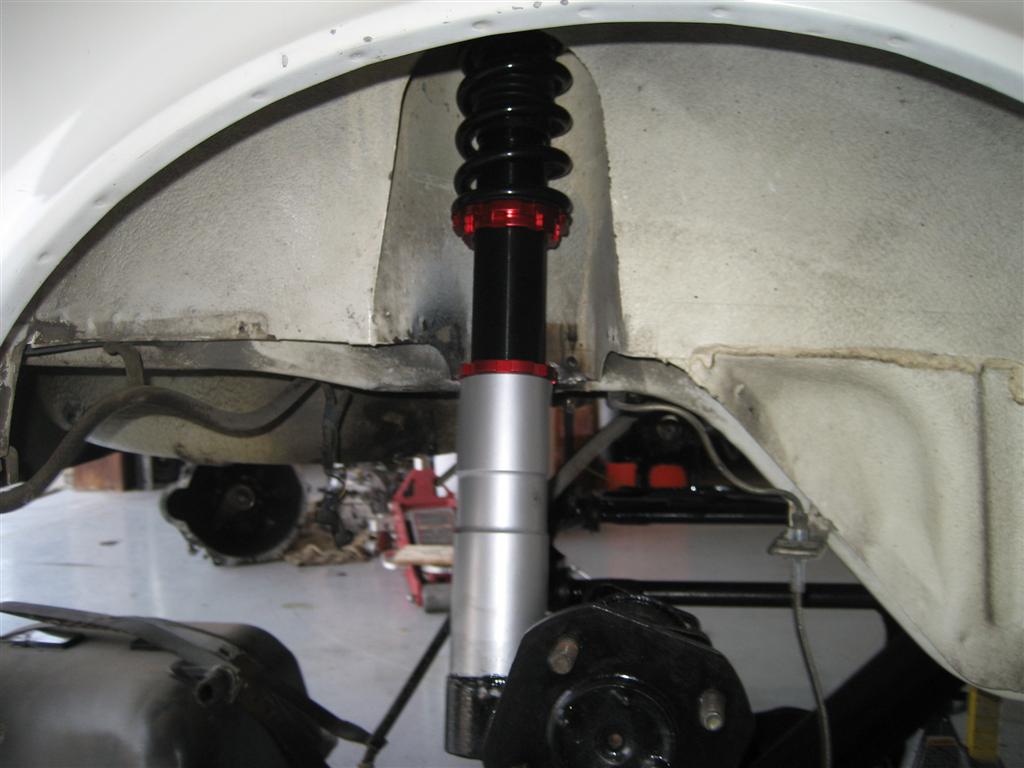
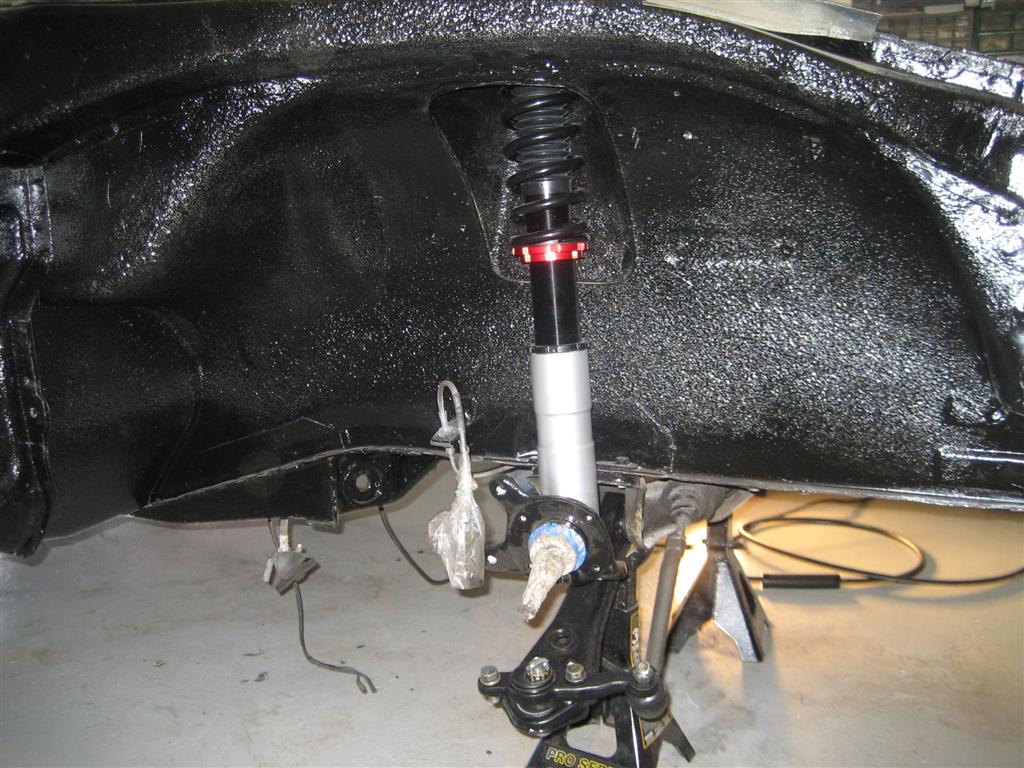
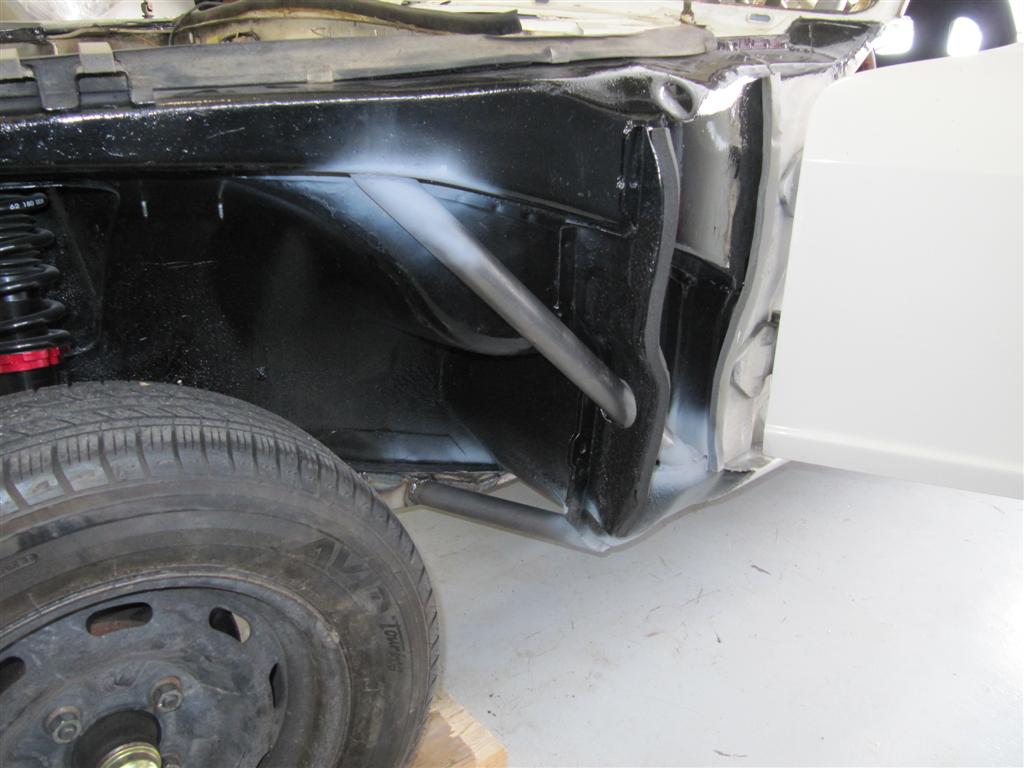
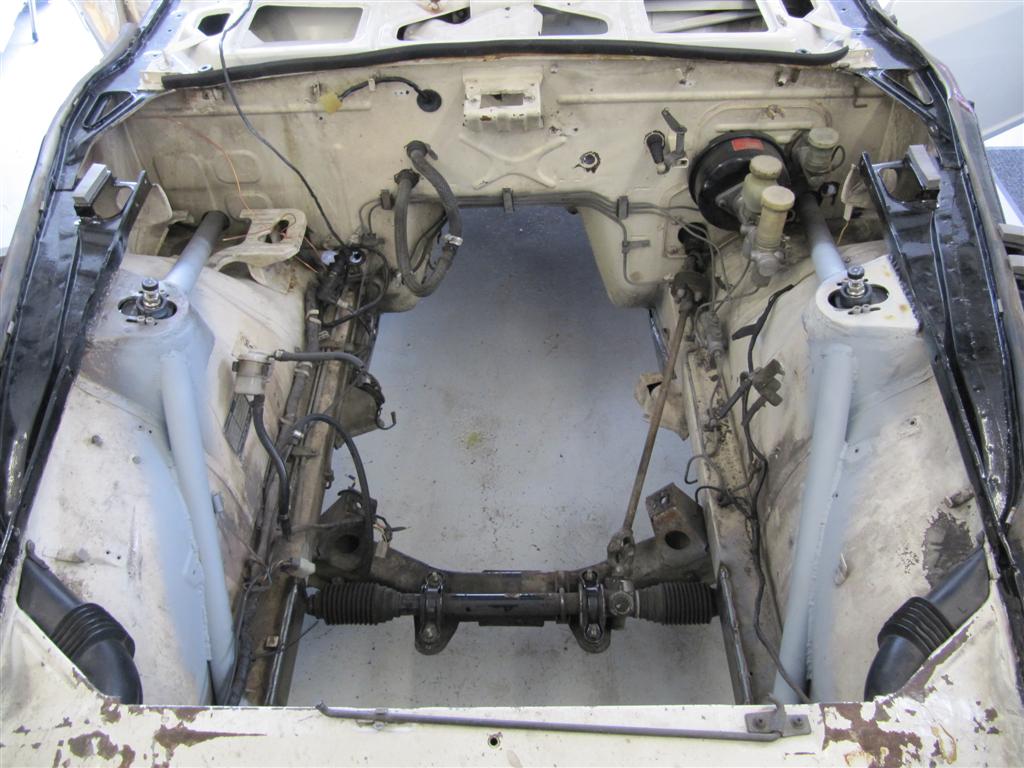
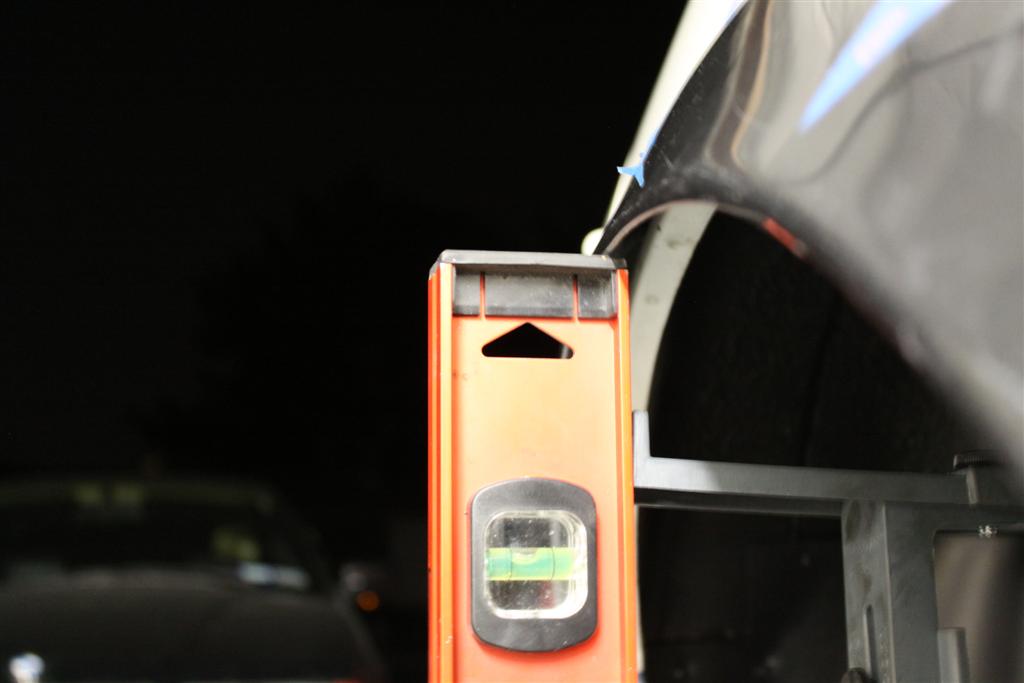
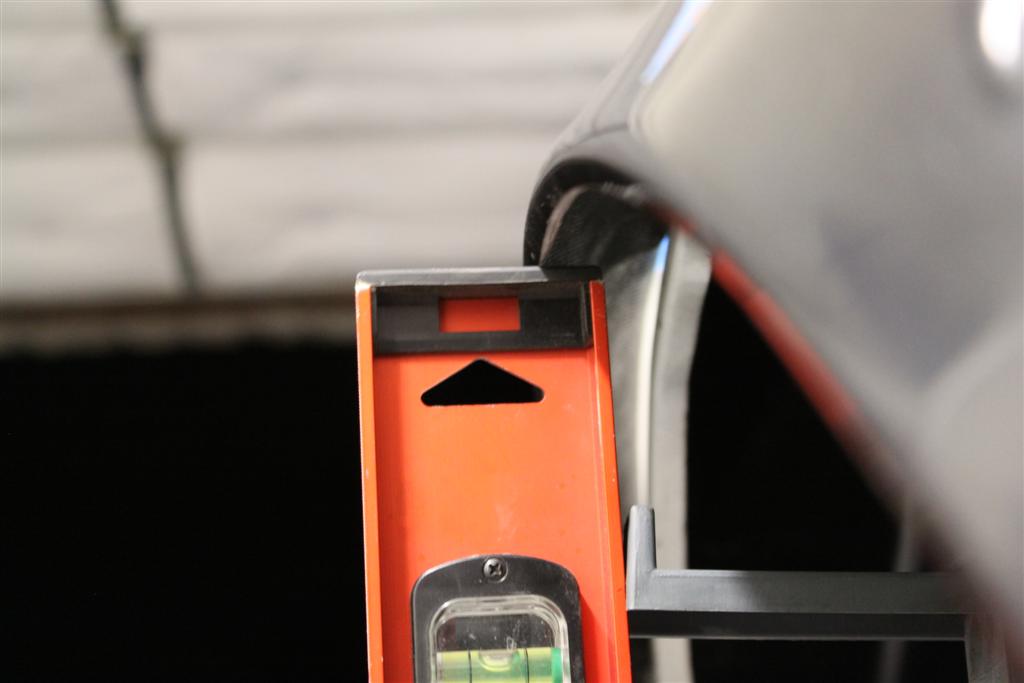
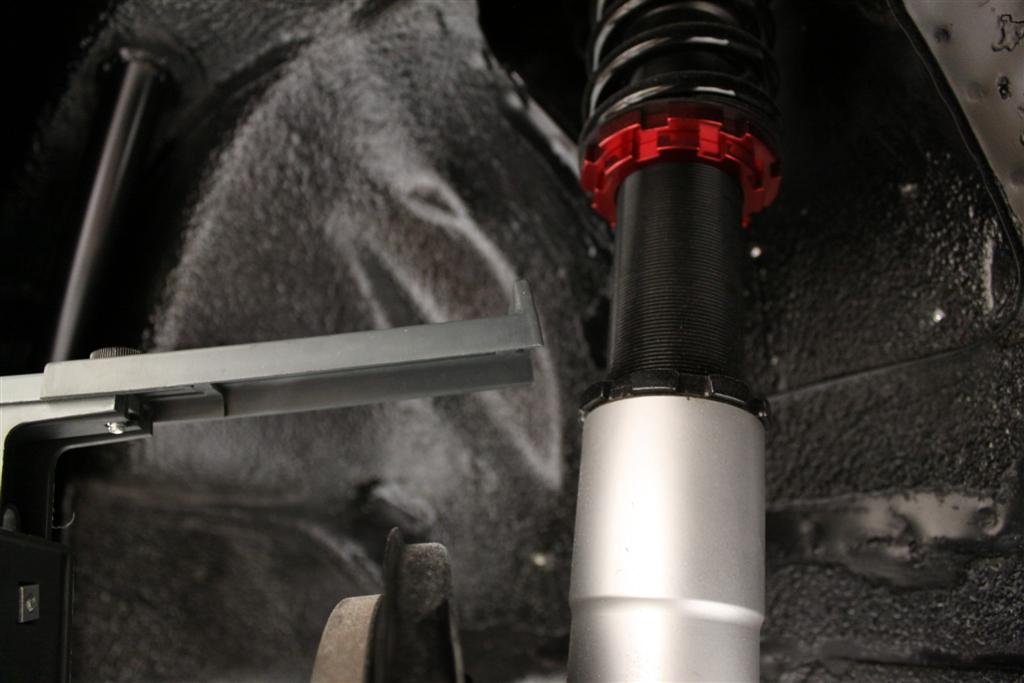
Installing coilovers is another large task for this car, they are important for when i race this car, i want little suspension movement. Along with making my suspension stiffer, i can adjust my ride height as well. This project involved cutting out the upper shock towers and welding in a different shock tower plate to accept the MEGAN coilover upper top hats. this was pretty difficult, and despite my decent measuring, i think i may be a bit off in the front, but hopefully it wont affect alignment too much.
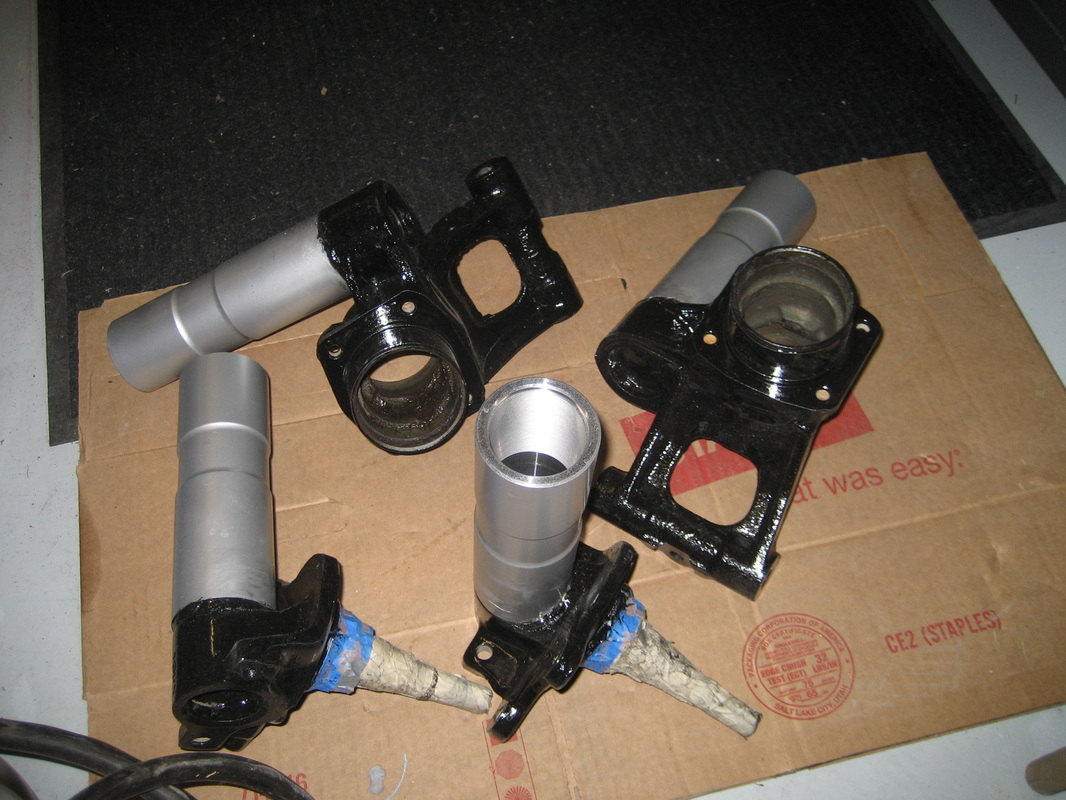
i also continued on finishing up the suspension painting, etc which also included welding on the sleeves onto the factory lower spindles to accept the bottoms of the coilovers.
It took me several attempts to get my welding beads acceptable, i am not a good welder, but after several attempts it was good. Then i painted the rears with POR15 to prevent temporary rust. i did not finish painting the front because at this point i realized i was going to do a roll cage which attaches to the front strut towers, so i didnt want to pretty them up.
|
|
Cont'd
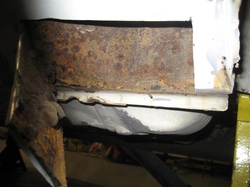
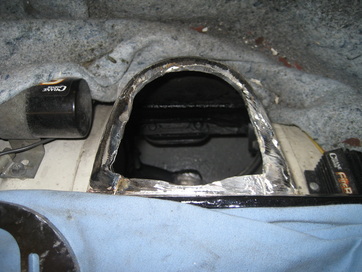
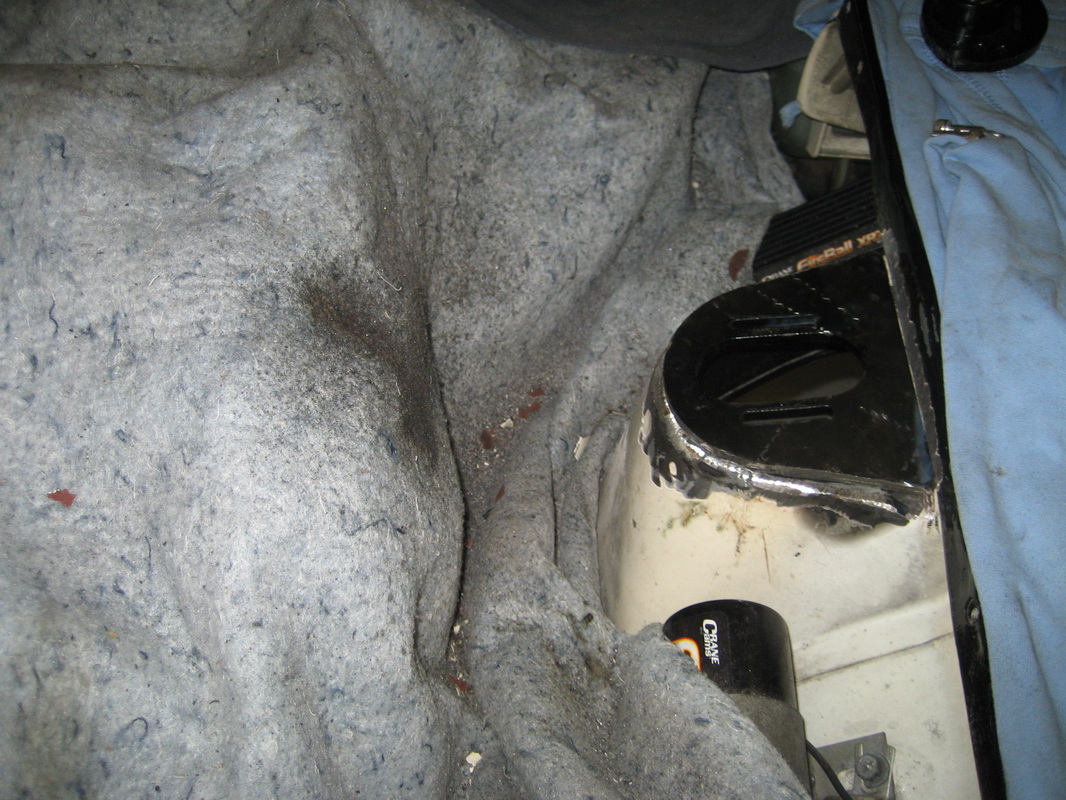
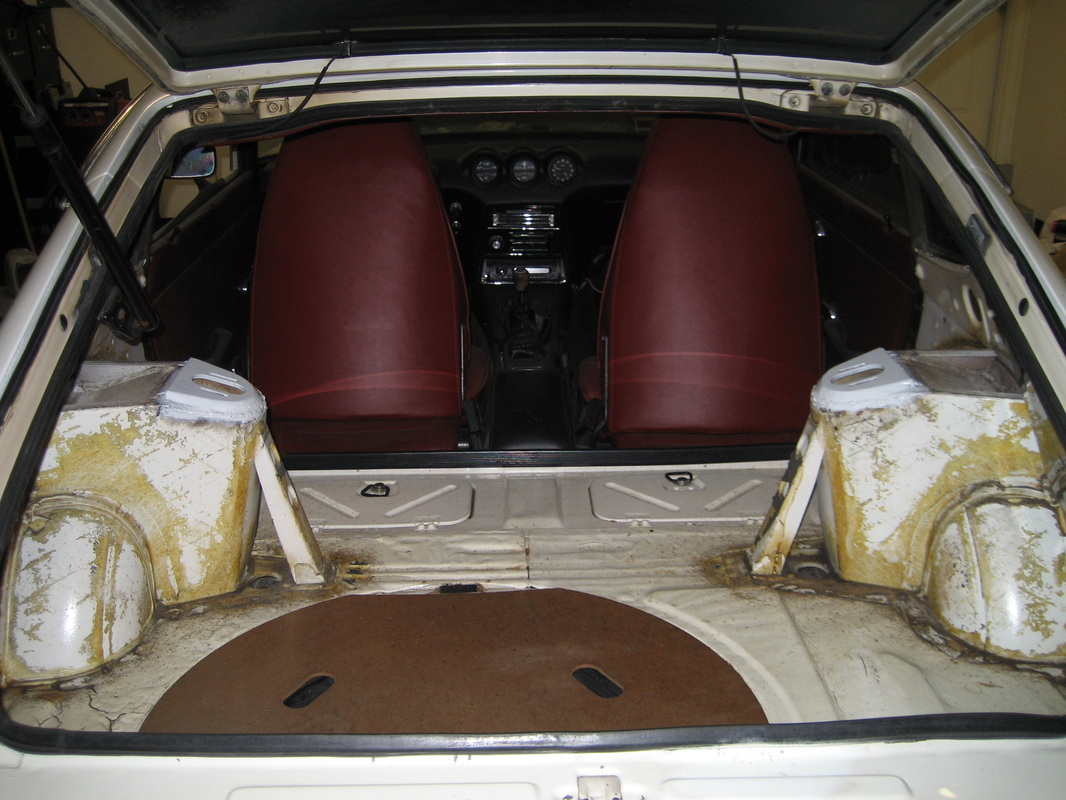
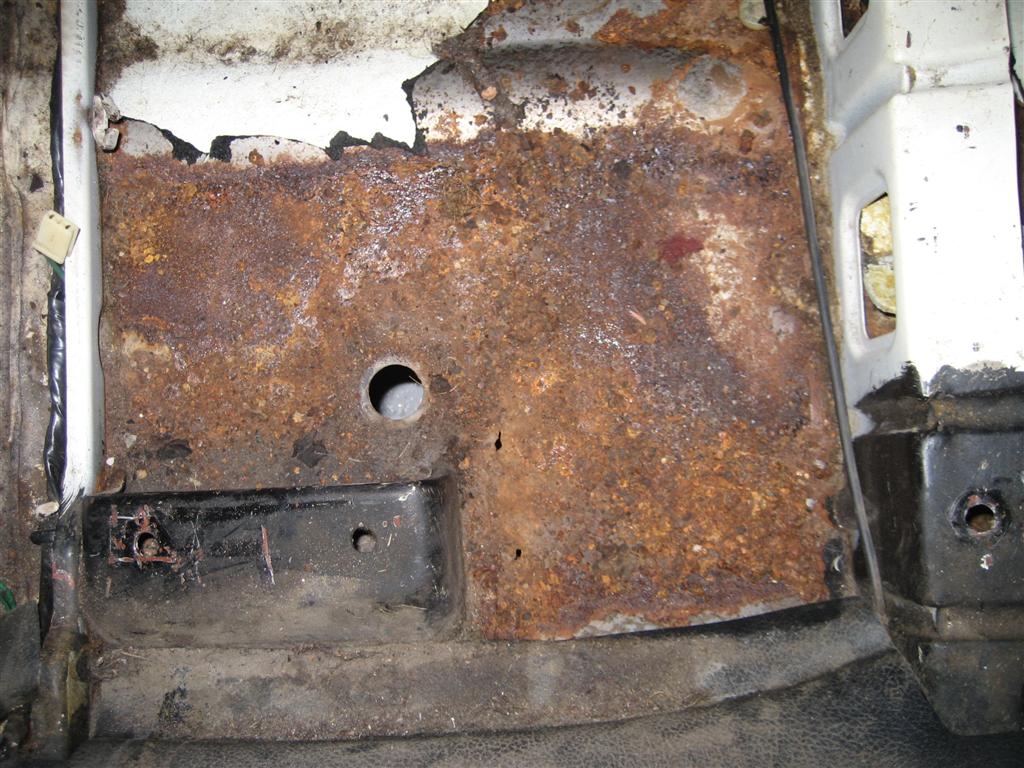
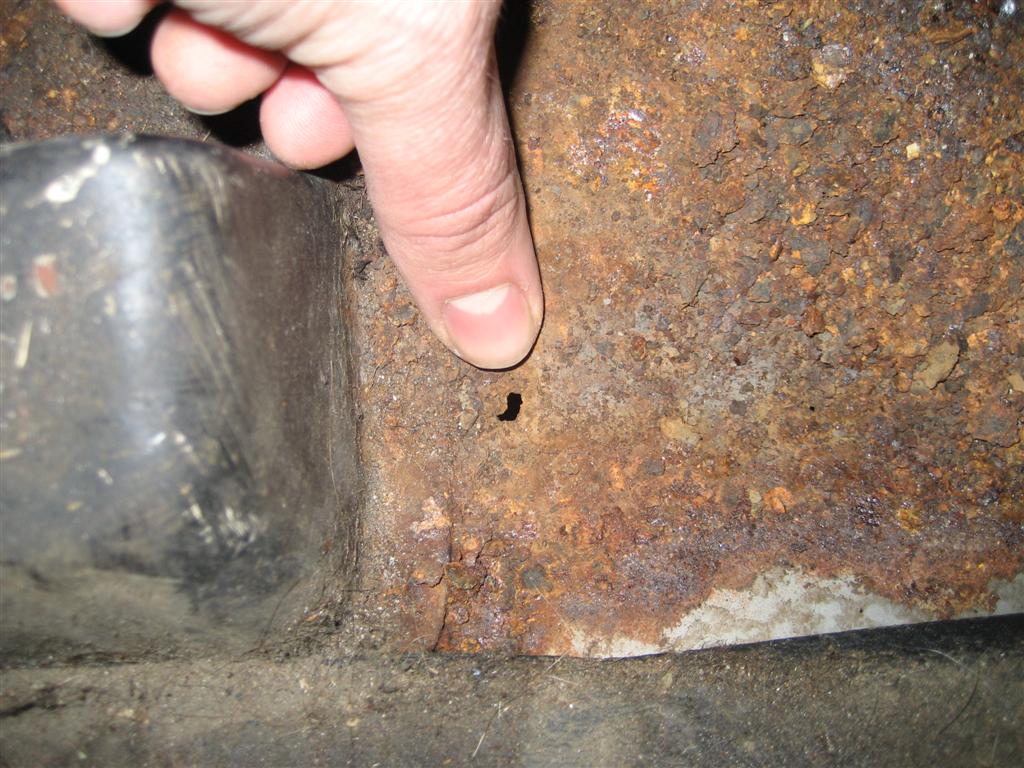
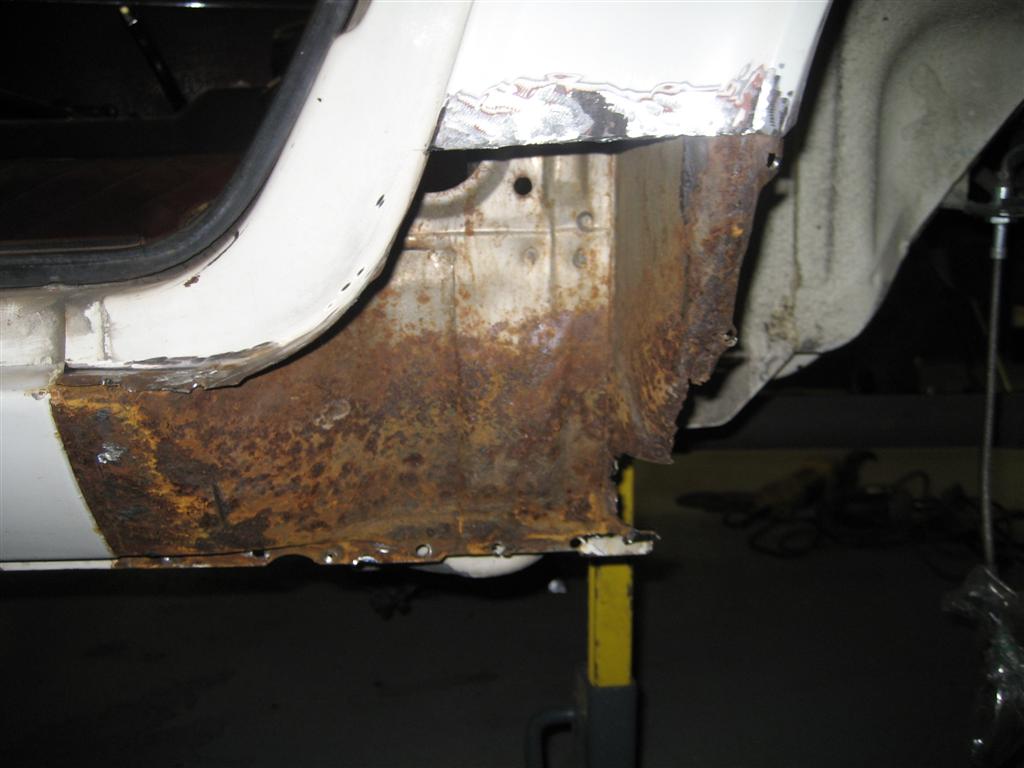
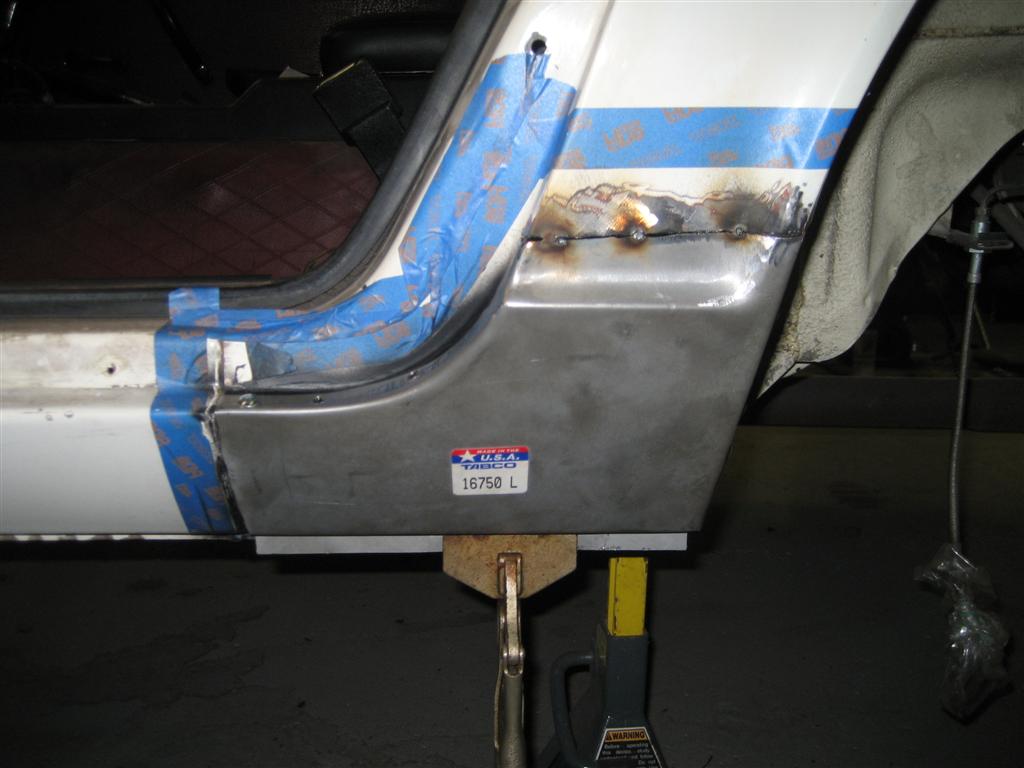
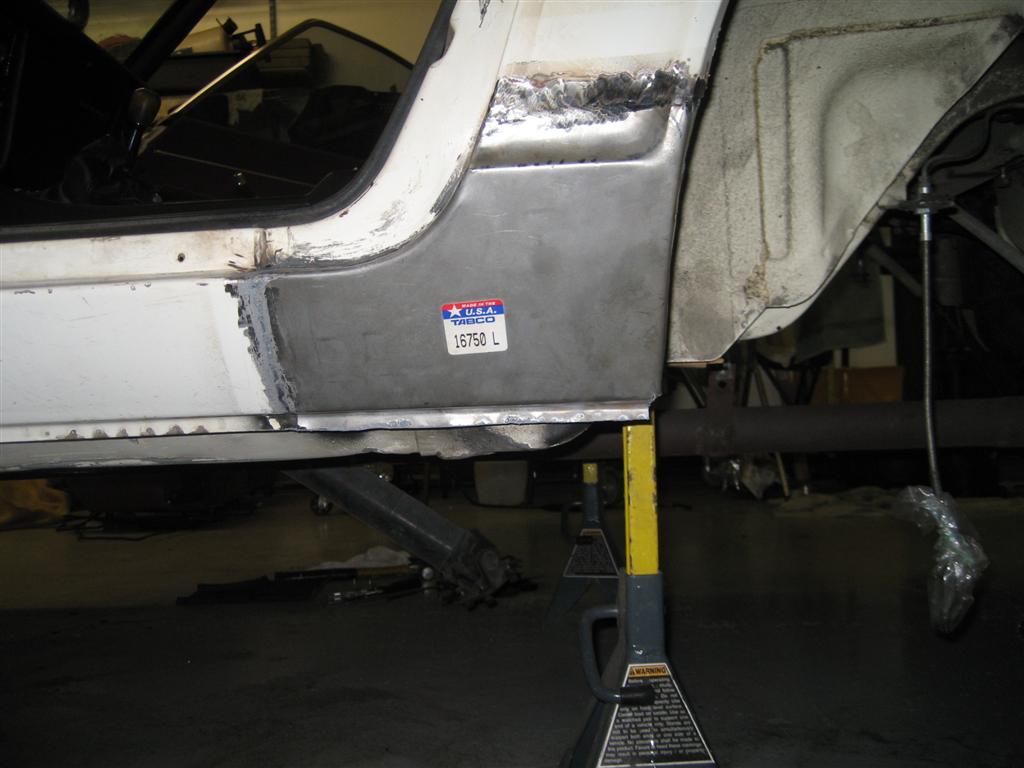
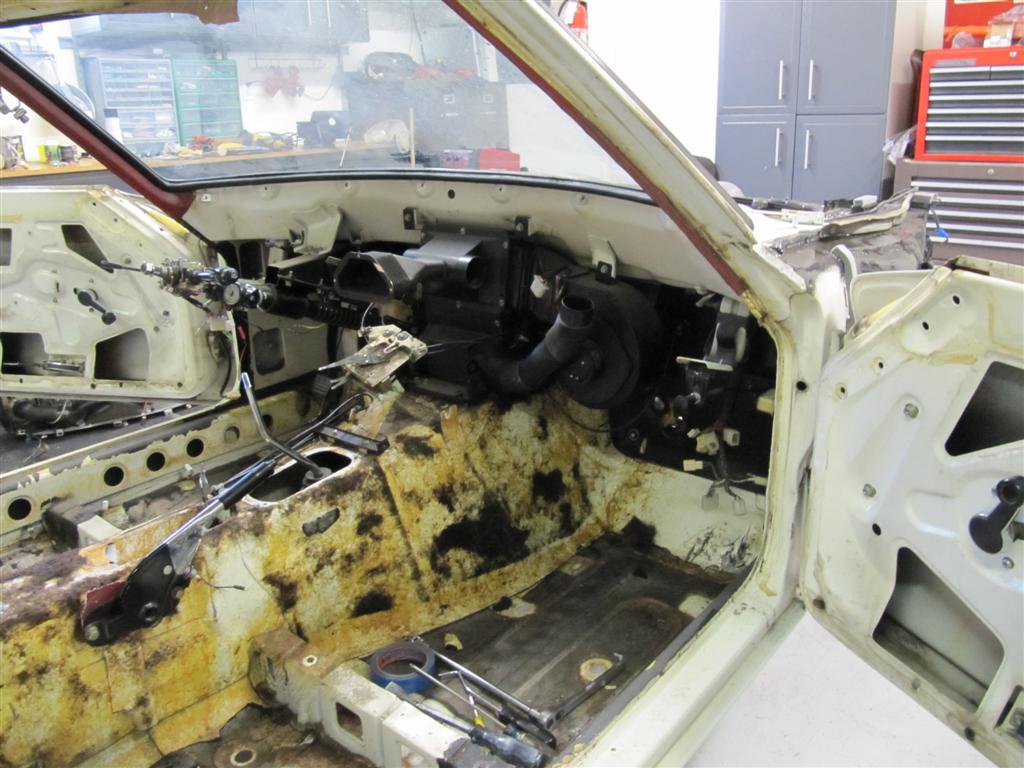
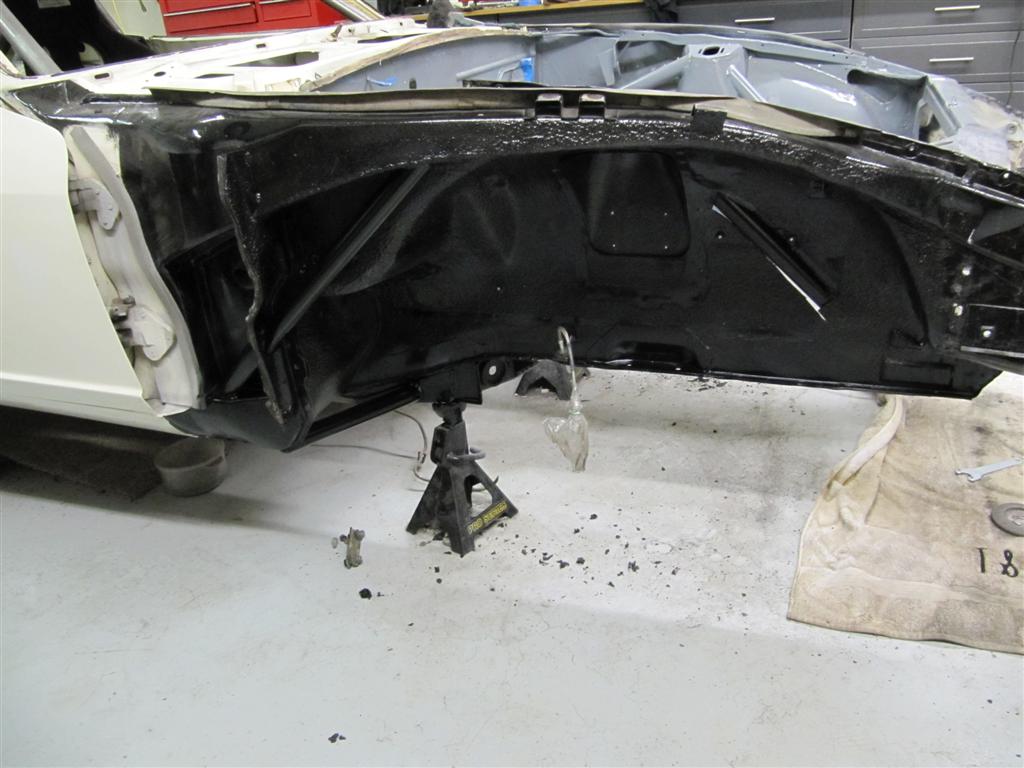
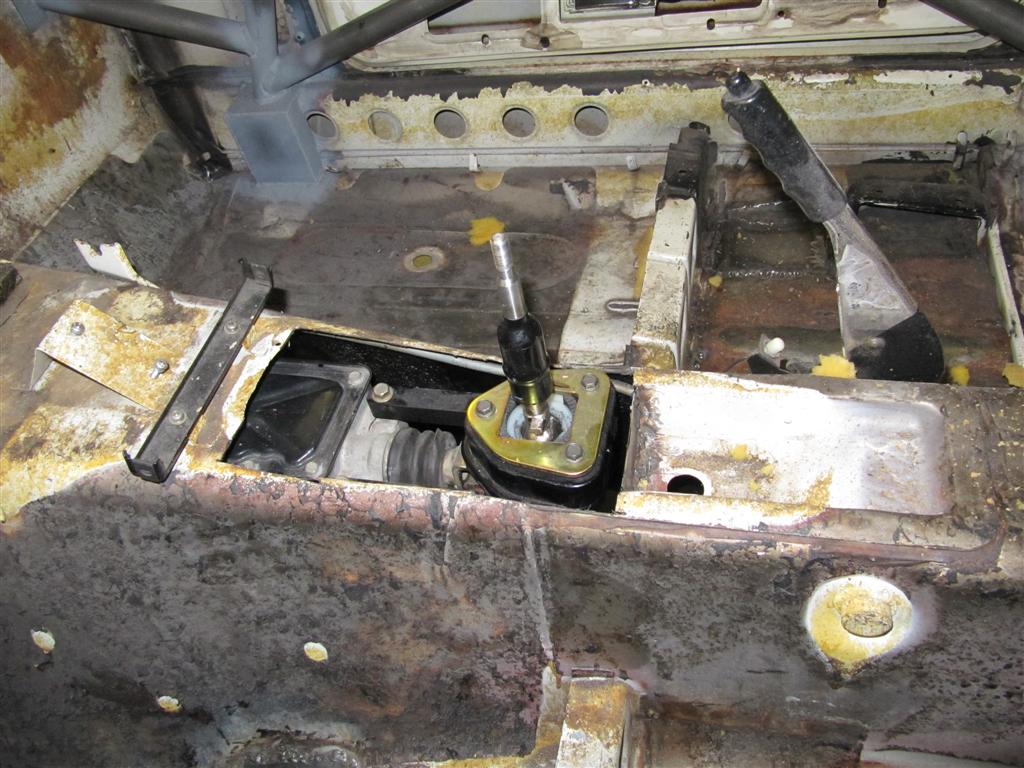
Next was to completely strip the interior of the old tar insulation and anything else in the way. The best way to get this out is to use dry ice to cause the tar to contract and in turn will crack up pretty easily. Another area i was concerned about was the "doglegs" on the front part of the rear wheel arch. i saw some small pinholes of rust and i kind of figured what it looked like underneath so i just sucked it up and went through with the repair. you can see the rust under the passenger side seat. the tar insulation just peeled up easily and usually that is a bad sign, that moisture has gotten underneath...not too bad considering what i have seen in the past...
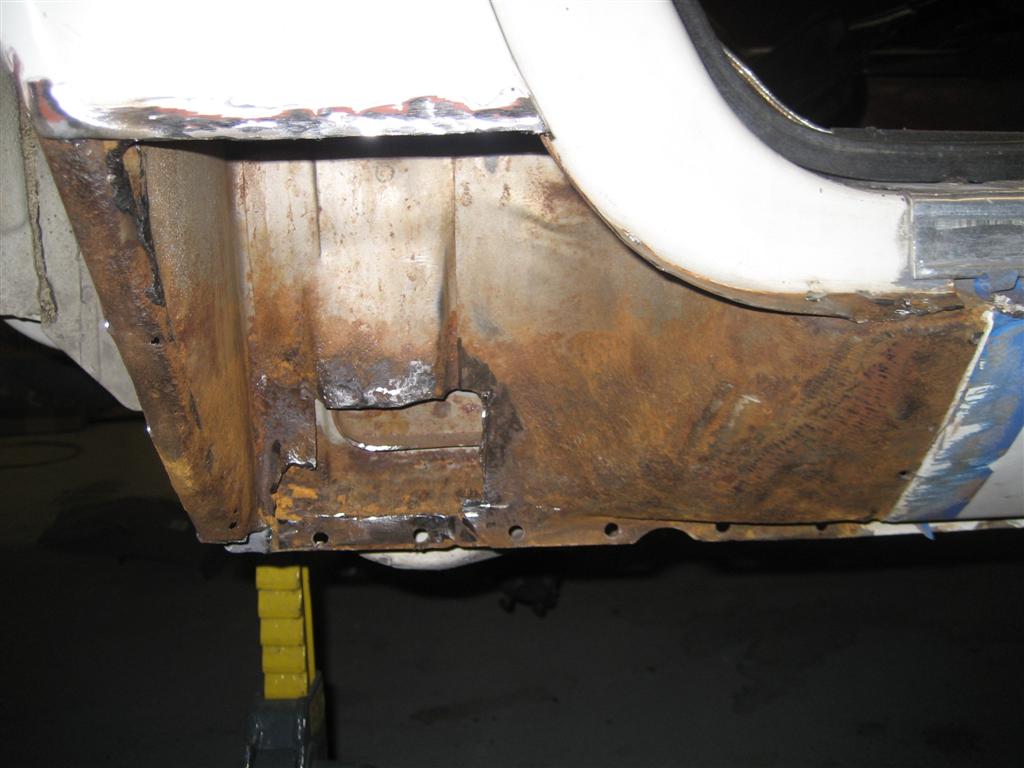
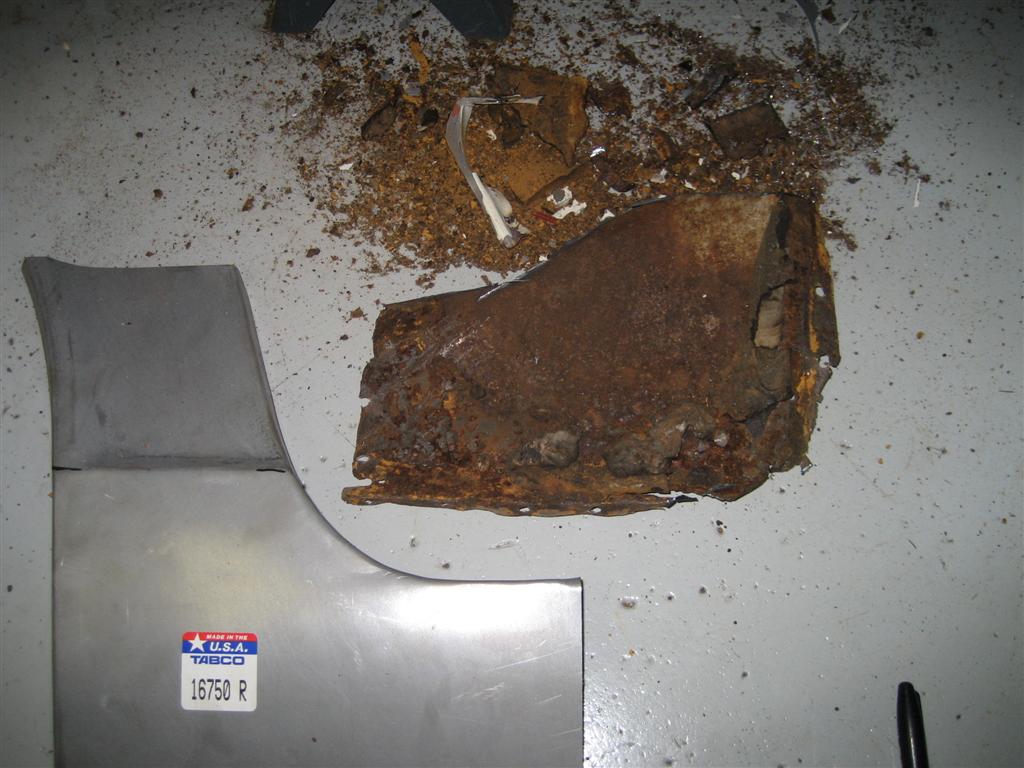
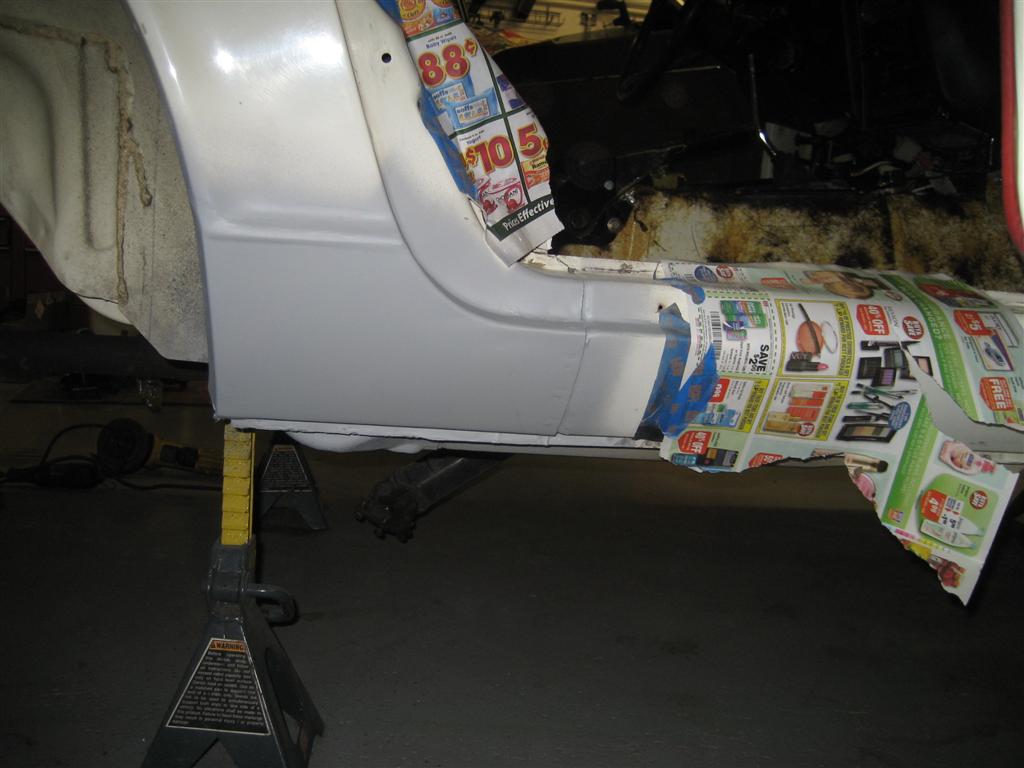
Before covering the rear doglegs with new metal, i coated the inside surfaces with eastwood "rust converter" to neutralize rust up into the fender well.
Both sides took me an entire weekend, its really time consuming to weld, grind, bondo and prime those small areas.
Before covering the rear doglegs with new metal, i coated the inside surfaces with eastwood "rust converter" to neutralize rust up into the fender well.
Both sides took me an entire weekend, its really time consuming to weld, grind, bondo and prime those small areas.
|
|
|
|
|
|
|
|
Cont'd
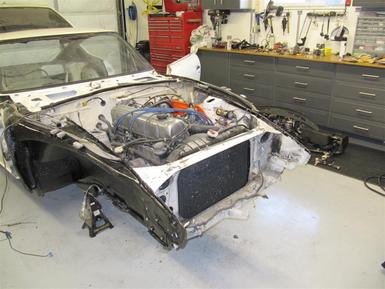
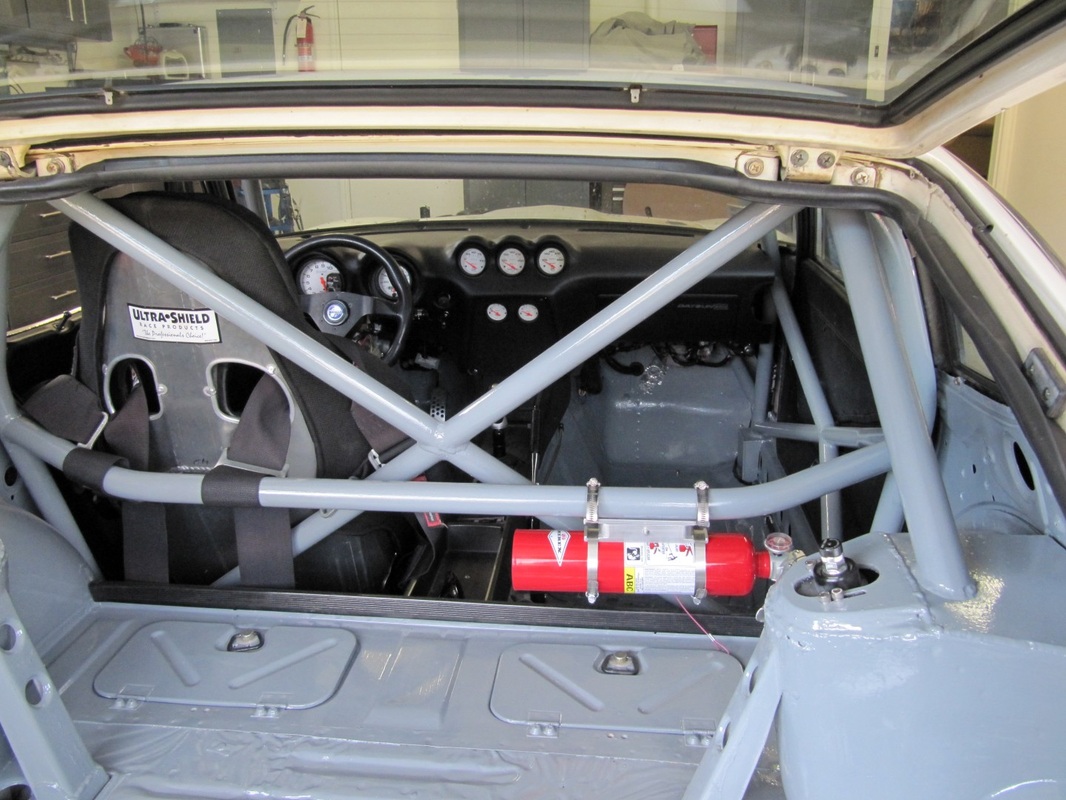
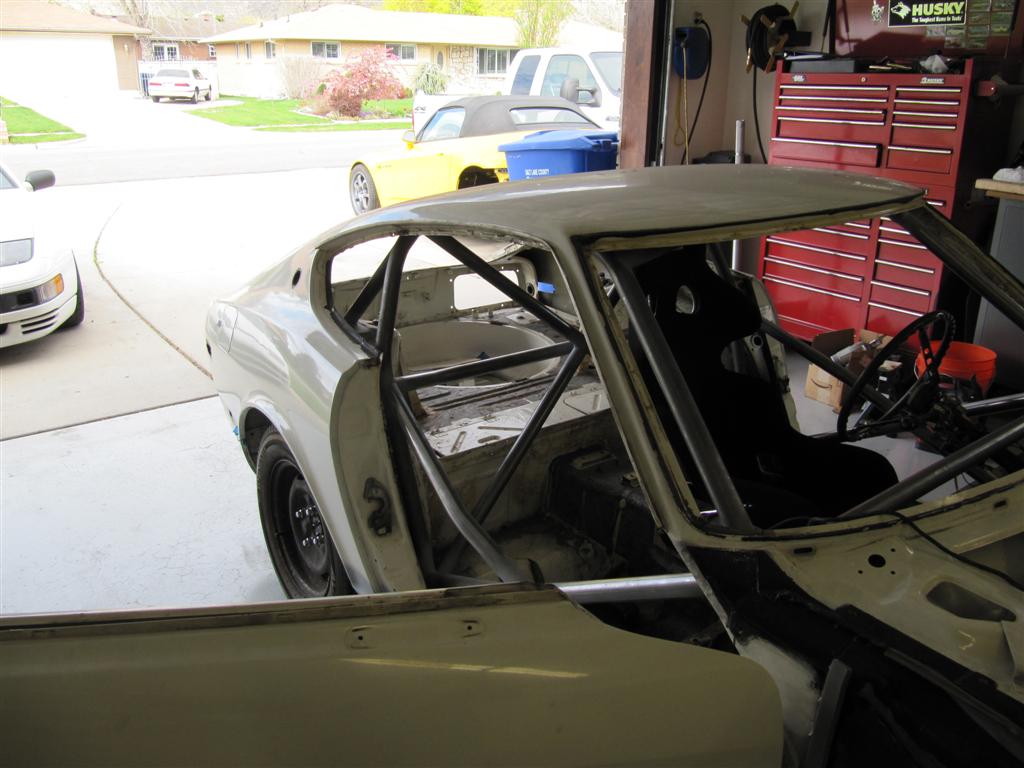
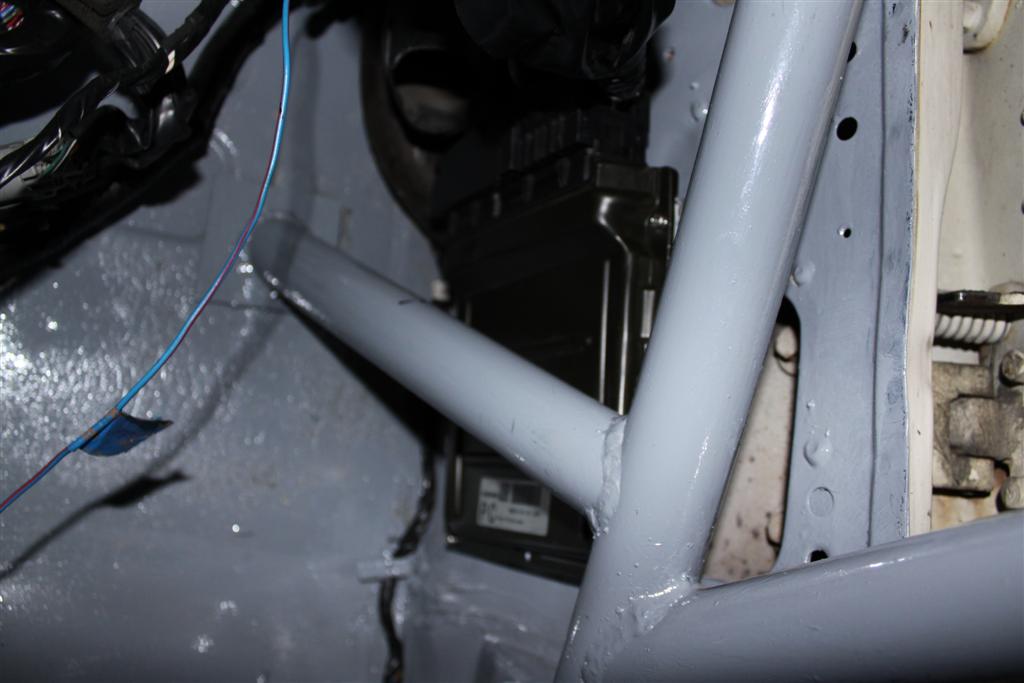
I continued to strip down the interior of everything that would hinder cage install. The cage will be going through the firewall and throughout the engine bay to attempt to triangulate most weak points on the car.
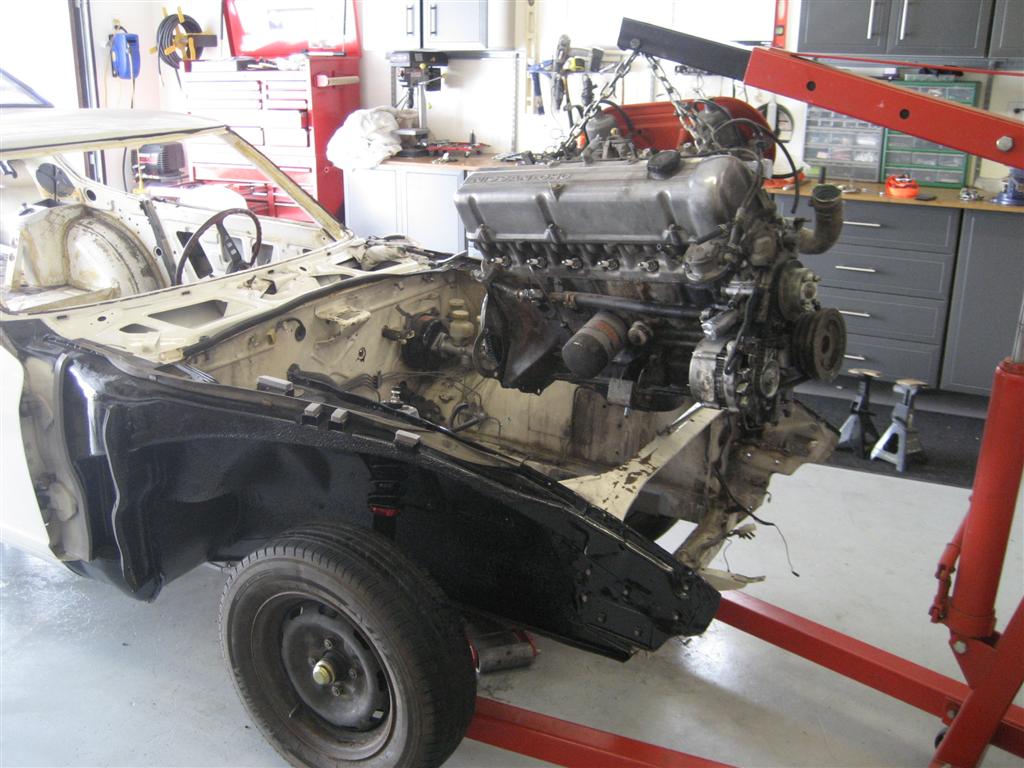
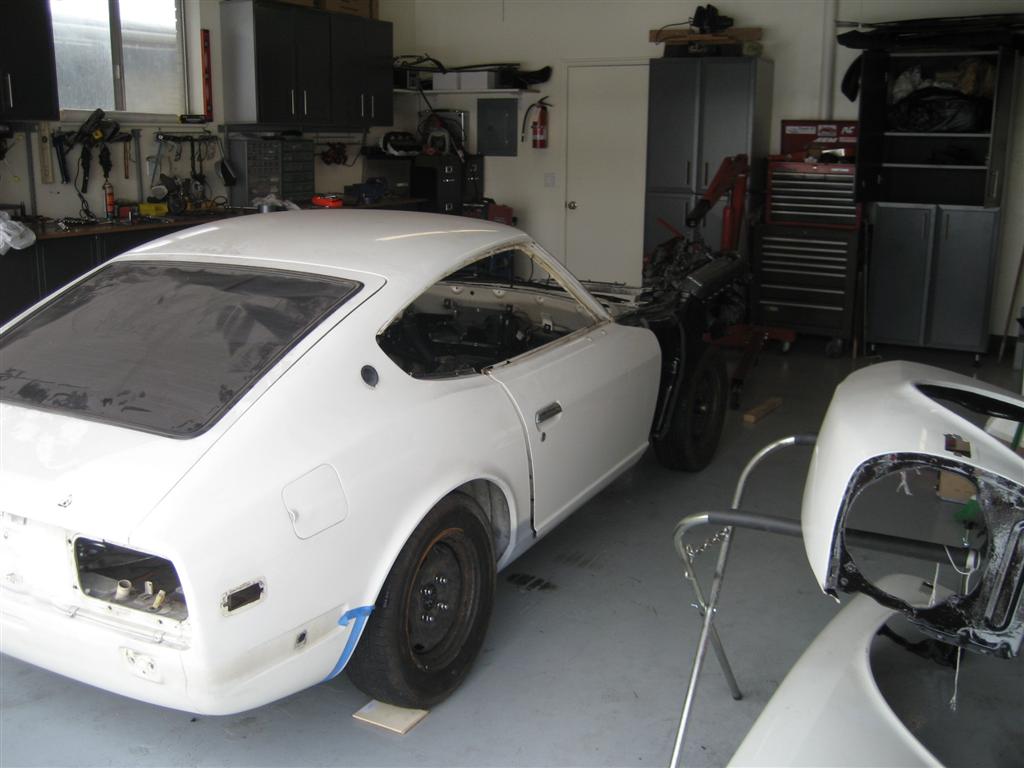
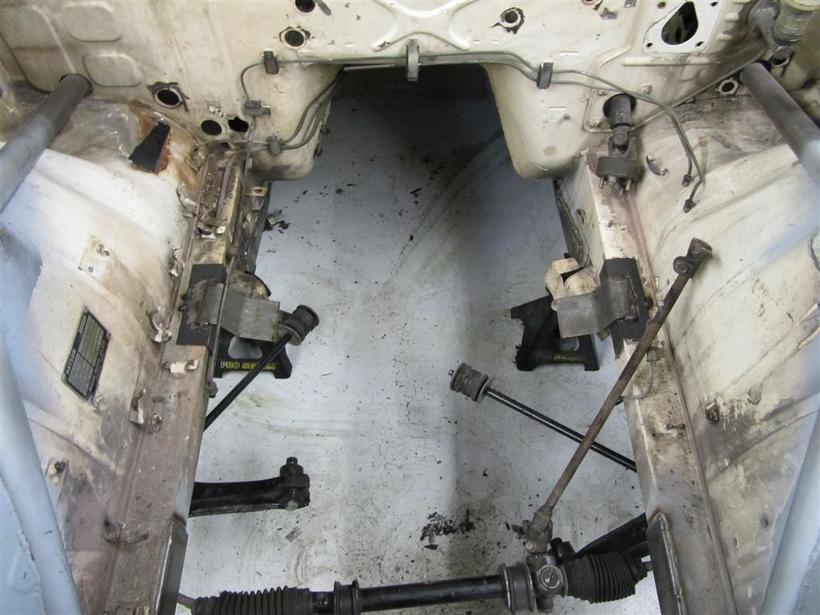
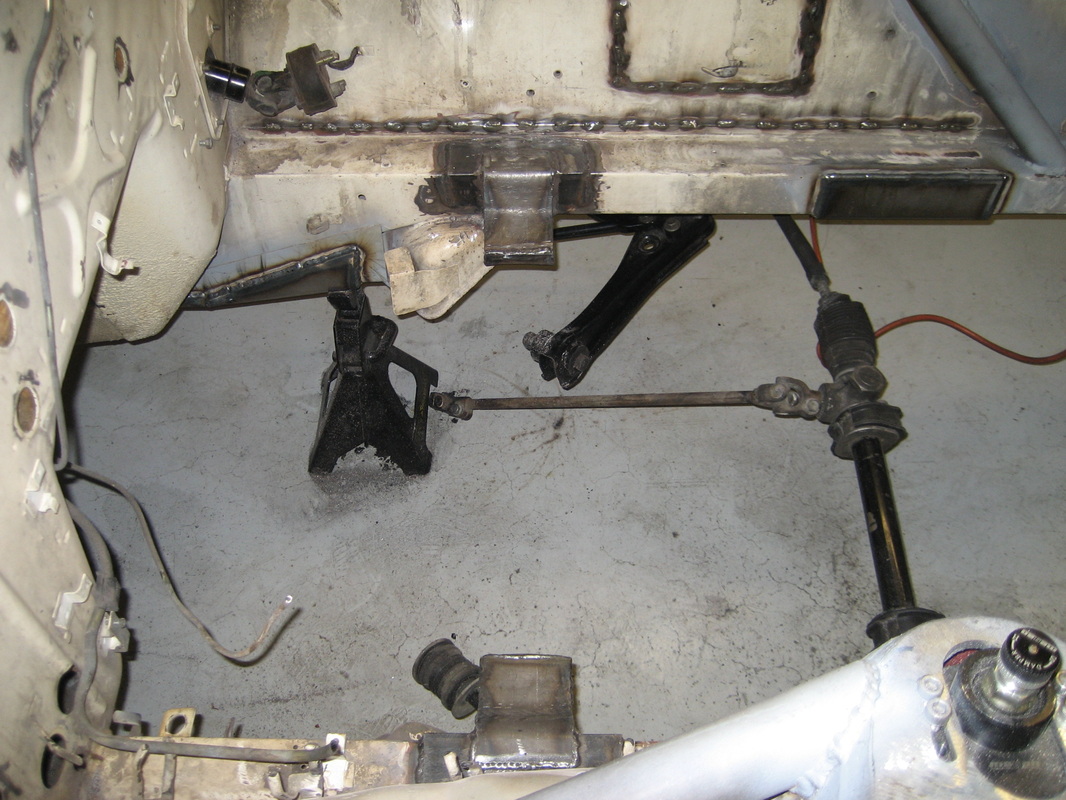
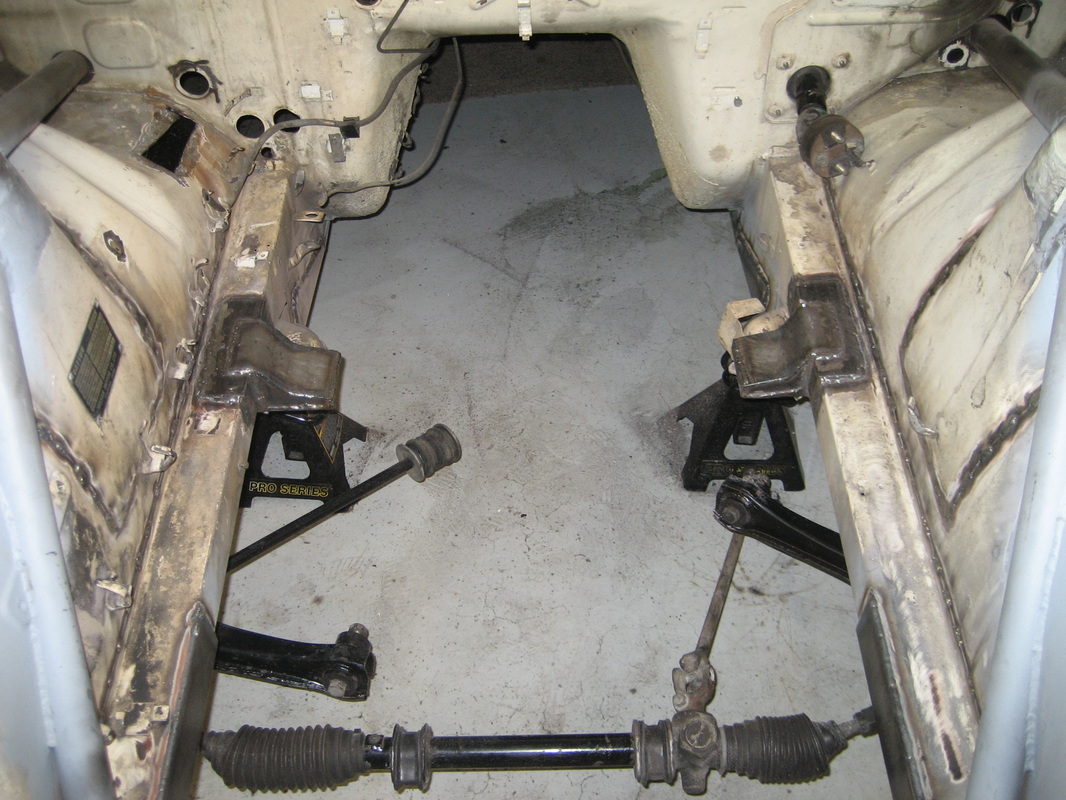
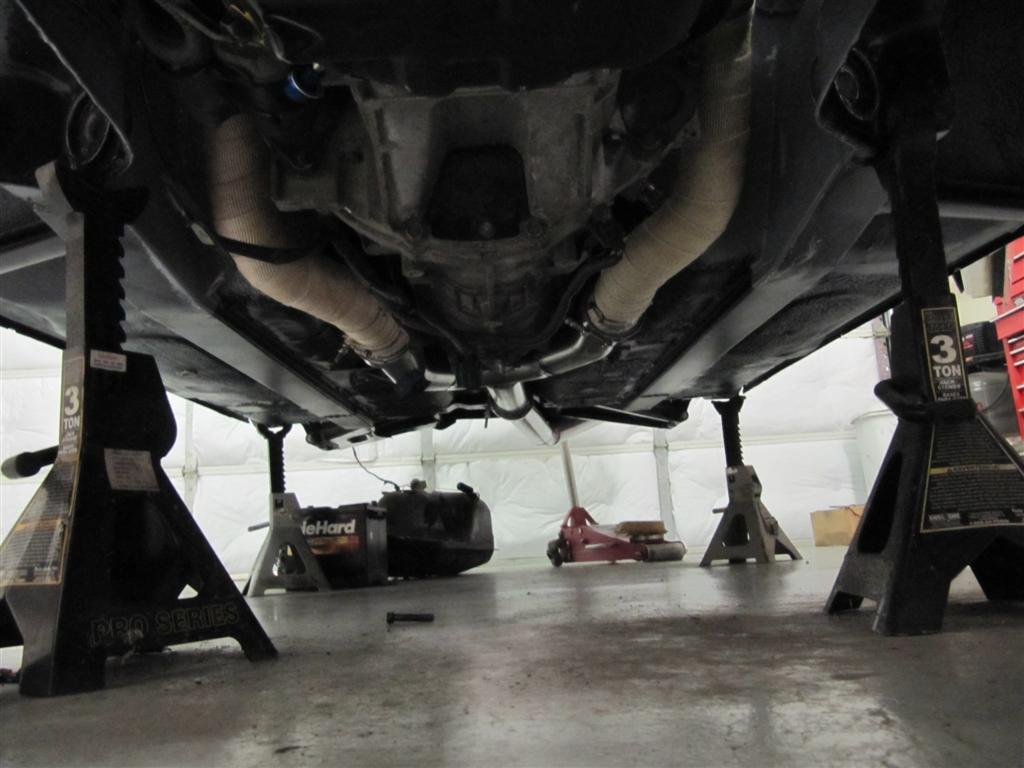
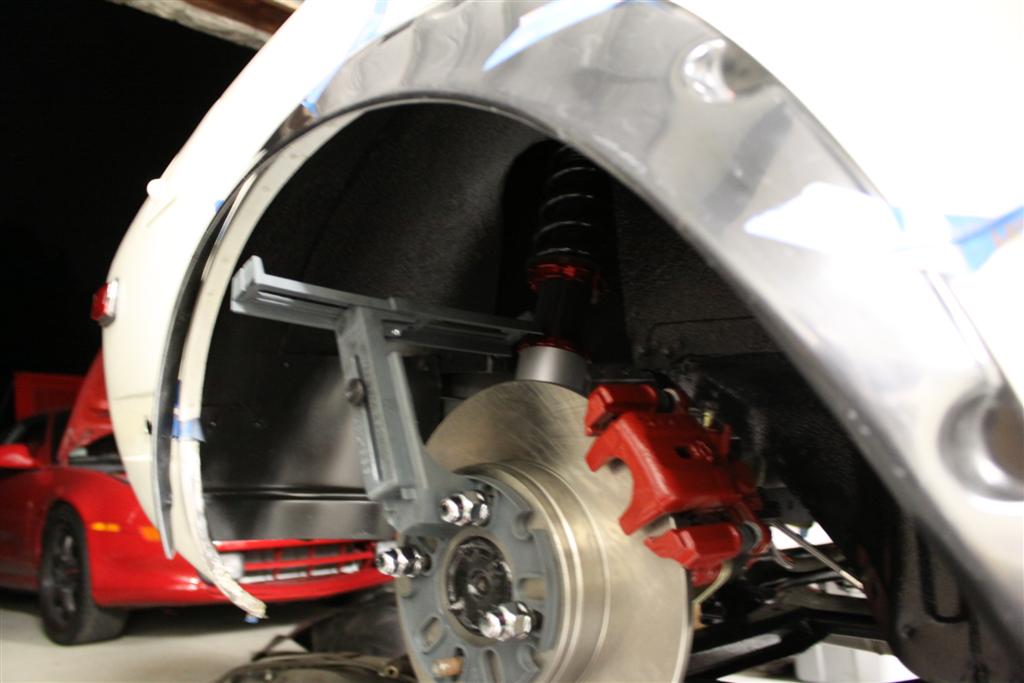
I also finally got my coilovers in so i can install them along with the newly refurbished suspension components. it finally rolls now. It is off to the cage builder to be worked on for about a month, so i need to get the 350z stripped down during the time it is gone.
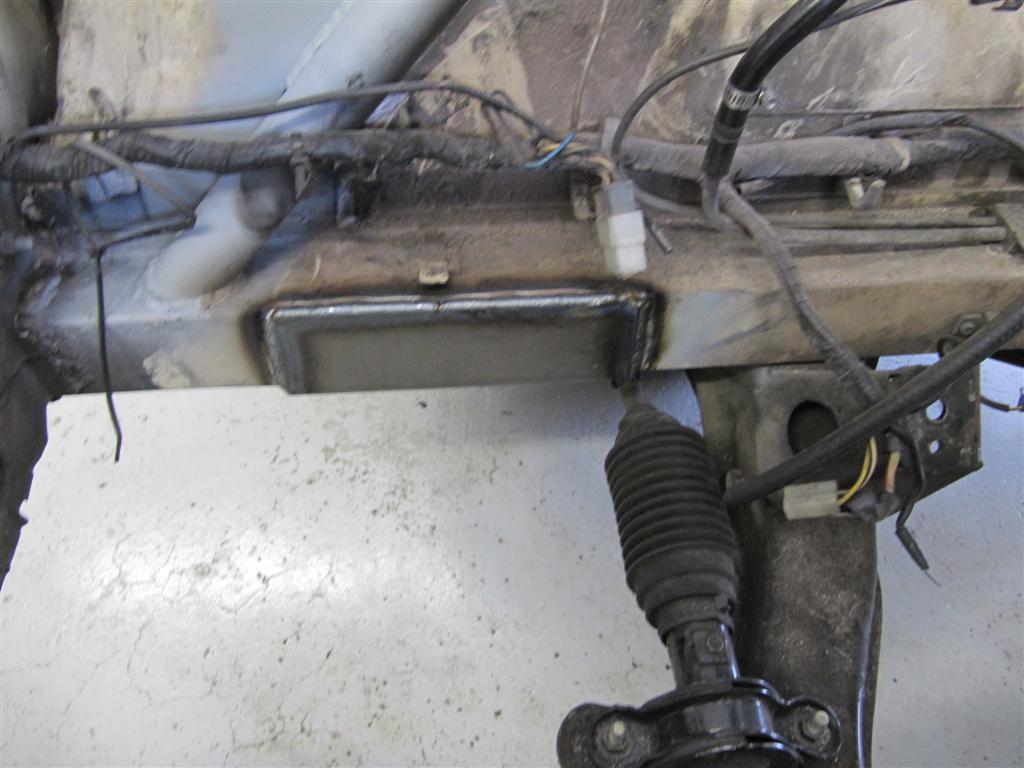
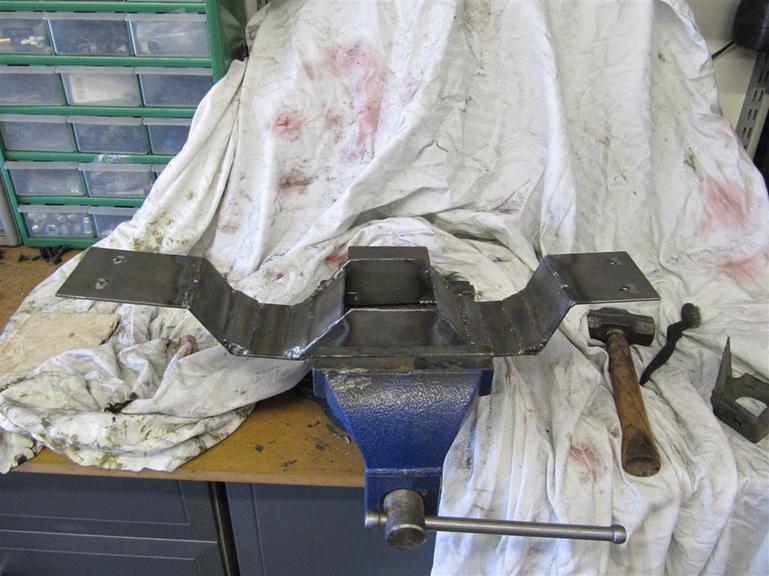
i tacked in my new frame rail reinforcements and sway bar plates so the cage builder can weld them up.
I also finally got my coilovers in so i can install them along with the newly refurbished suspension components. it finally rolls now. It is off to the cage builder to be worked on for about a month, so i need to get the 350z stripped down during the time it is gone.
i tacked in my new frame rail reinforcements and sway bar plates so the cage builder can weld them up.

|
|
|

|

3/27/12
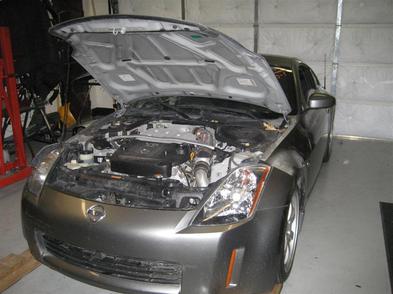
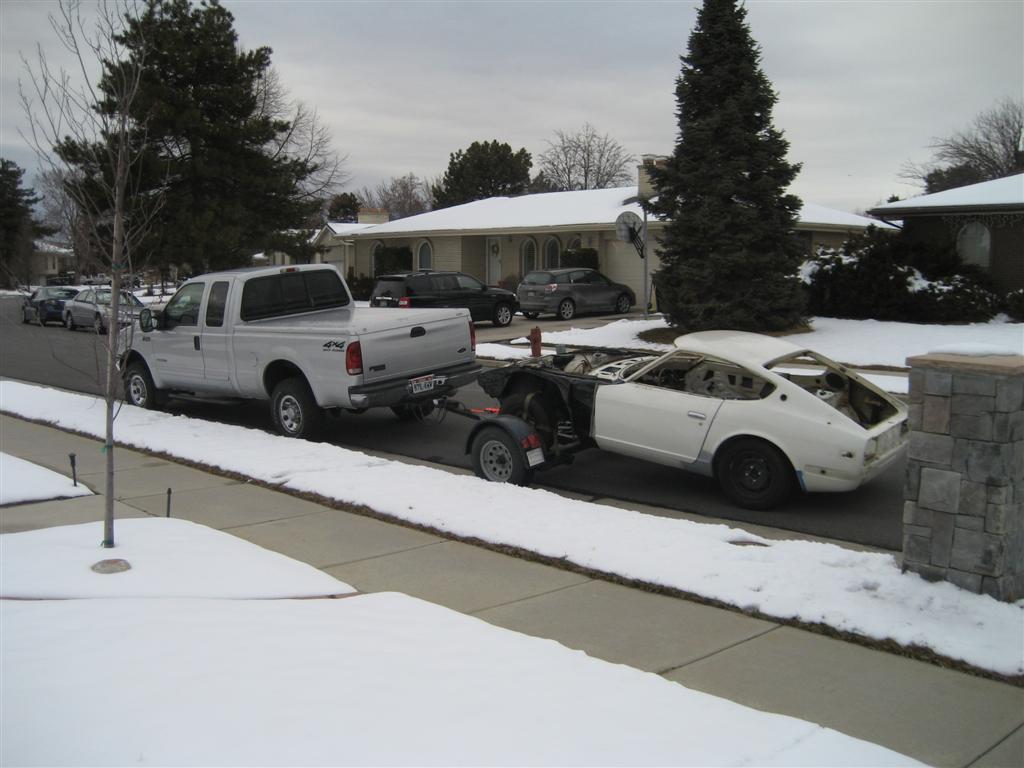
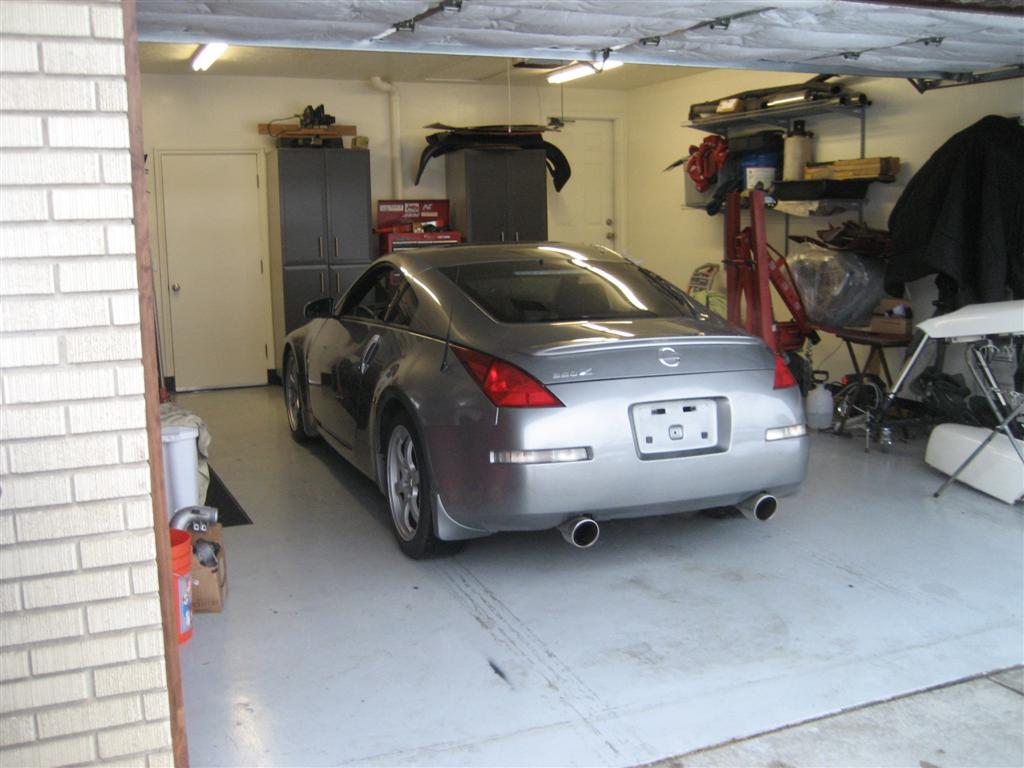
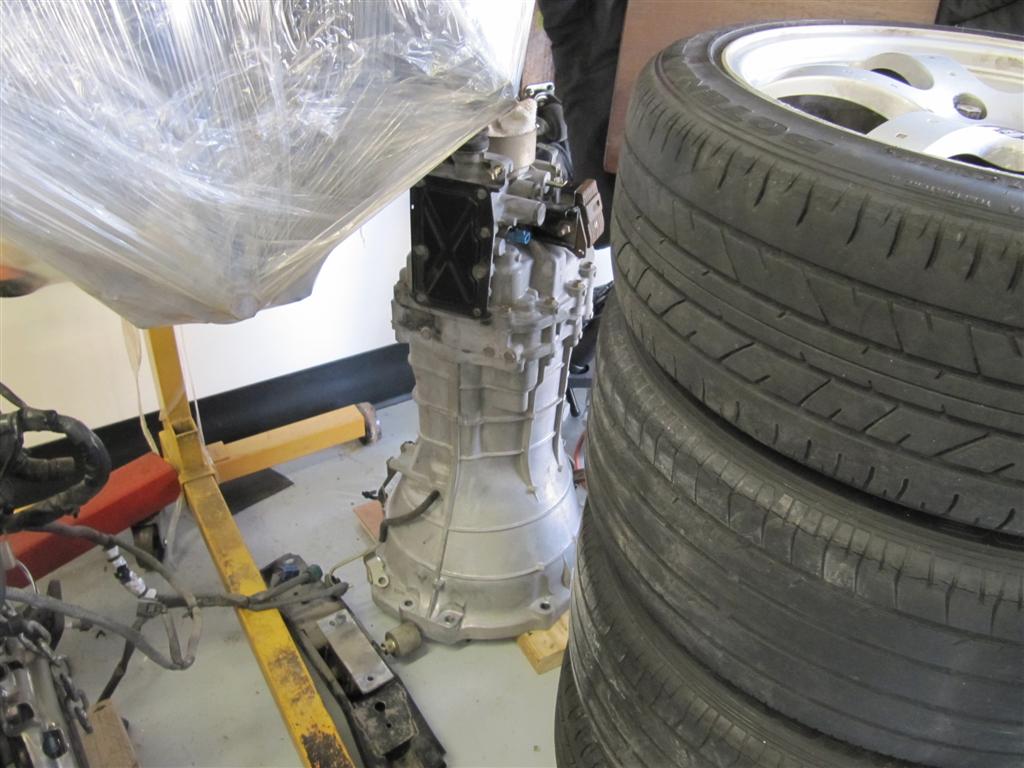
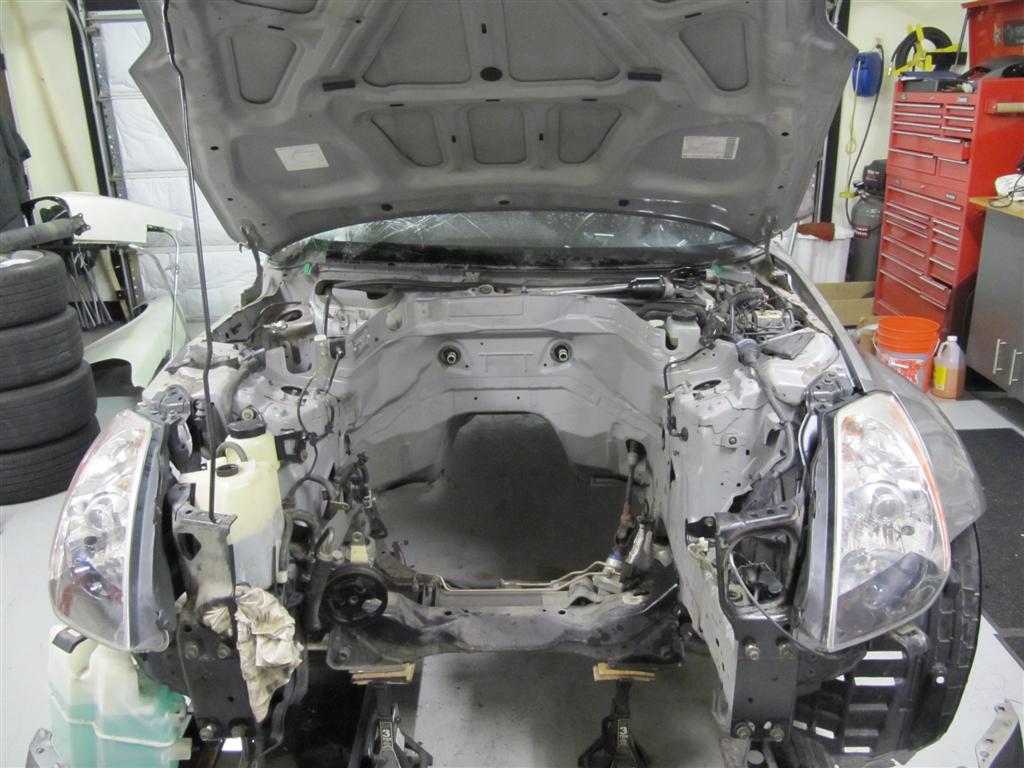
I picked up a wrecked 350z that needs to be stripped almost completely in the month window i have until i get the 240z back from the cage builder.
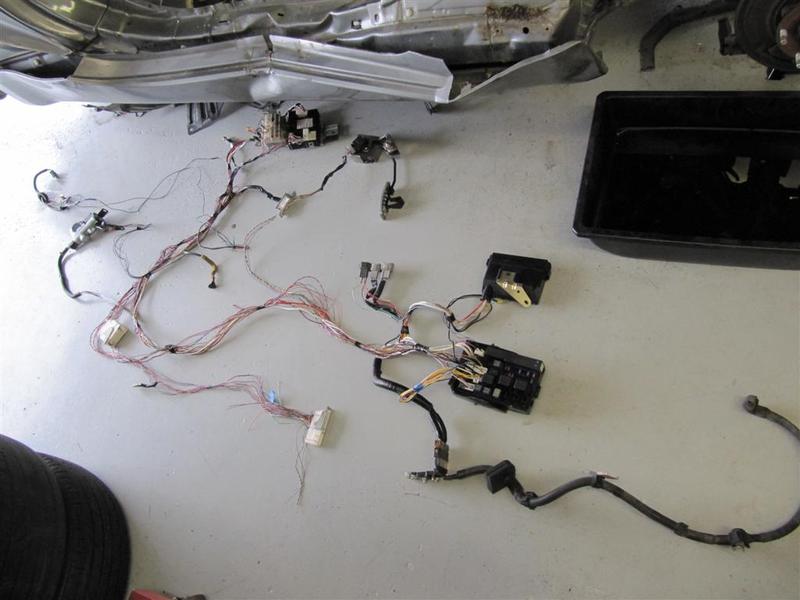
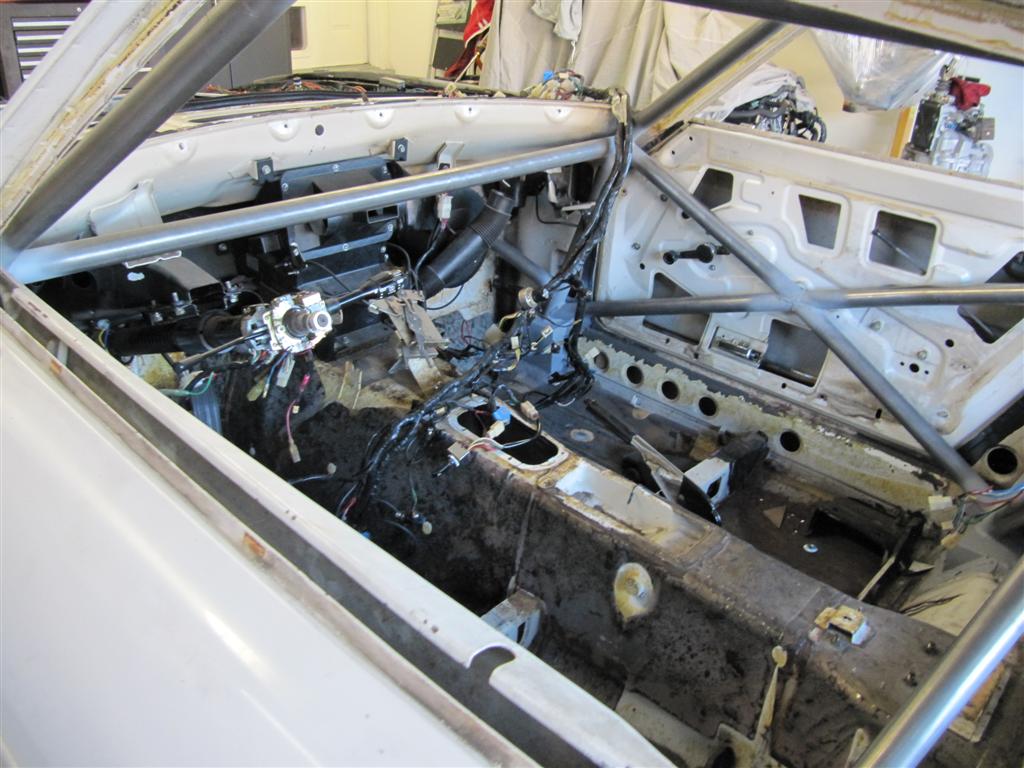
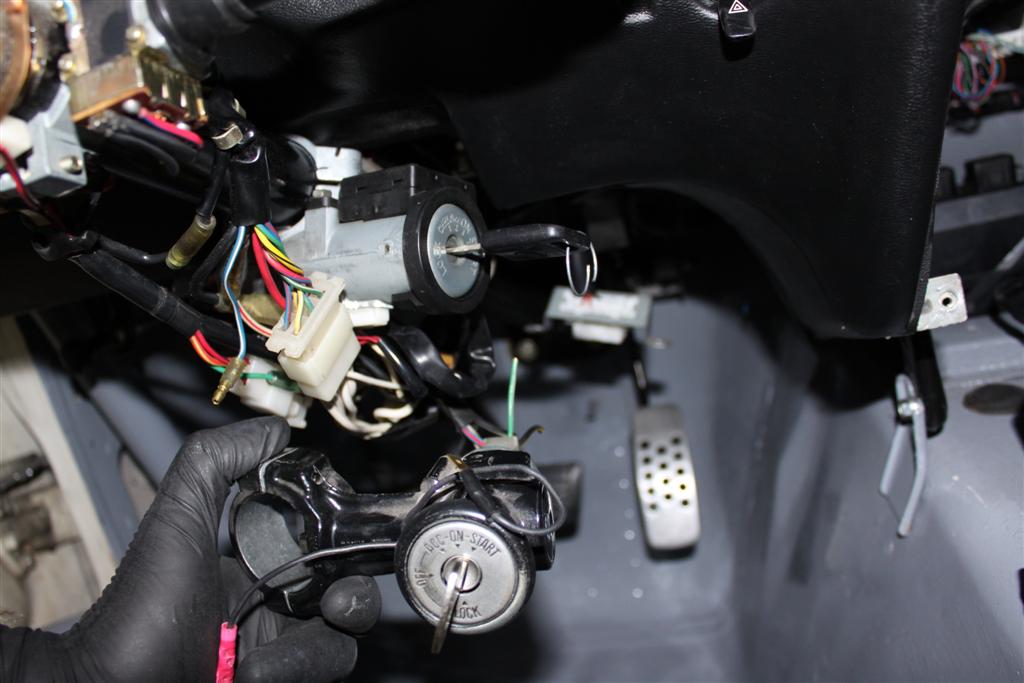
i started out taking apart most of the dash, etc to get the body harness out. All i can say is what a huge PAIN that was, it snakes around everywhere and most of the car needed to be taken apart to access it.
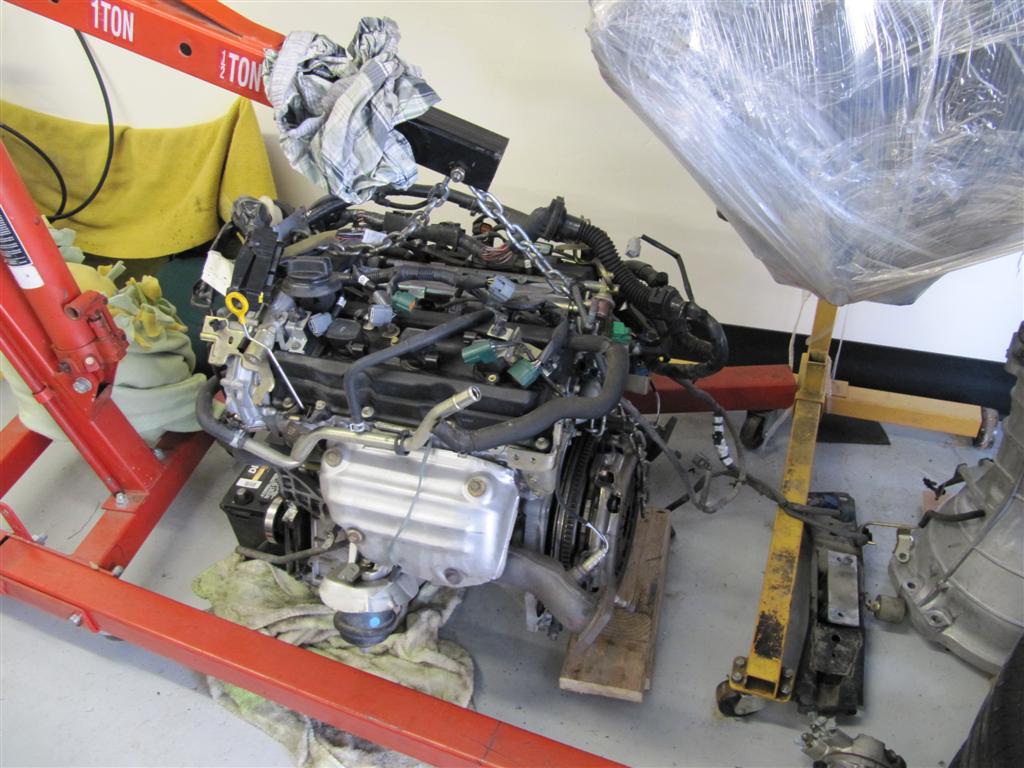
I then started the week long task of deleting wires i didnt need. Since this is going into a car with no power windows, locks, and very basic functions, i mostly just needed the parts of the harness that will keep the engine running well. The harness pic below is AFTER the simplification, i should have taken a pic of it before...I am keeping NATS (nissan anti theft system) and in order to do that there are a handful of modules that talk to each other through CAN bus to allow the engine to start. After a week of harness modifications the harness is simplified, the engine/tranny is out and it is about as stripped as i want it before i try to sell what is left.
Final wrap of the harness will happen after i mock it up in the 240z, otherwise i will find myself ripping half of it apart again. The cardboard box shows all the wires i deleted out of the main wiring harness...
i started out taking apart most of the dash, etc to get the body harness out. All i can say is what a huge PAIN that was, it snakes around everywhere and most of the car needed to be taken apart to access it.
I then started the week long task of deleting wires i didnt need. Since this is going into a car with no power windows, locks, and very basic functions, i mostly just needed the parts of the harness that will keep the engine running well. The harness pic below is AFTER the simplification, i should have taken a pic of it before...I am keeping NATS (nissan anti theft system) and in order to do that there are a handful of modules that talk to each other through CAN bus to allow the engine to start. After a week of harness modifications the harness is simplified, the engine/tranny is out and it is about as stripped as i want it before i try to sell what is left.
Final wrap of the harness will happen after i mock it up in the 240z, otherwise i will find myself ripping half of it apart again. The cardboard box shows all the wires i deleted out of the main wiring harness...
|

|

|
|
3/29/12
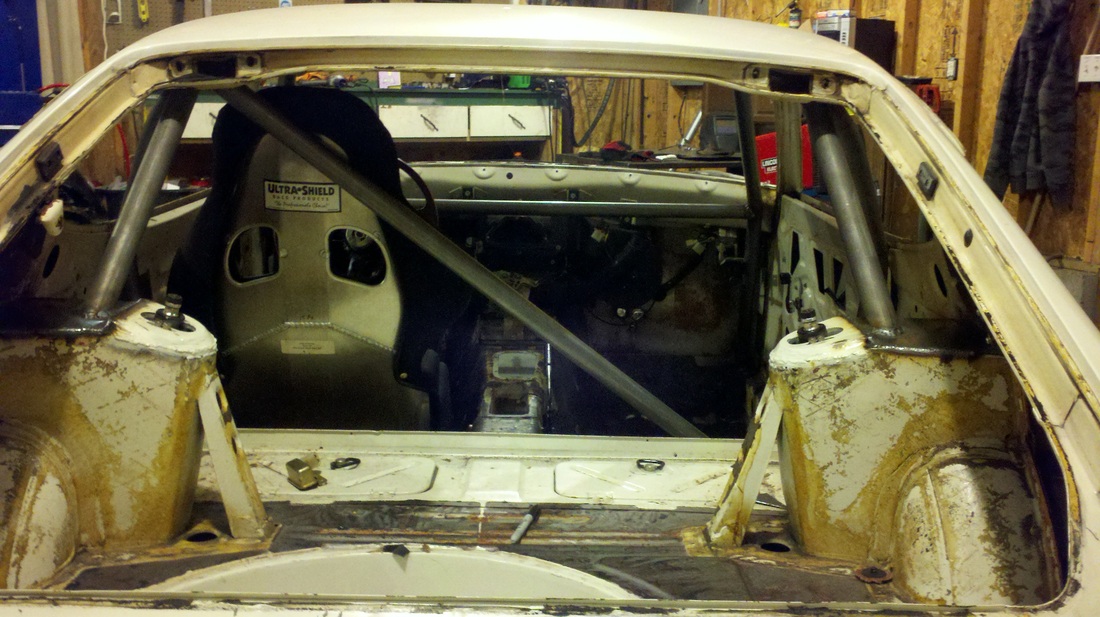
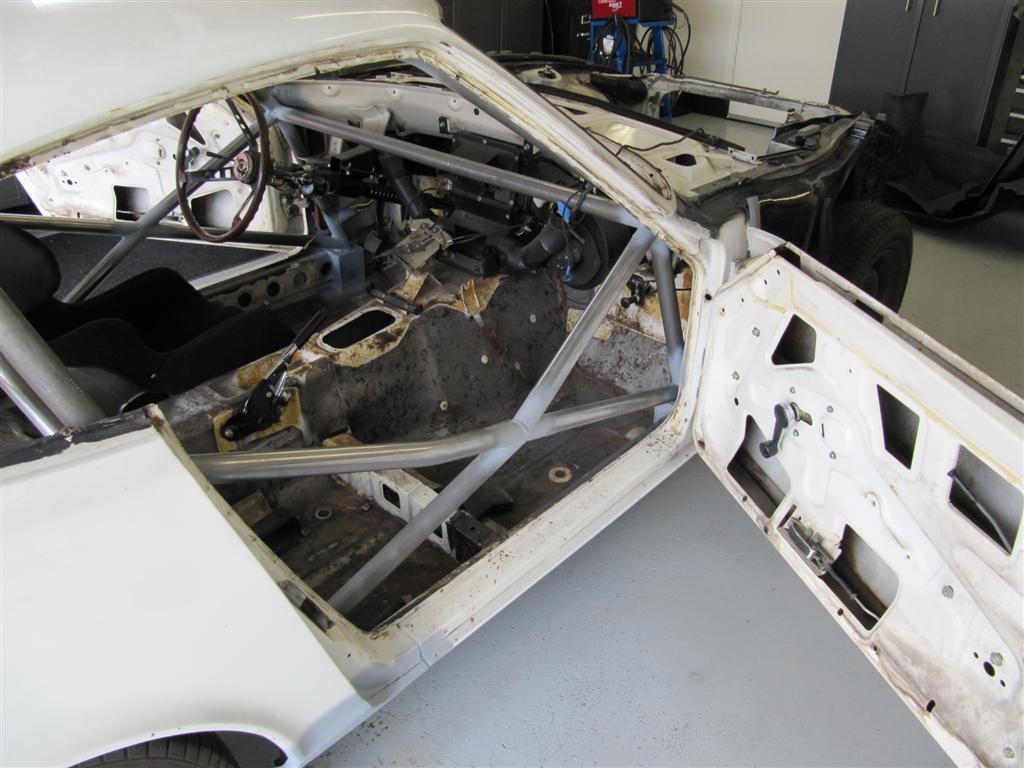
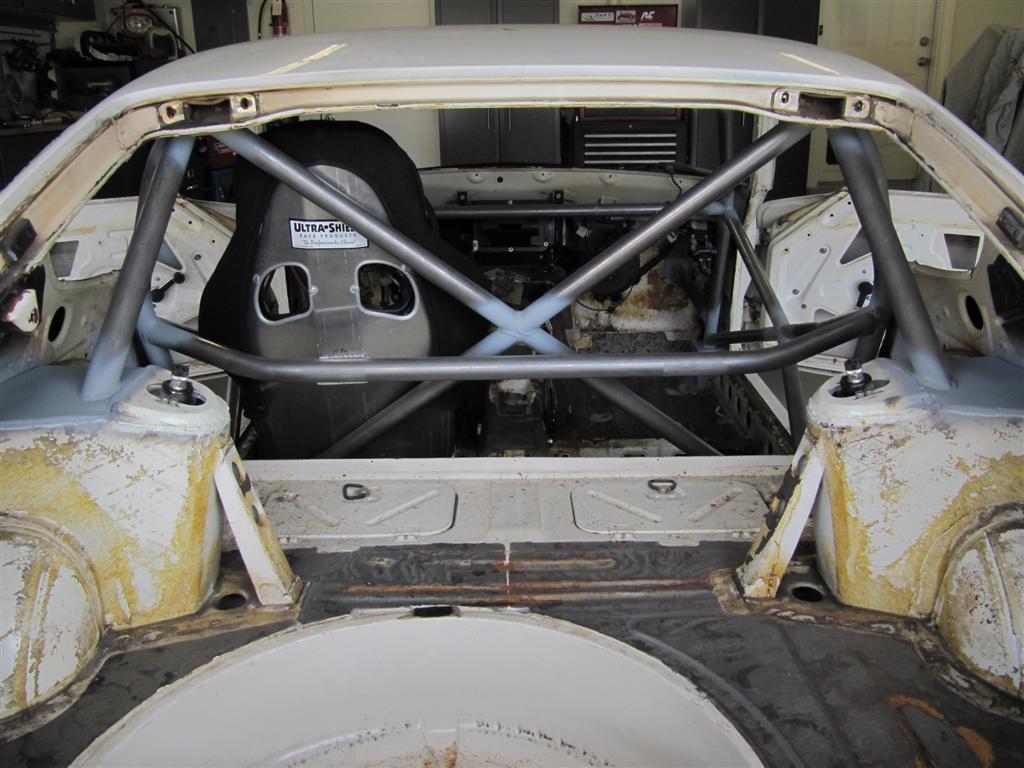
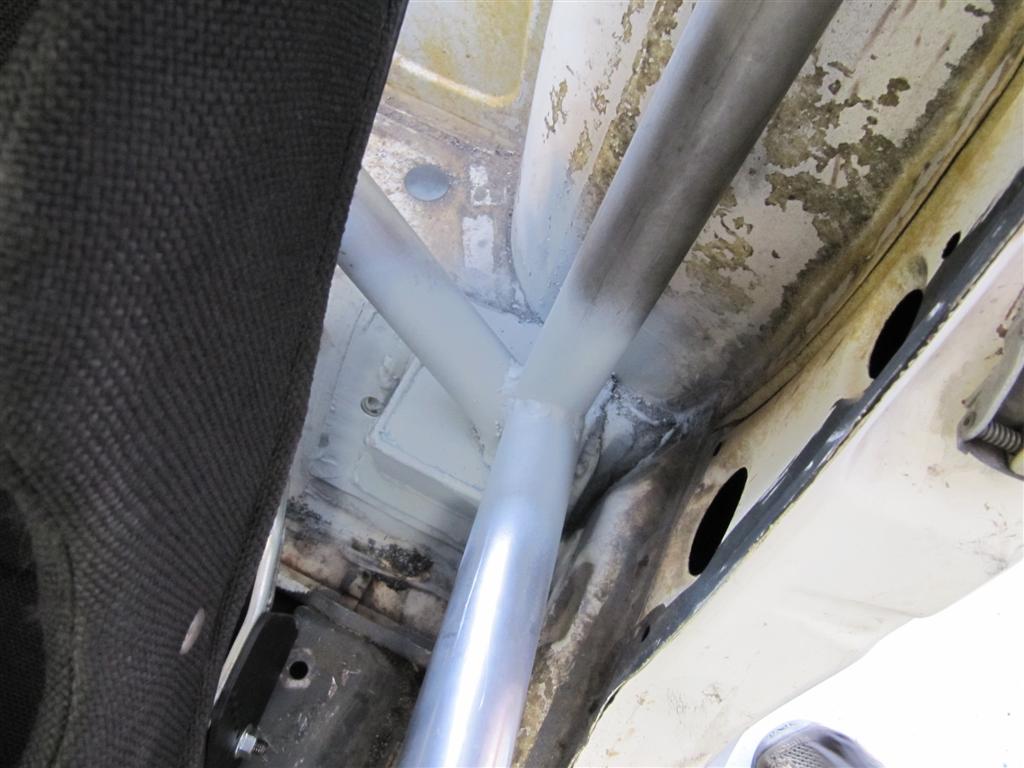
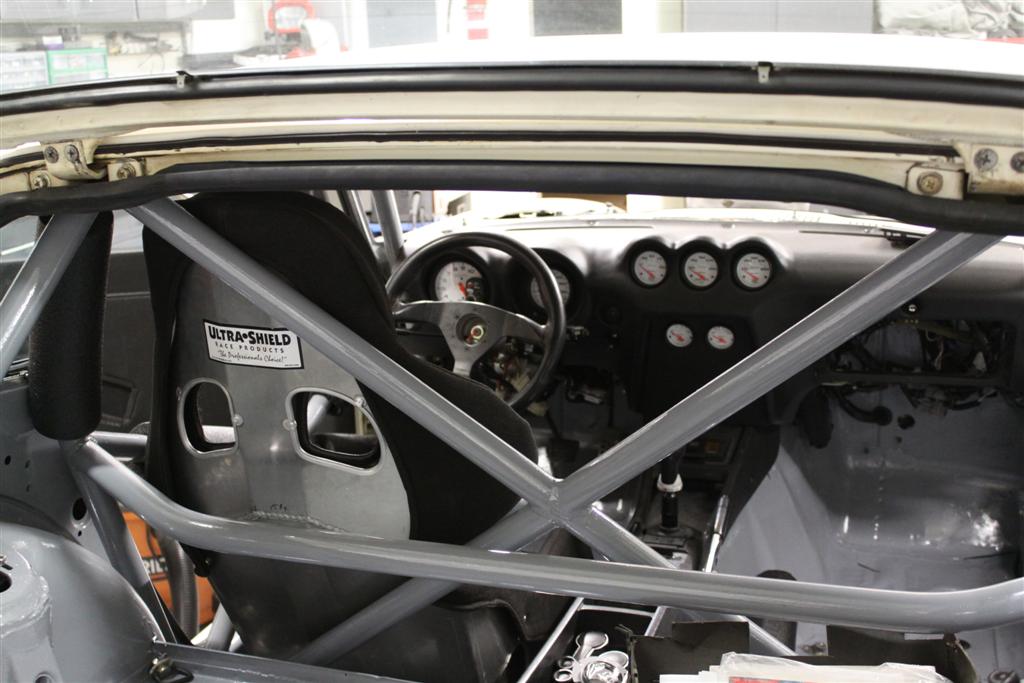
Went to Derricks last night (cage builder) and checked out the progress. It looks really nice so far, I took a few pics below. Its about 50% done.
4/21/12 update
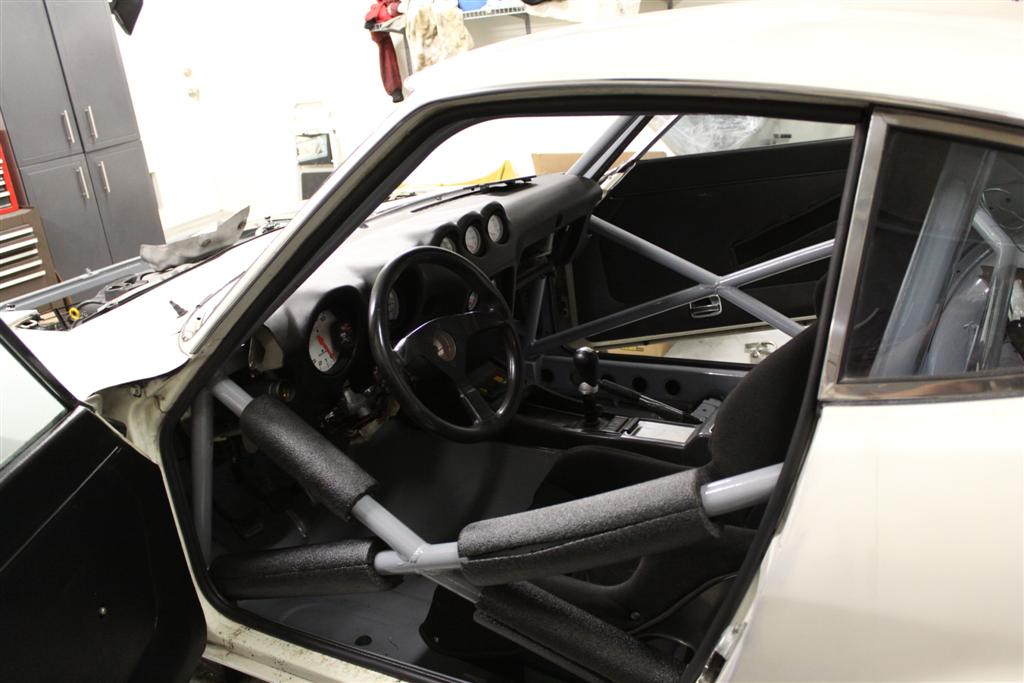
I got the car back from the cage builder. 90% is done, he didnt have time to do gussetting, so i may just not do it or wait on doing it. I am happy with the results though.
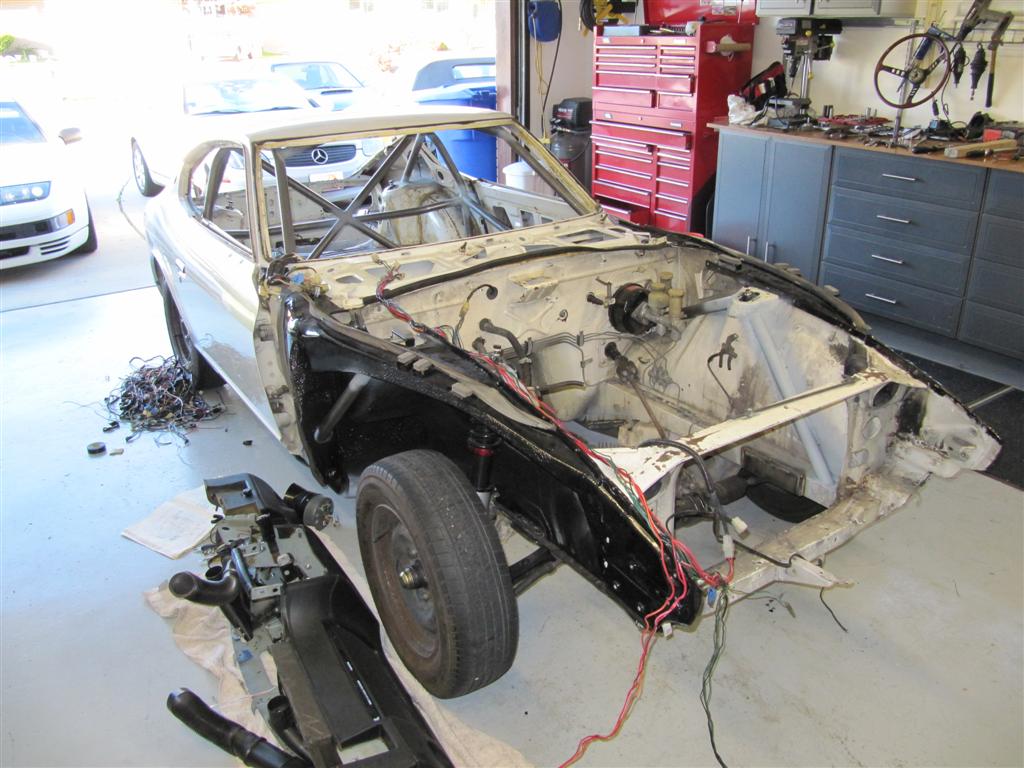
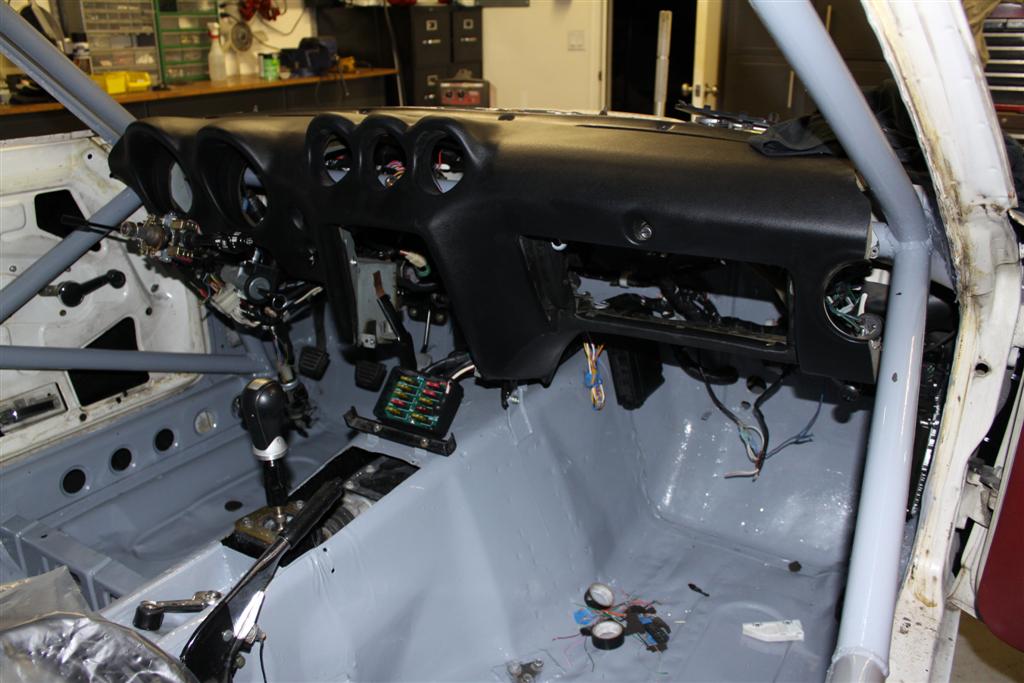
Now i have started to simplify the body harness, this is also laborious and time consuming, like everything else is on a project like this. As of today, i cant get the turn signals to work, but ill figure it out eventually. im deleting everything but what is required to pass safety for street driving. The whole wiring diagram fits on one sheet of paper vs. the 350z spanning several chapters!
Now i have started to simplify the body harness, this is also laborious and time consuming, like everything else is on a project like this. As of today, i cant get the turn signals to work, but ill figure it out eventually. im deleting everything but what is required to pass safety for street driving. The whole wiring diagram fits on one sheet of paper vs. the 350z spanning several chapters!
|

|
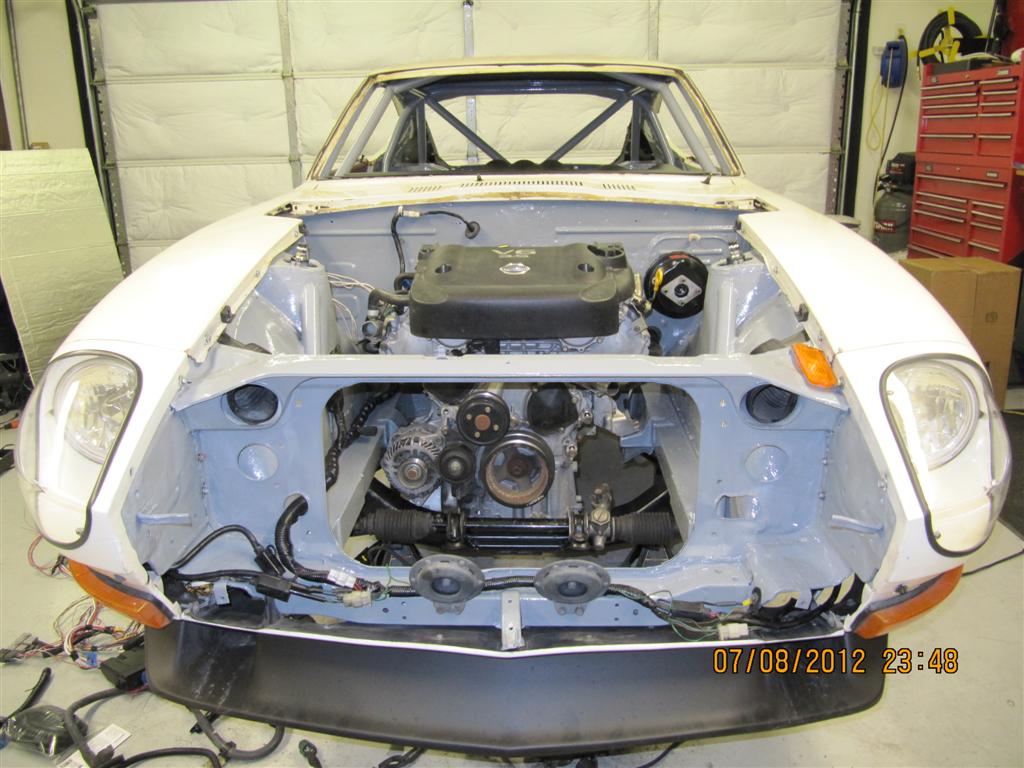
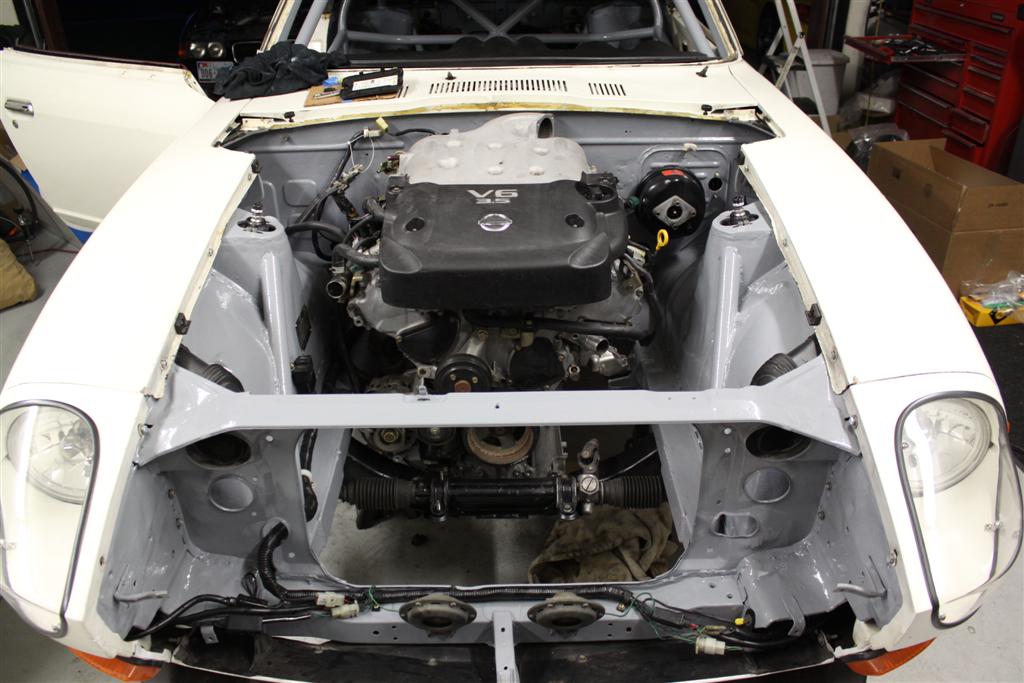
4/29/12
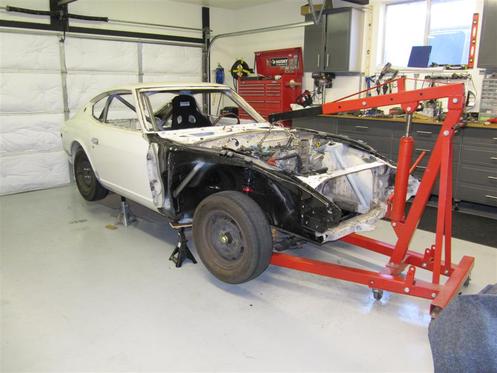
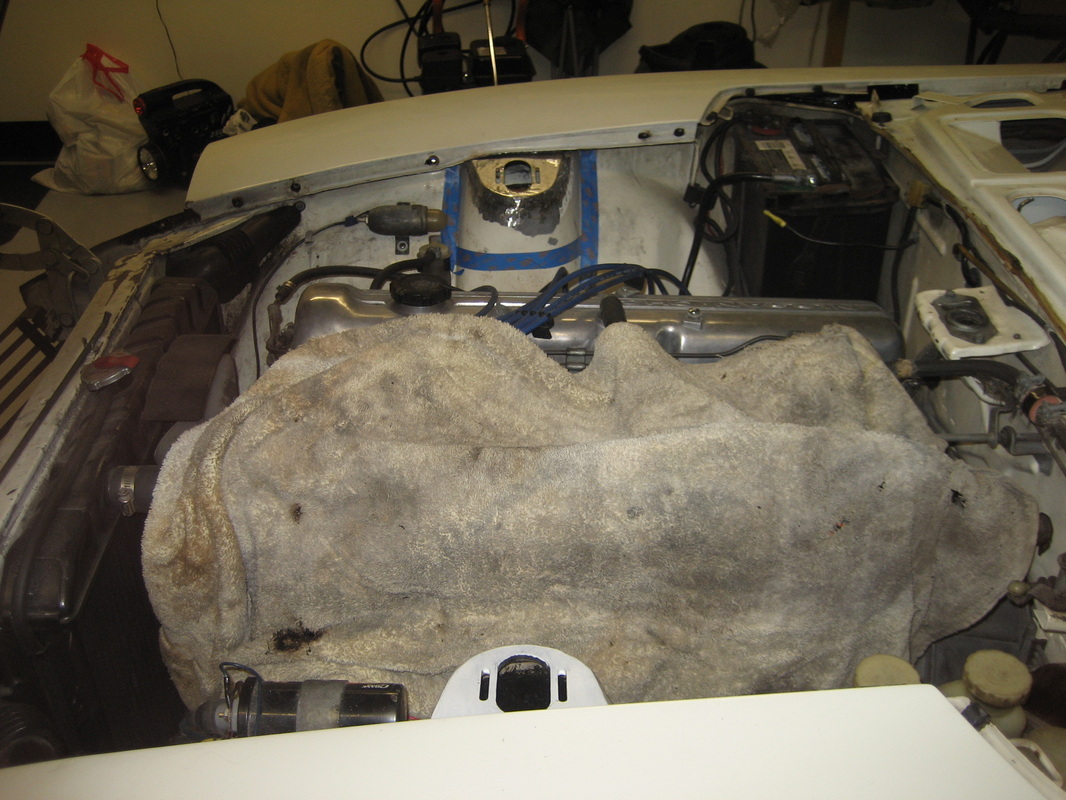
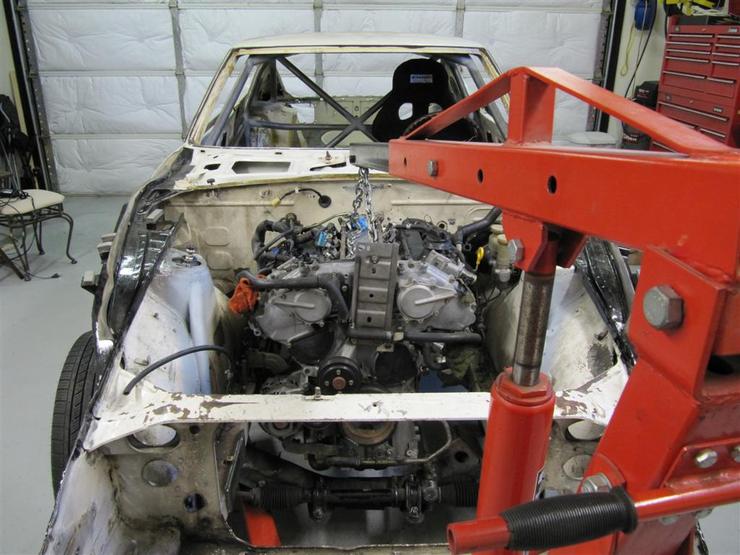
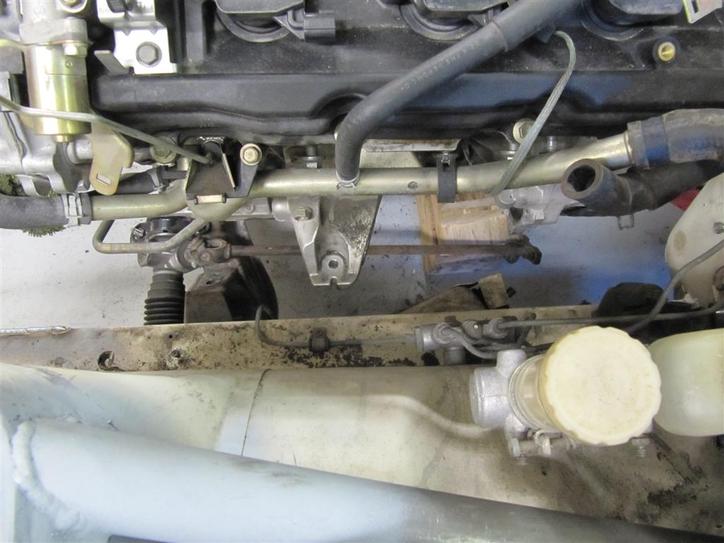
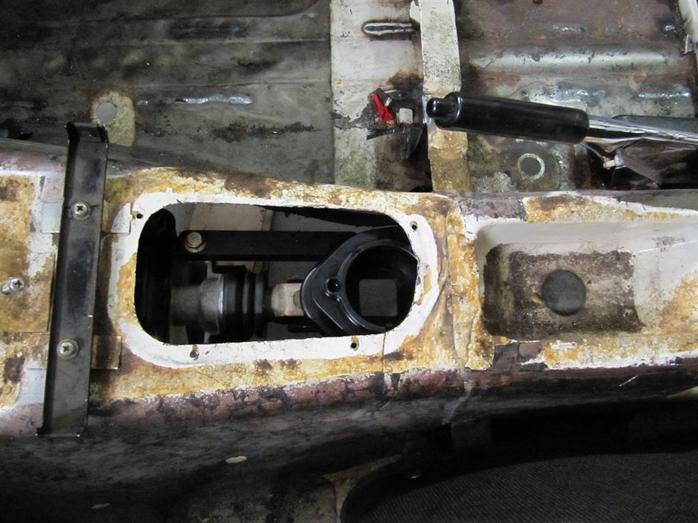
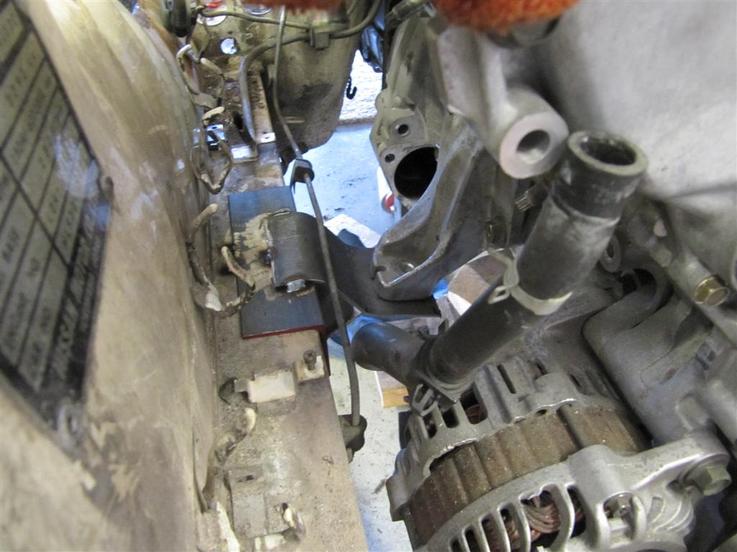
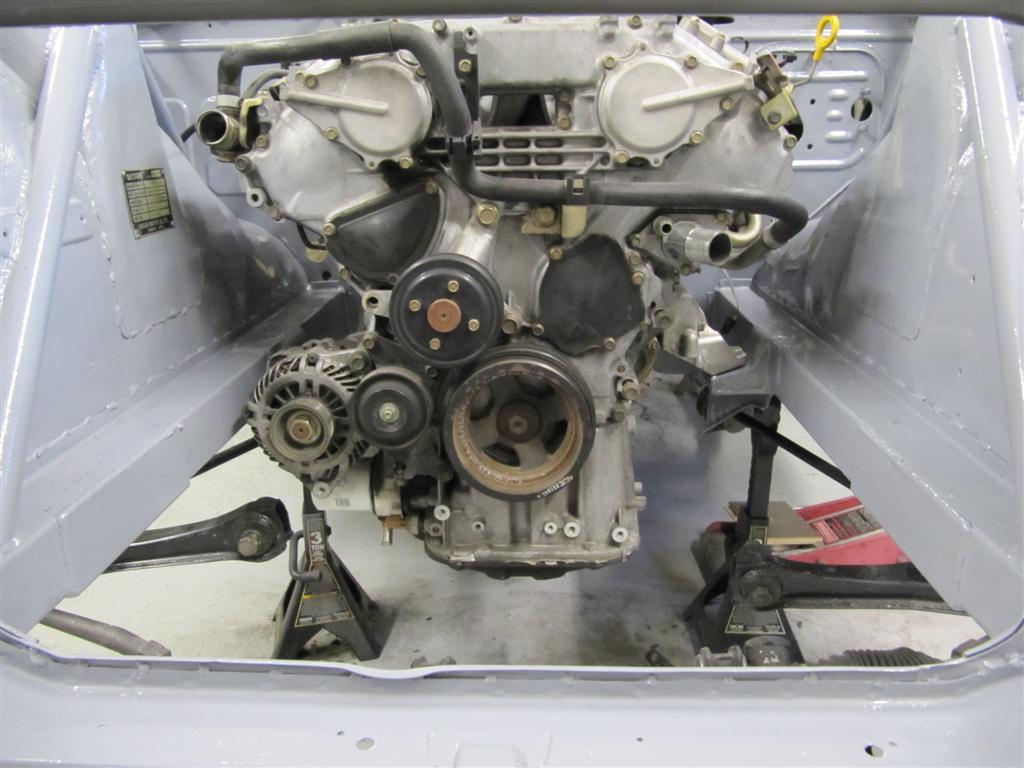
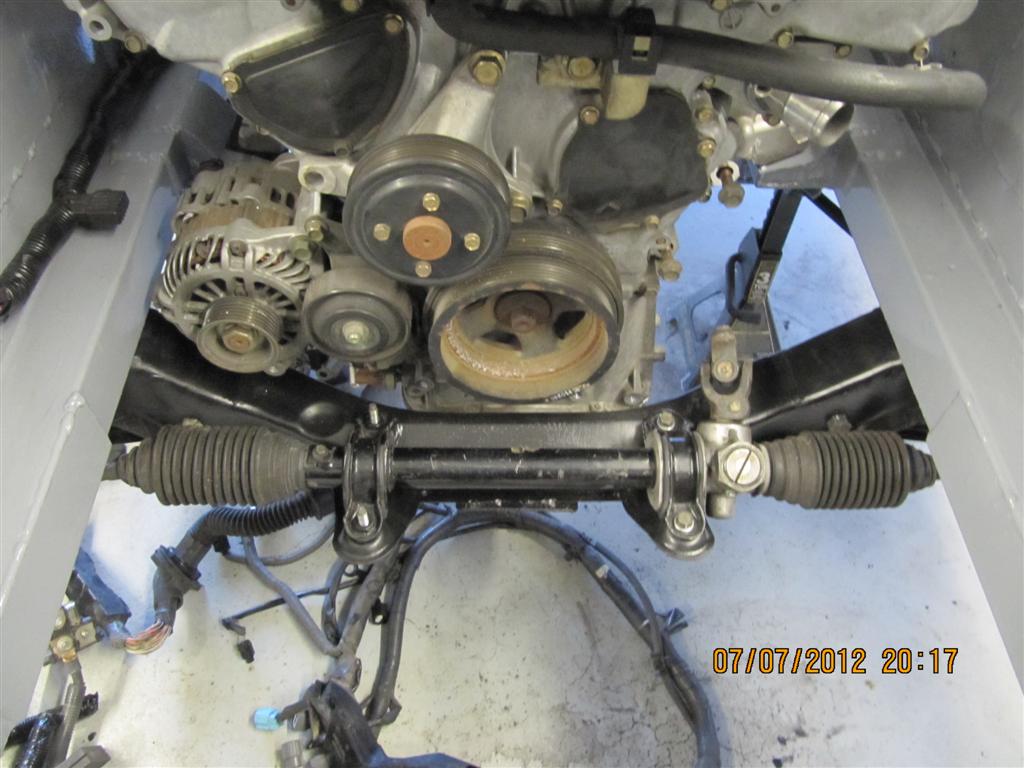
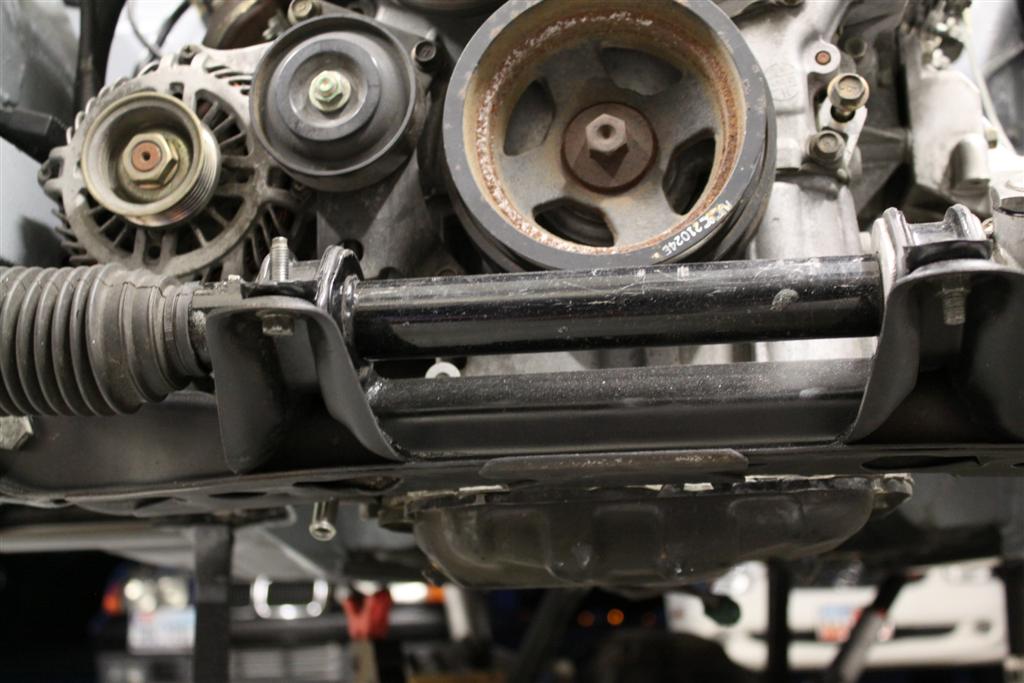
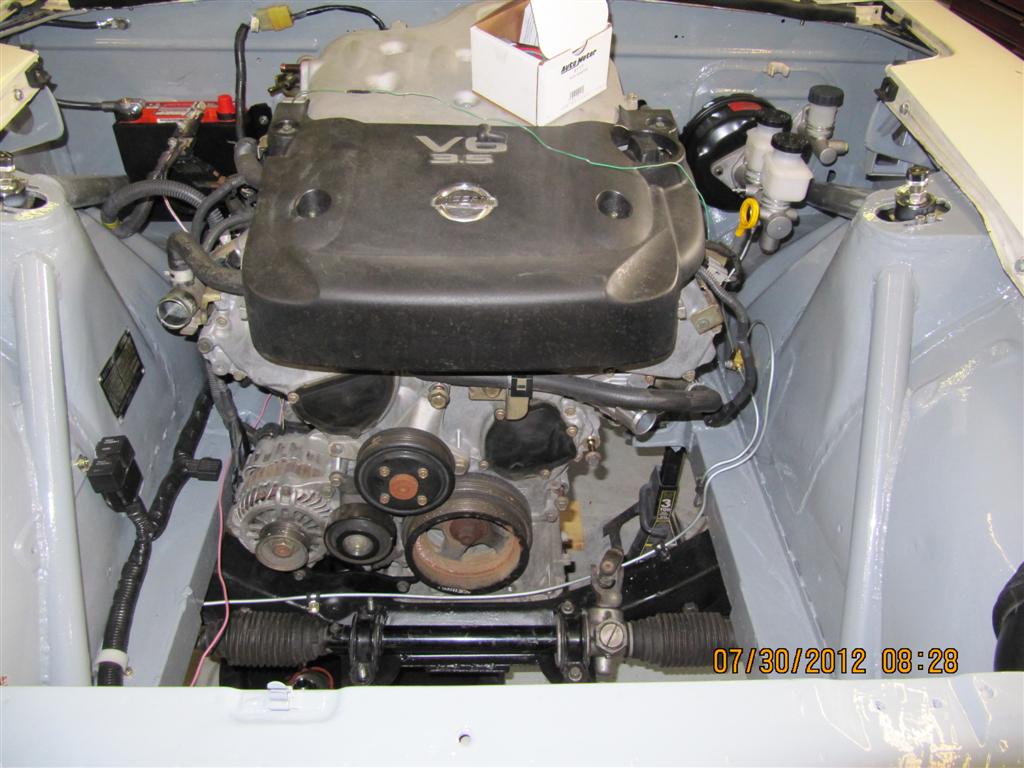
I finished modifying the body harness and finally got the engine/tranny in to see where it is all going to line up. Definitely going to need to modify the crossmember because of the front sump. After that is in place i have to see where the intake manifold is going to sit on the firewall. i may need to do some firewall fabrication around the throttle body. Just so happens my windshield wiper motor is right in the middle, where the intake manifold turn will be...great, do i need wipers? probably not, but it would be nice. The transmission is very long and the shifter is pretty far back even with Austin's shorter shift bracket.
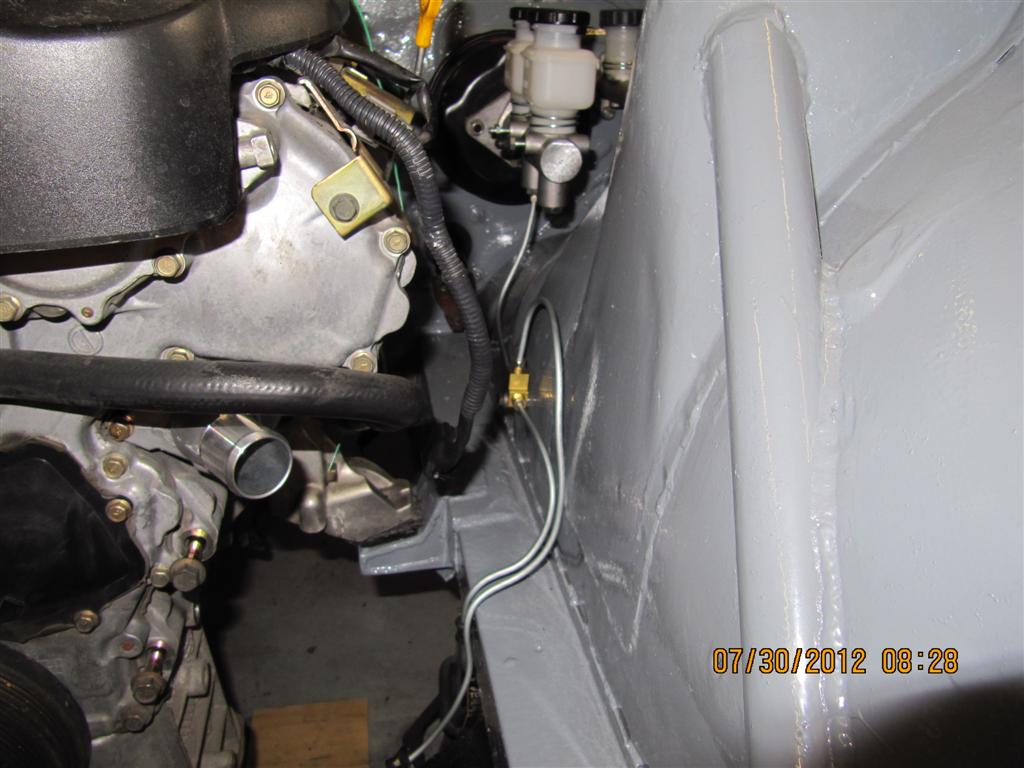
I also need to relocate my brake lines and proportioning valve, probably need to do a cockpit located one anyway.
After mounts are made and engine is fitted, ill have to remove it to paint the horrid engine bay, it will look so much better after that.
I also need to relocate my brake lines and proportioning valve, probably need to do a cockpit located one anyway.
After mounts are made and engine is fitted, ill have to remove it to paint the horrid engine bay, it will look so much better after that.
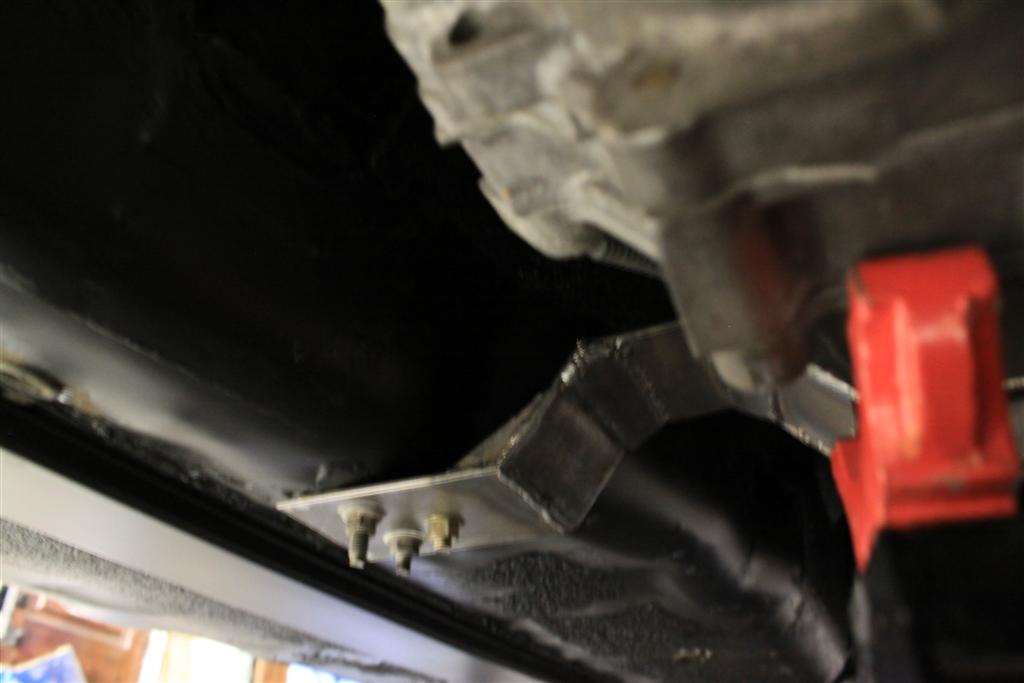
5-9-12
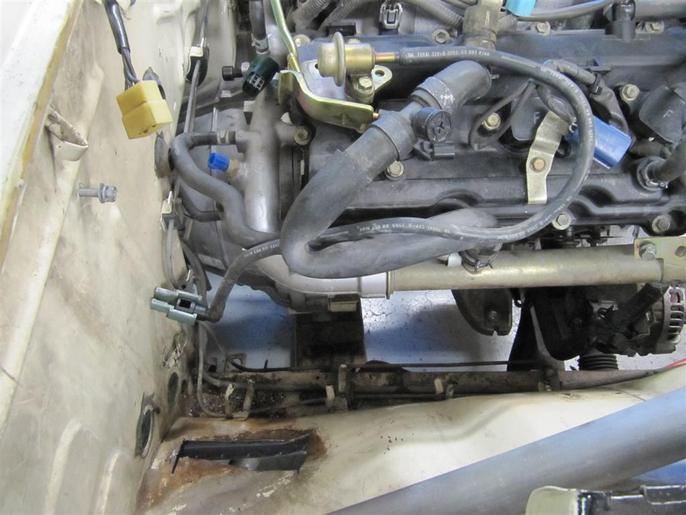
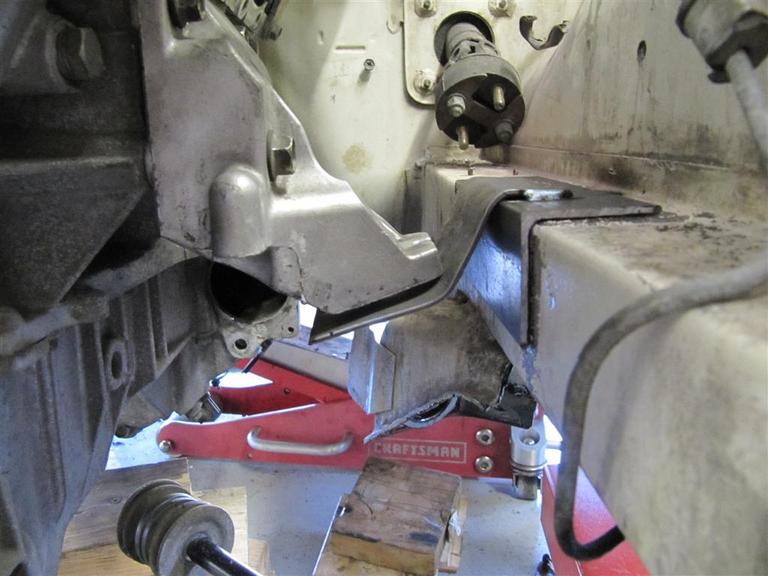
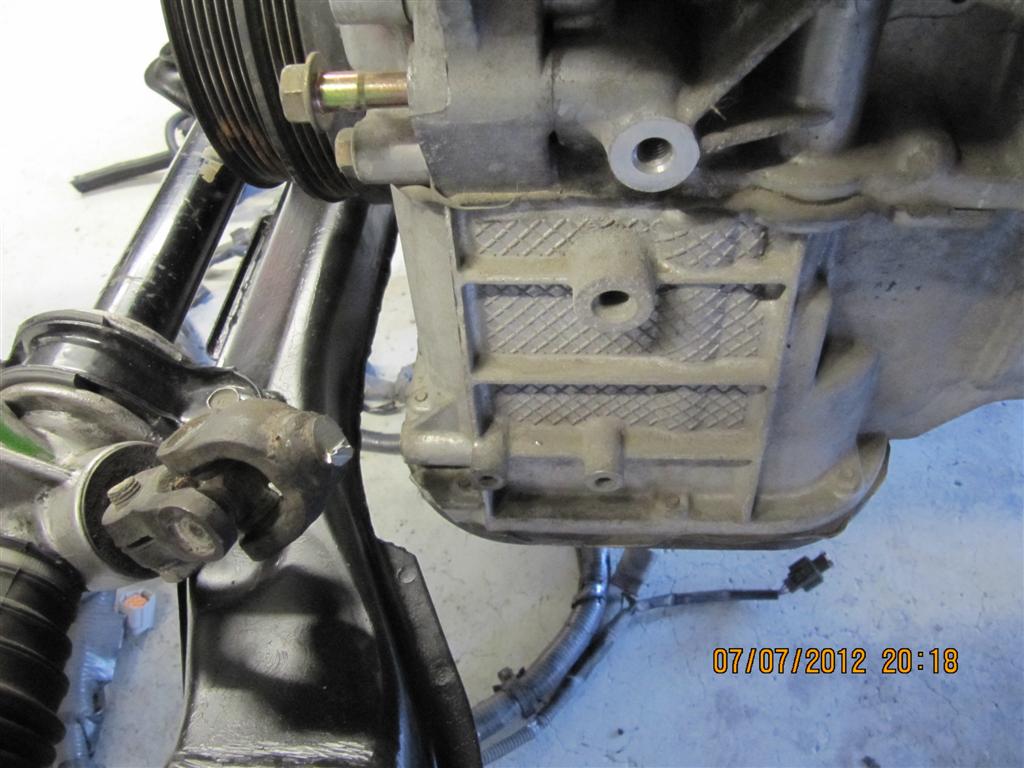
So i spent the past week or so lining up the engine/tranny and marking everything that will need to be moved, deleted, etc. I have made the transmission mount (needs some finish work) and started on the engine mounts, at least have the contour of them. I have removed the engine so i can finish welding up the motor mount design. Havent quite gotten the design 100% figured out, they are in a strange place on the car with the tension rod area right below, so i have some thinking to do.
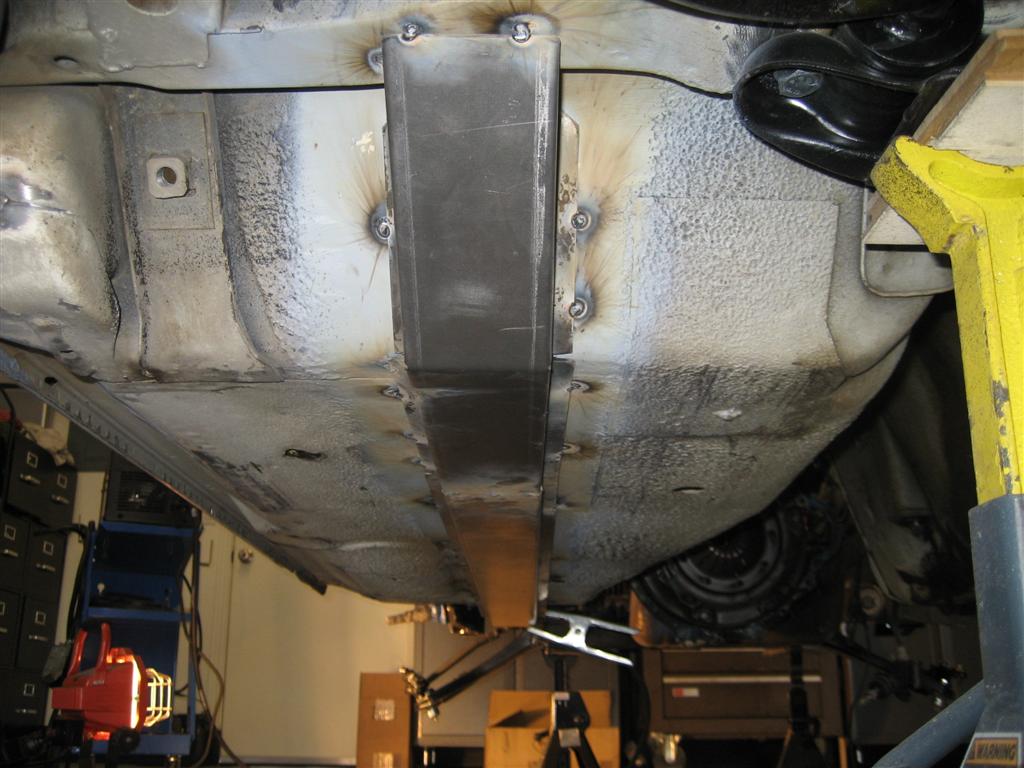
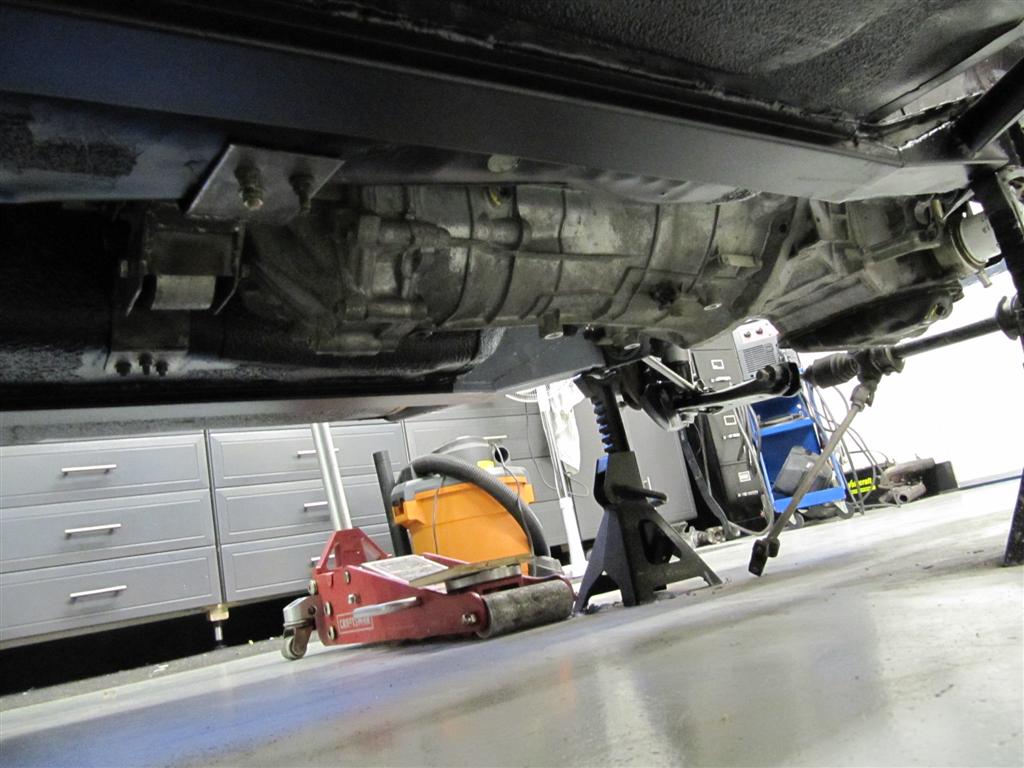
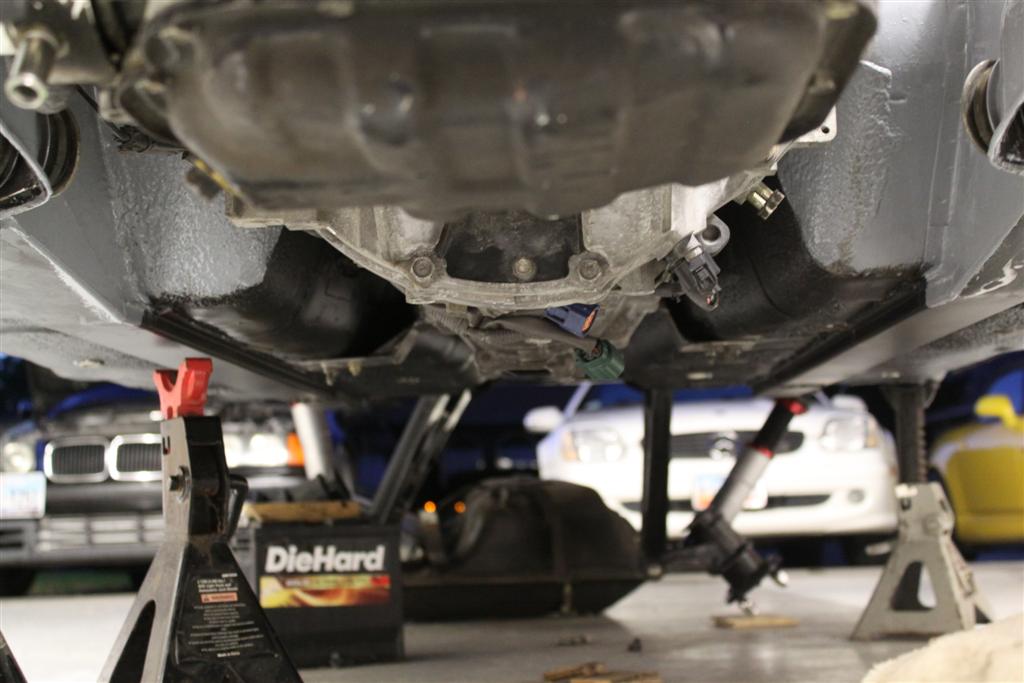
I tried to level the engine/tranny best as possible to make sure drive shaft angles are as straight as possible...
Im also trying to mount the engine as low as possible to improve center of gravity, however the oil pan is below the front crossmember about 2"...i will need a skid plate of some sort. that is where the motor was level, so i dont really have a choice there. i could lift the engine up a tad with thicker bushings on the engine mounts.
5-11-12
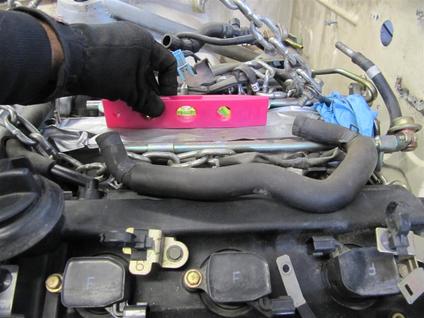
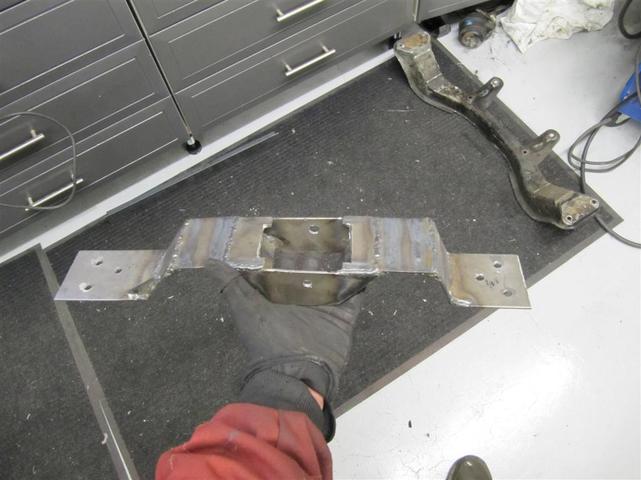
I finished the engine mounts, im happy with them. I am still on a welding learning curve. i also stitch welded the strut towers and frame rails to reinforce them as much as i can. I standed on each motor mount and jumped up and down and there doesnt seem to be any flex. The engine/transmission combo is about 450lbs so i think the mount design will be more sufficient.
There are only a few other things to do until i can paint the engine bay, cut off certain tabs, etc and plug some holes with metal plates.
There are only a few other things to do until i can paint the engine bay, cut off certain tabs, etc and plug some holes with metal plates.
5-22-12
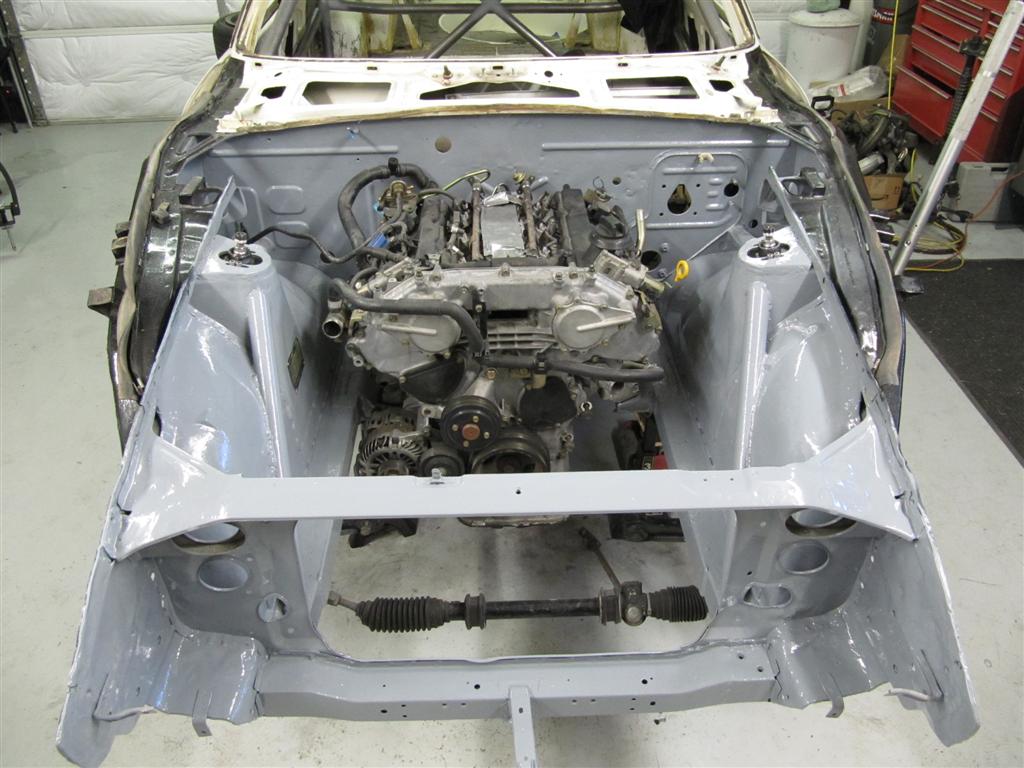
I spent a few days prepping and painting the engine bay. It turned out well, i used Duplicolor engine enamel primer and just cleared over it. Im not quite finished, but also recoated the wheel wells also with VHT epoxy.
6-15-12
I wasnt happy with the paint finish, so i roughed it all up and recoated it in "RustSeal" gray. i like it a lot better and it doesnt scratch as easy as the duplicolor engine enamel clear.
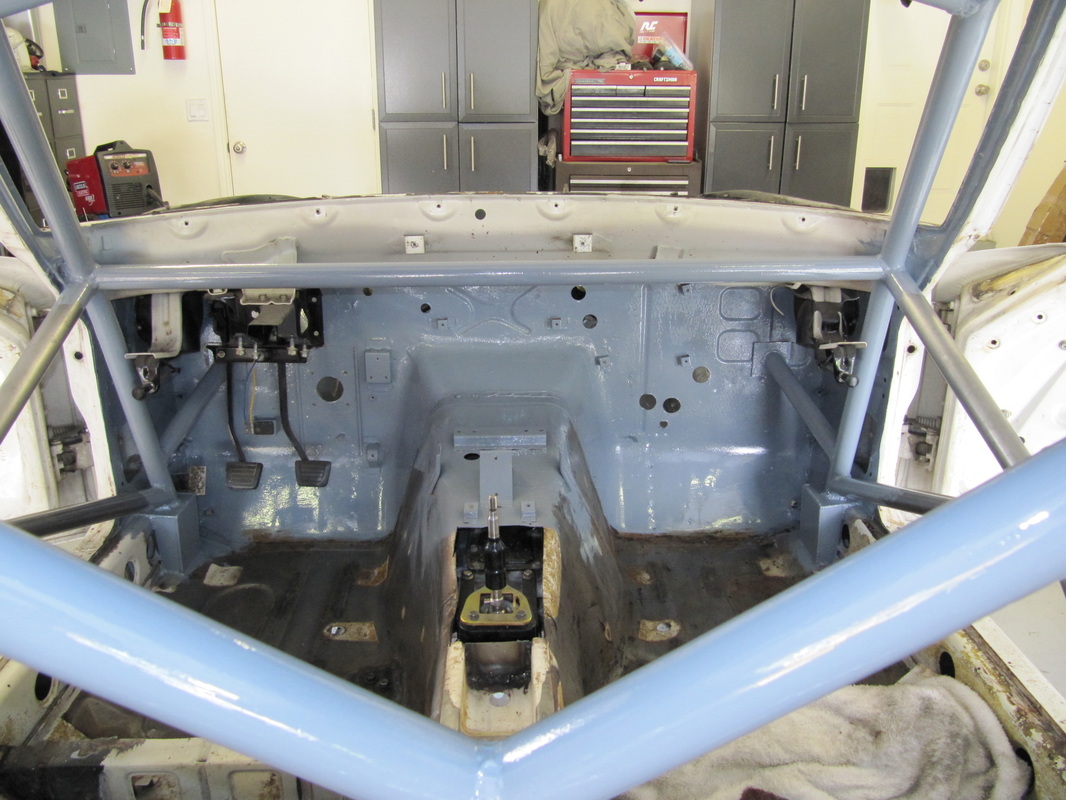
I also got to finally mounting the engine/tranny in place. havent drilled final mounting holes on the engine yet because i may have to change some angles due to the driveshaft. Ill do final mounting after they are lined up properly. Now its time to strip all the interior of the glue that used to hold all the panels on...not going to be fun. i hate this part already.
I also got to finally mounting the engine/tranny in place. havent drilled final mounting holes on the engine yet because i may have to change some angles due to the driveshaft. Ill do final mounting after they are lined up properly. Now its time to strip all the interior of the glue that used to hold all the panels on...not going to be fun. i hate this part already.
6-24-12
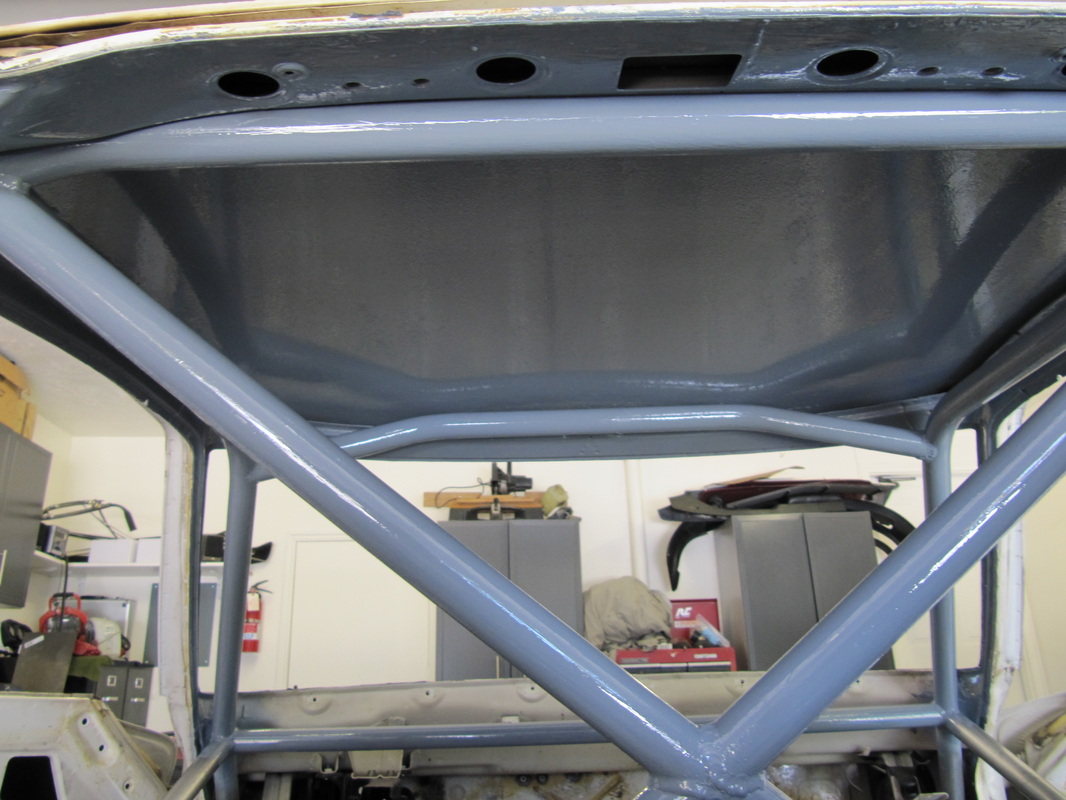
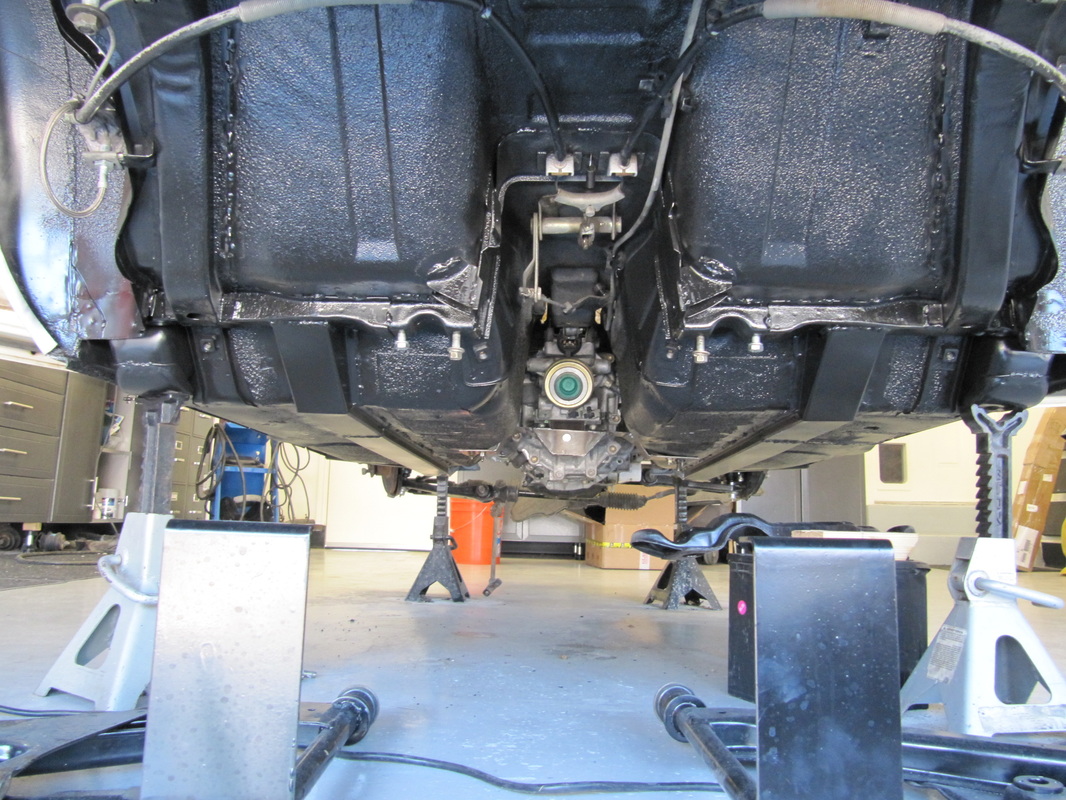
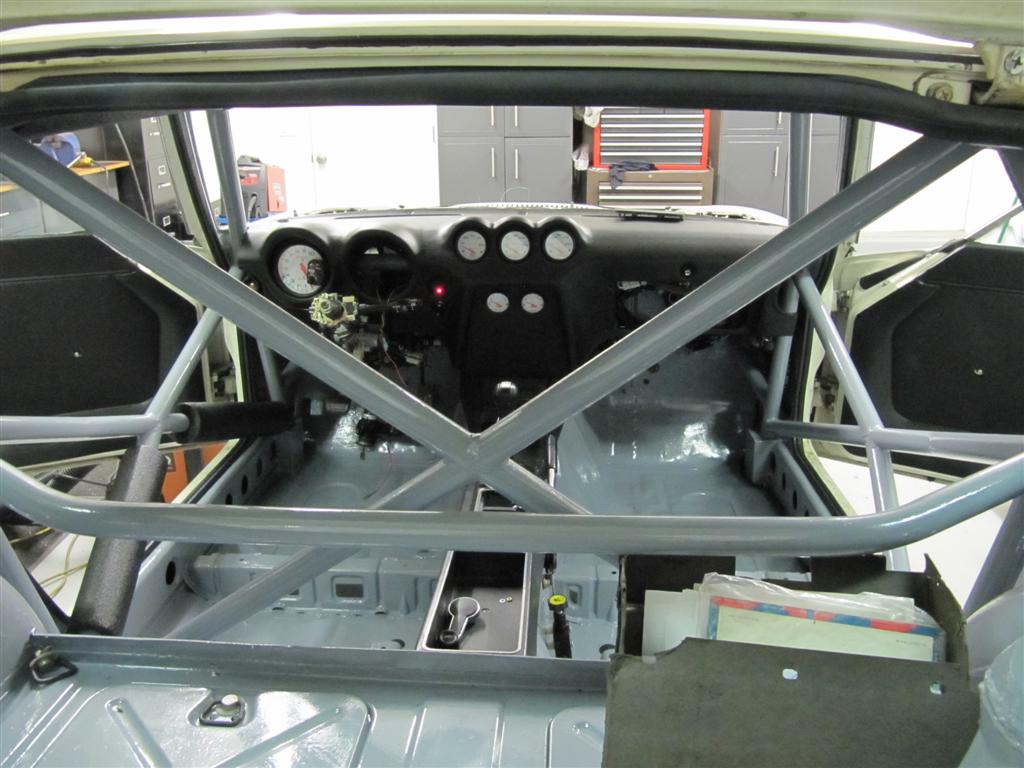
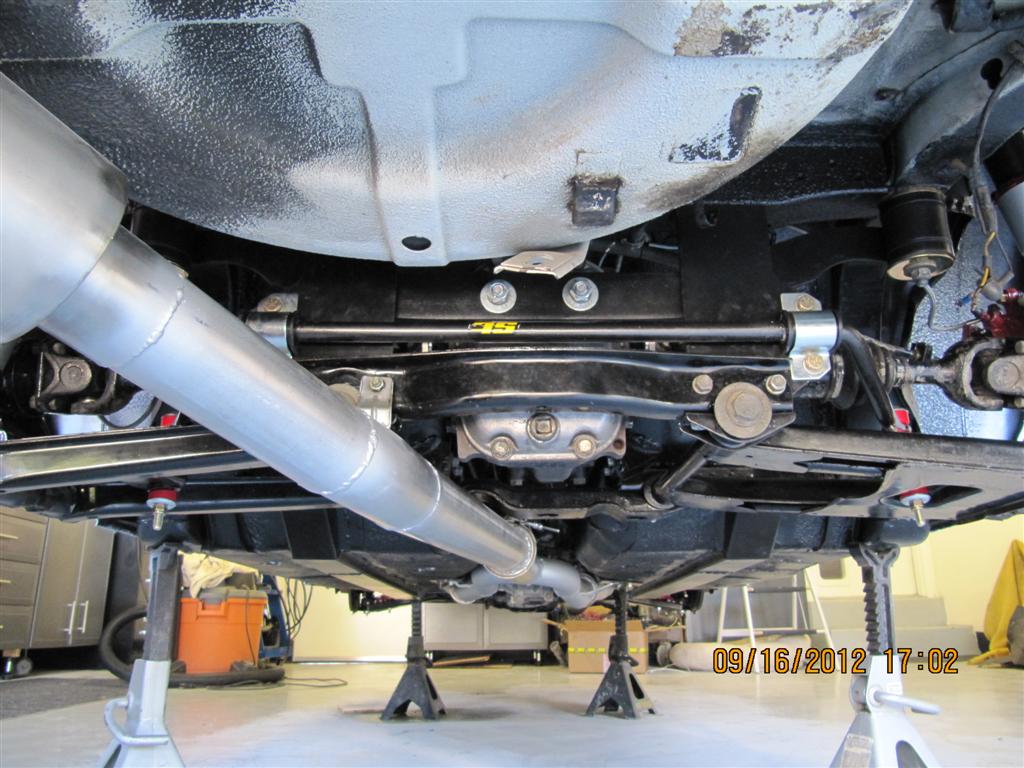
I spent this past weekend cleaning and painting the rear end of the undercarriage, it looks a lot better. I also got started on really cleaning and painting the interior to match the engine bay. I got the roof, a pillars, most of the cage, and the firewall all done. its going to look really good when its all done, then its time for some reassembly.
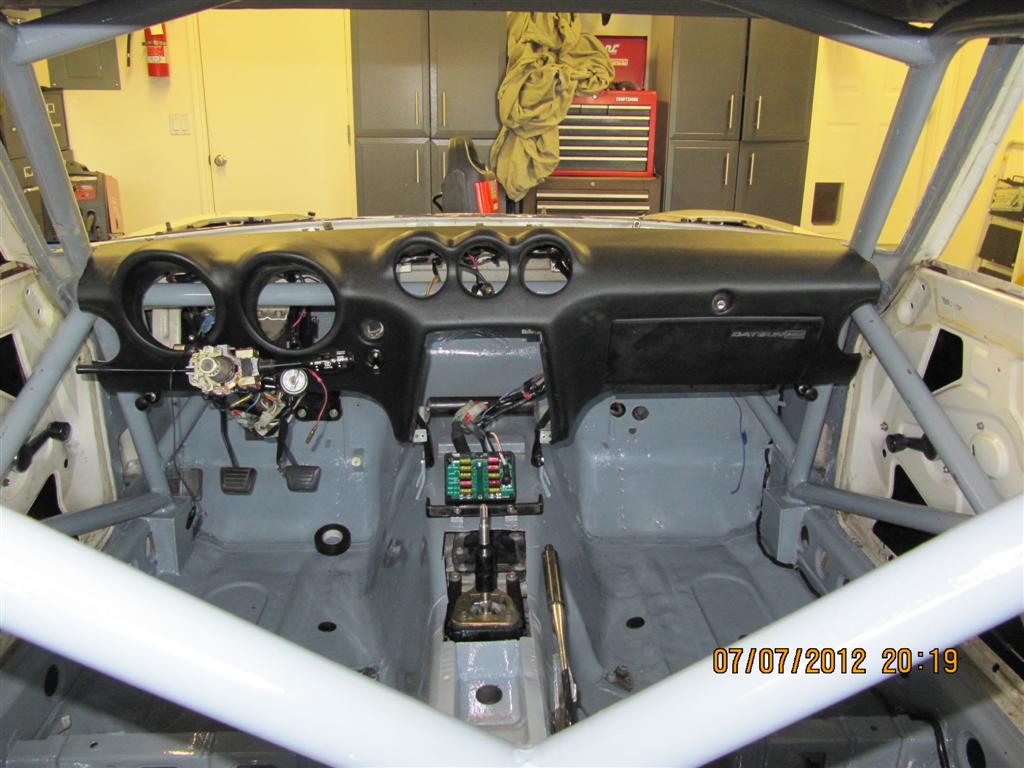
7-9-12
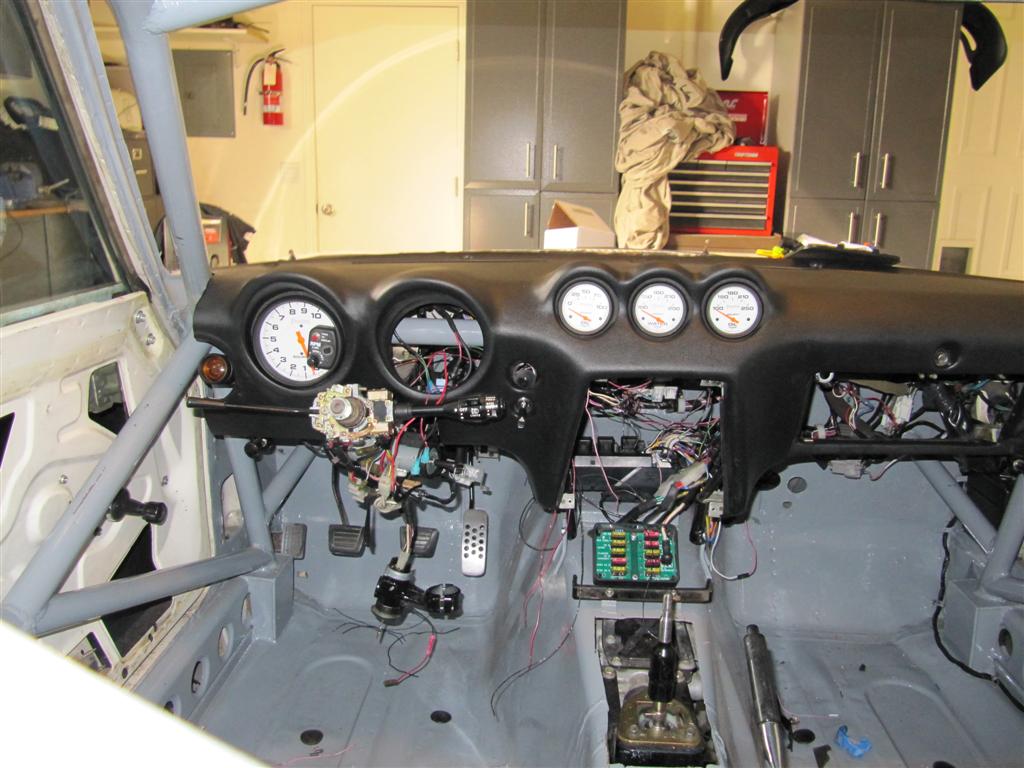
i have made some good progress since the last update. Ive finished painting the interior with rust seal, installed the dashboard, front end parts, front cross member, and the entire body wiring harness. Everything is coming along nicely, next is the engine/tranny harness, then ill hook up an external fuel pump and would like to try and start it to make sure it still runs with even more wires removed.

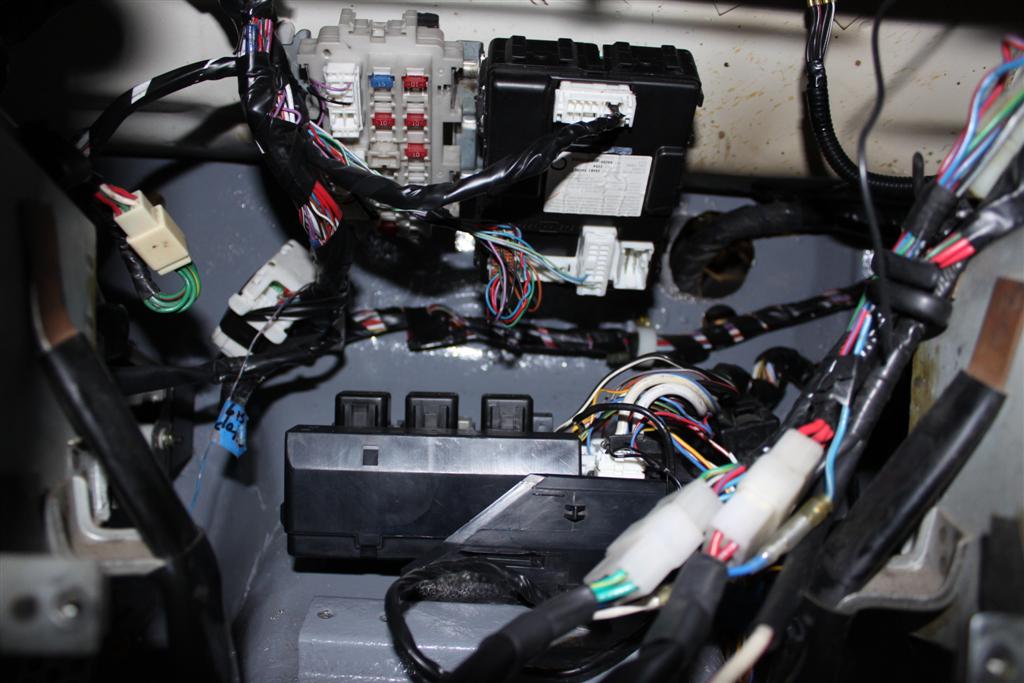
7-18-12
I got more done. i think the wiring is about 95% done, just need to figure out a few wires/ignition splices then button all that up. I mounted all the 350z modules/fuse panels up underneath the dash where the heater core/blower assembly would be. i also mounted the ECU near the passenger kick plate behind the roll cage bar. I used "rivnuts" to mount everything since i love them so much. They make mounting items where the back part is inaccessible so easy.
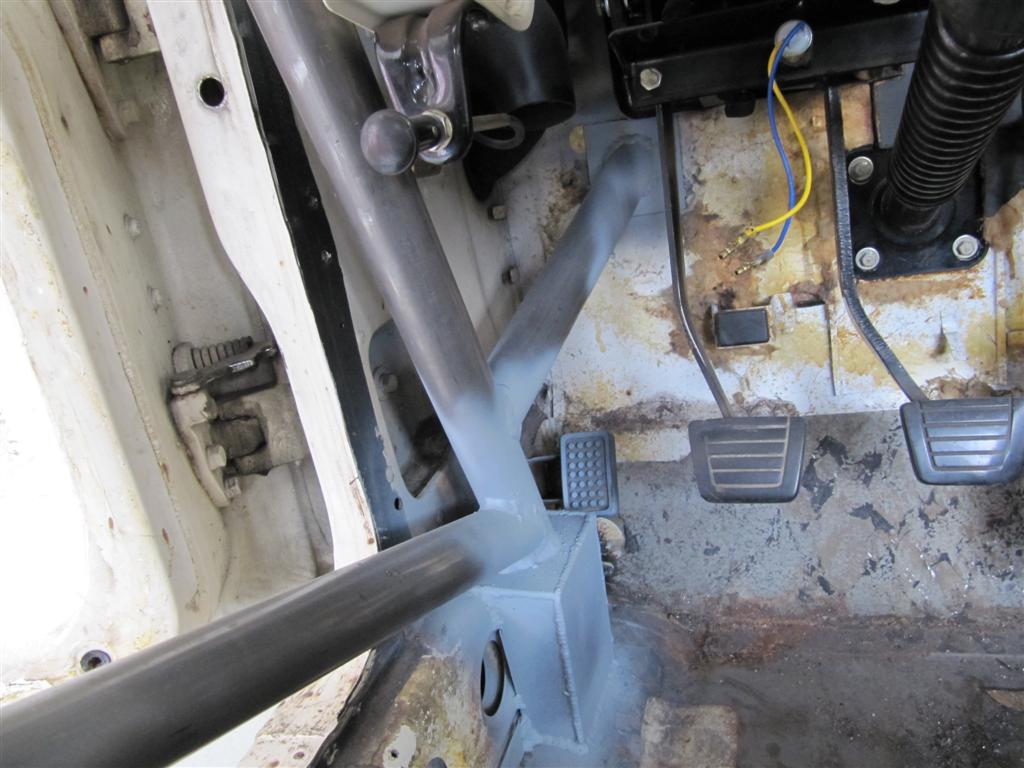
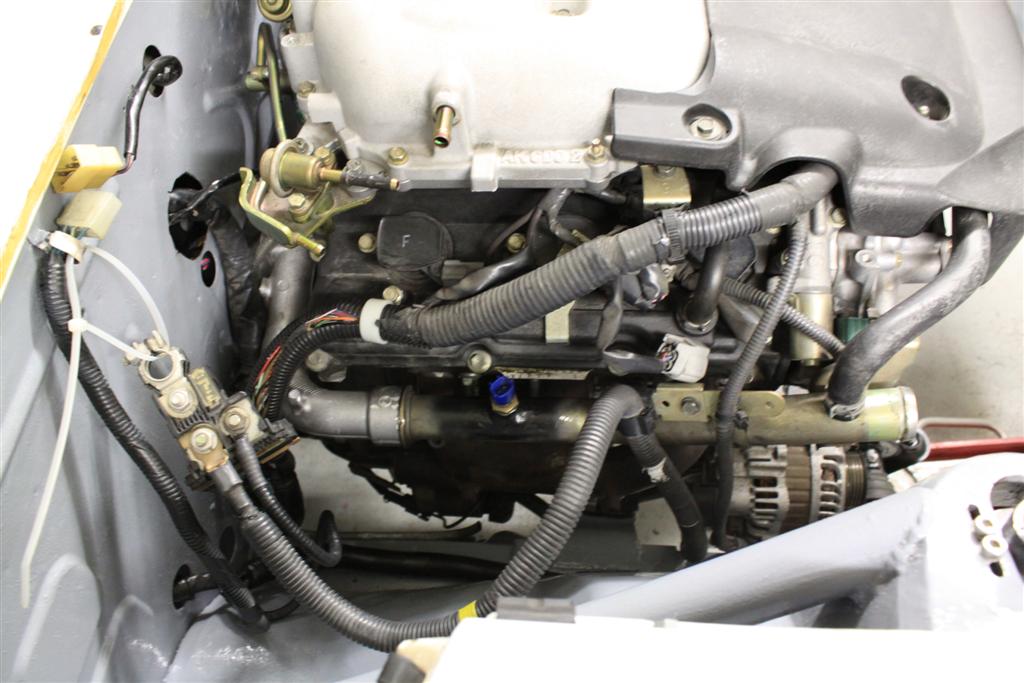
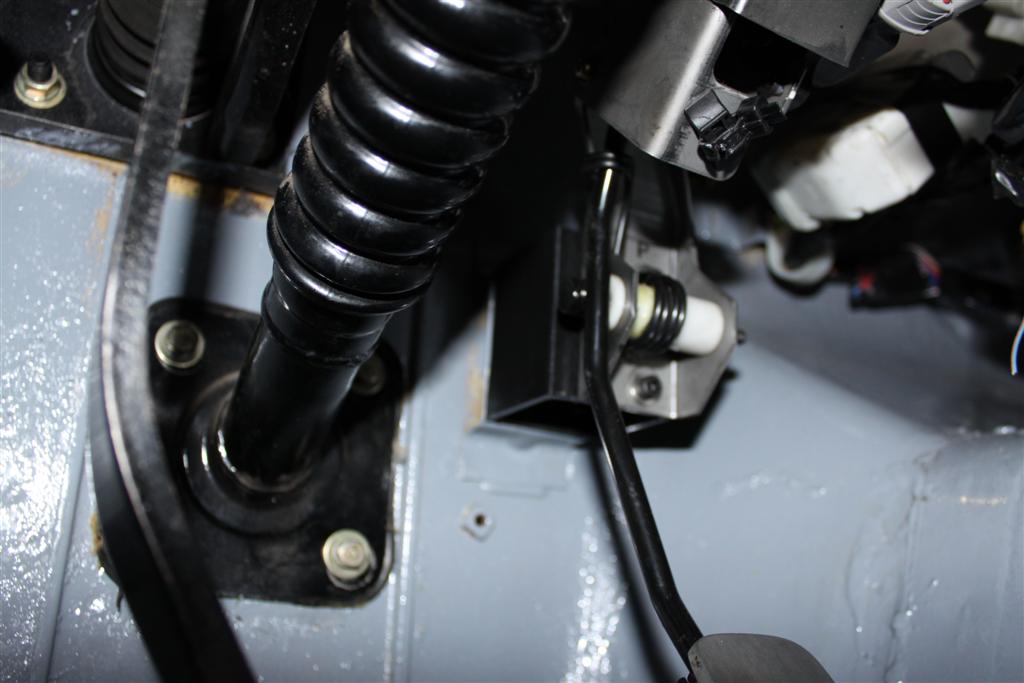
I also made a spacer/converter for the accelerator petal to mount up the the 240z original pedal mount location.
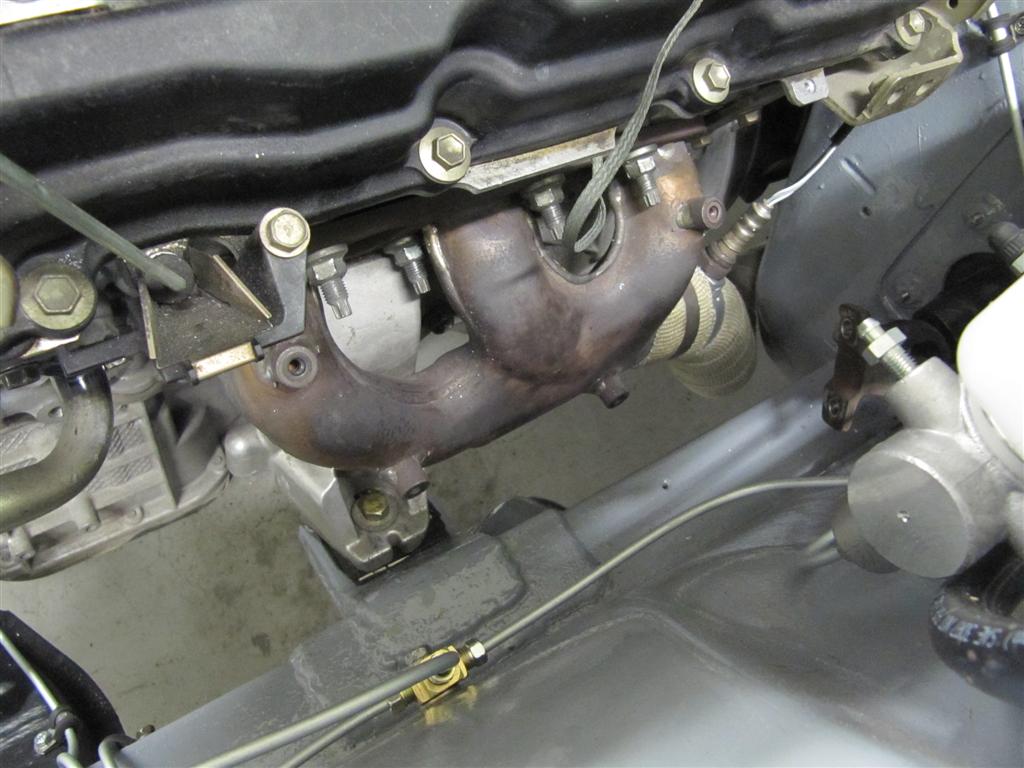
The intake manifold is also in place as well as the rear hatch with new weatherstripping, etc and i relocated the coolant temp sensor as well as welding shut all the oil warmer, throttle body warmer, and heater lines...
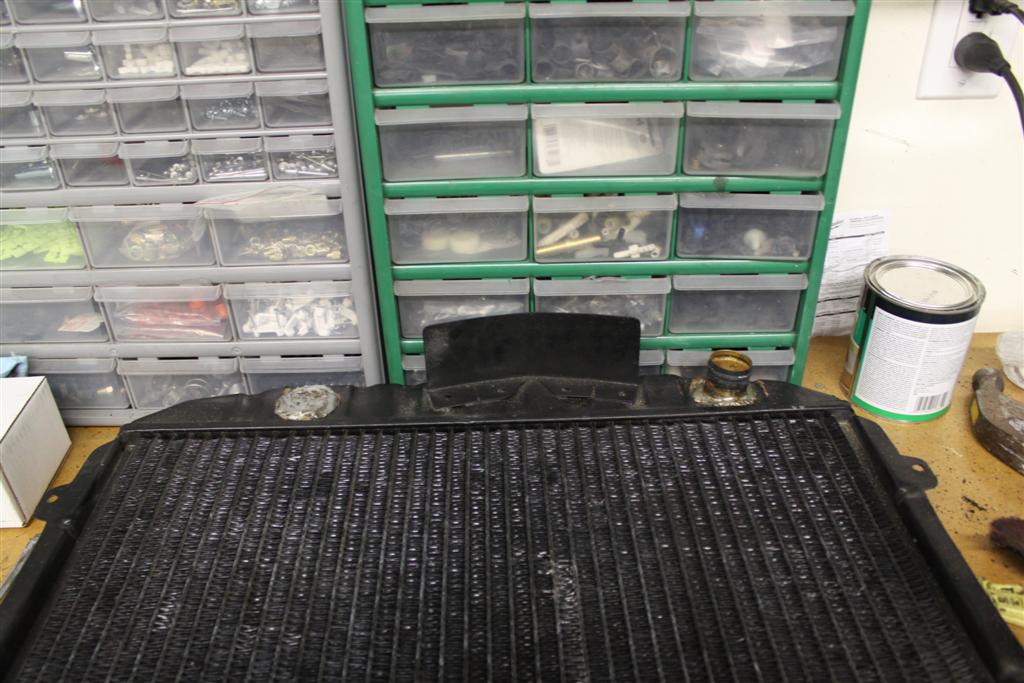
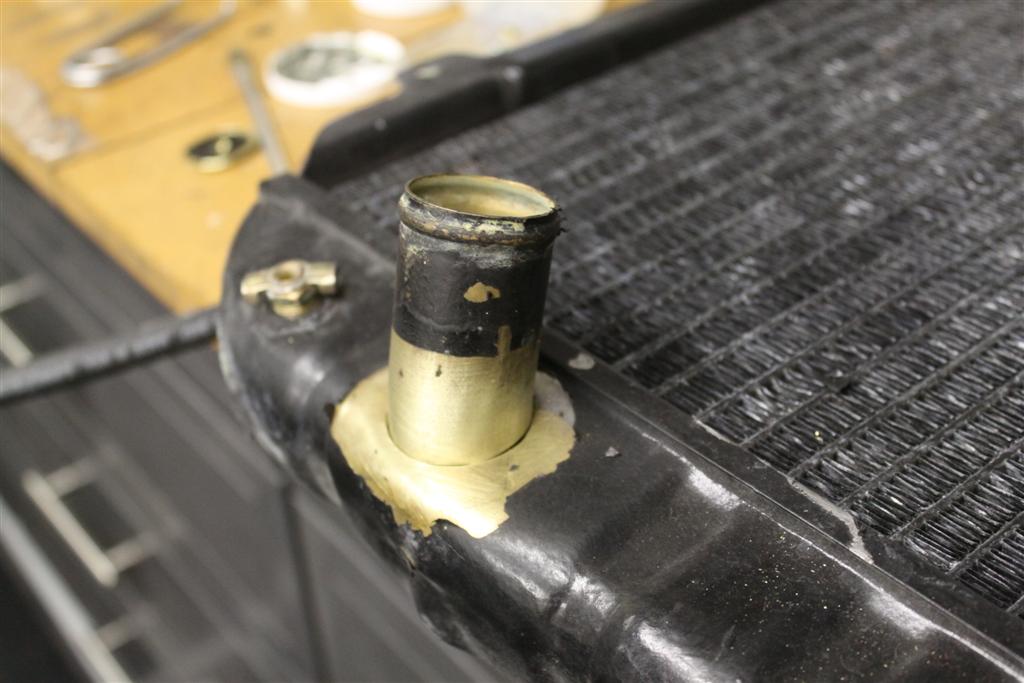
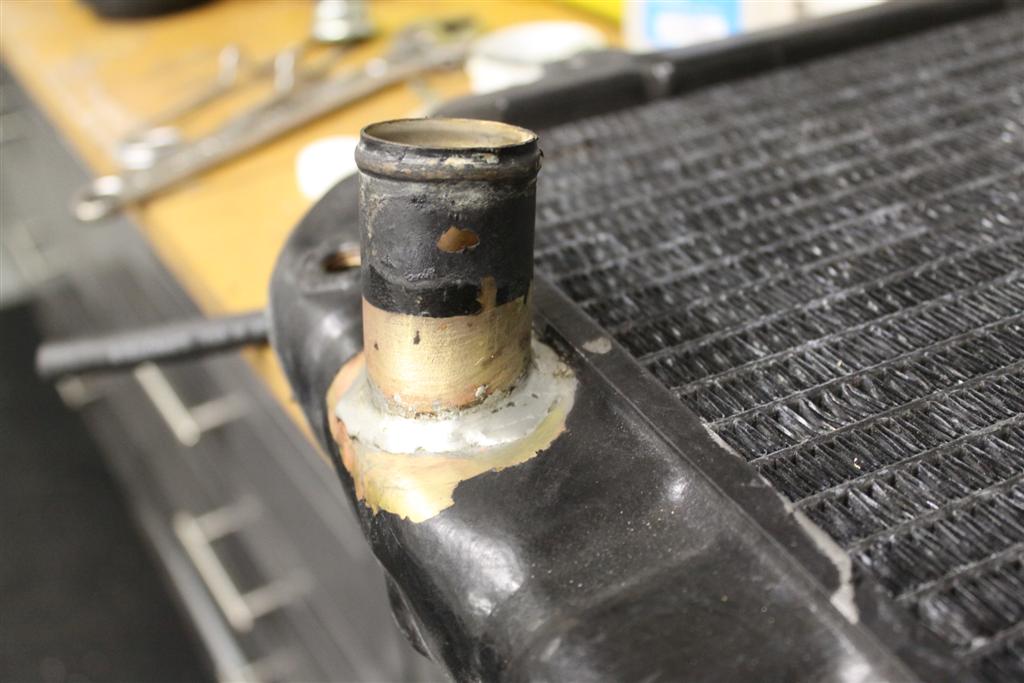
Next step is to modify the radiator and make the exhaust, which is going to be a pretty massive task. i want to fab all or some of the exhaust prior to starting the car...
Still thinking about whether or not i should reinforce my tranny mount...i need to remove it to modify a few things anyway...
I also made a spacer/converter for the accelerator petal to mount up the the 240z original pedal mount location.
The intake manifold is also in place as well as the rear hatch with new weatherstripping, etc and i relocated the coolant temp sensor as well as welding shut all the oil warmer, throttle body warmer, and heater lines...
Next step is to modify the radiator and make the exhaust, which is going to be a pretty massive task. i want to fab all or some of the exhaust prior to starting the car...
Still thinking about whether or not i should reinforce my tranny mount...i need to remove it to modify a few things anyway...

8-2-12
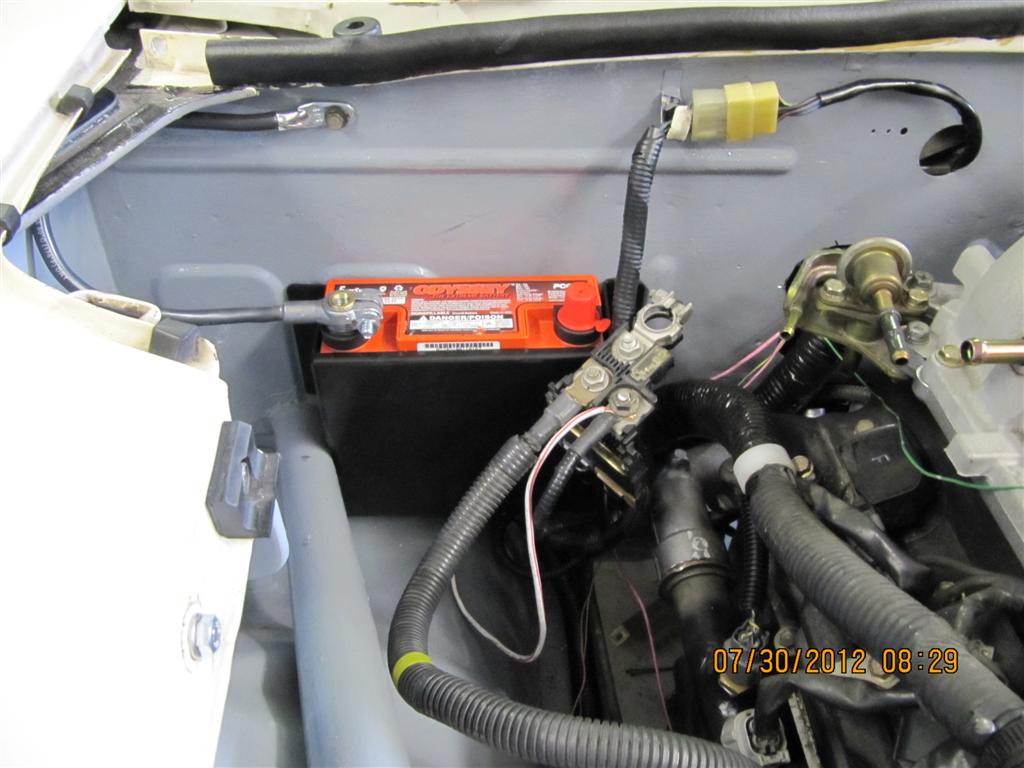
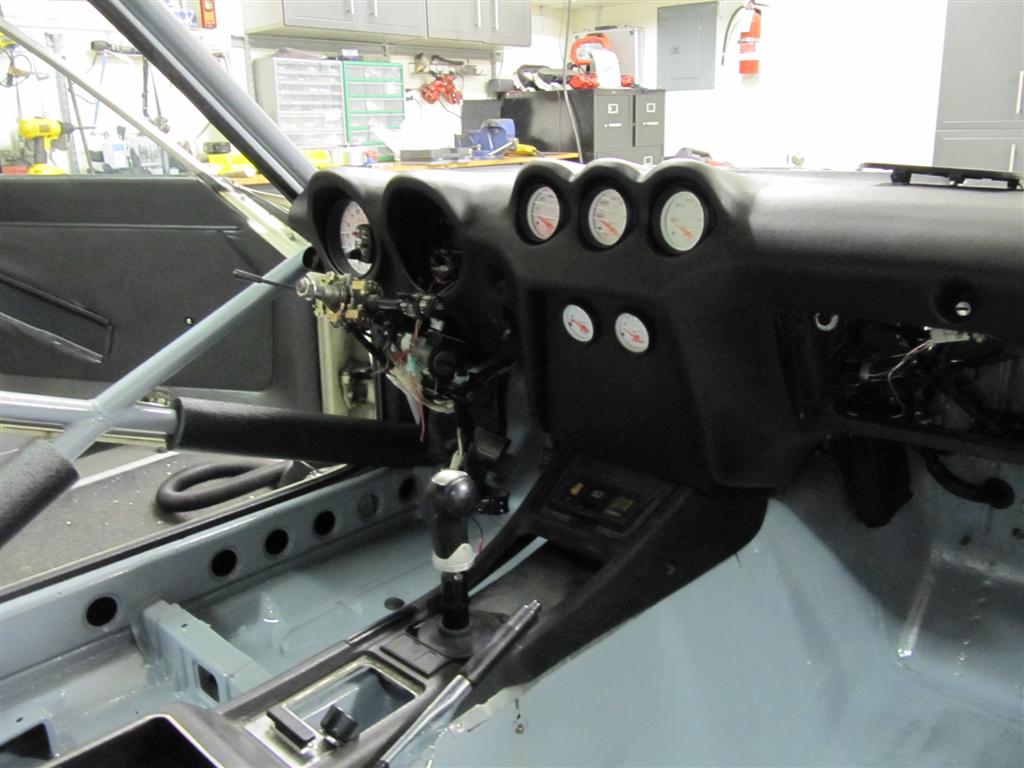
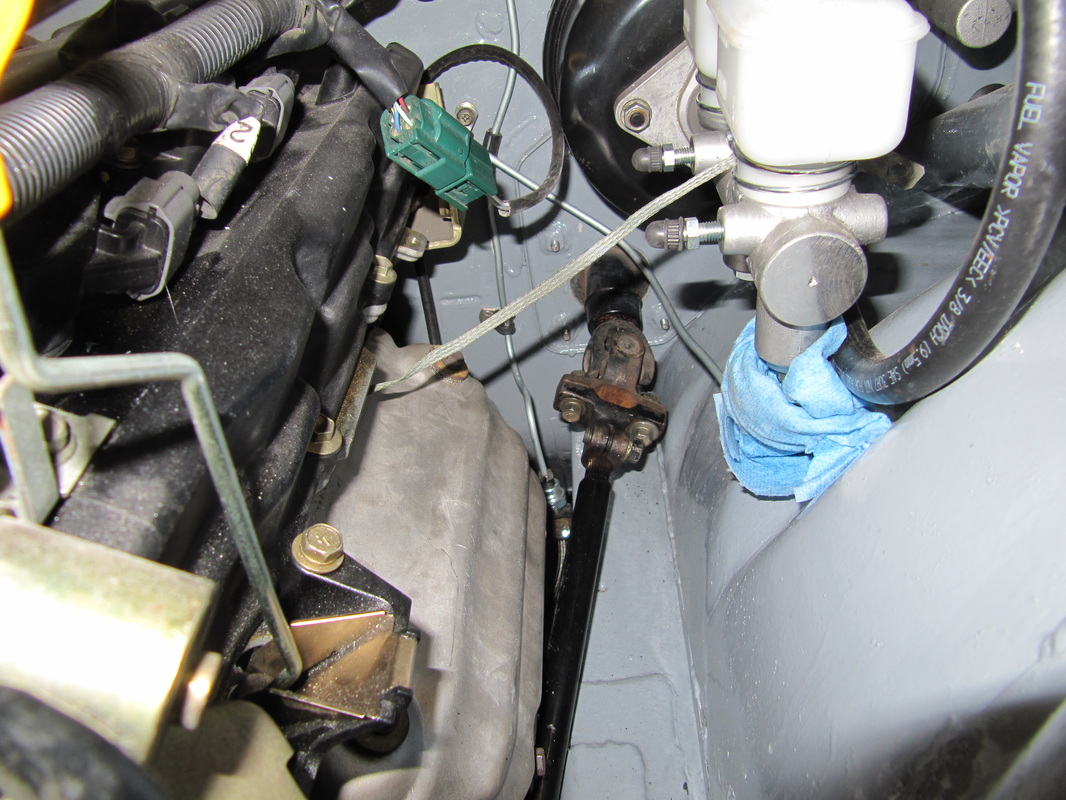
im getting small things done, nothing really significant. But that is what i basically left on this project, about a million little things. Exhaust is the next large task. Got the brake lines made and installed. i used a wilwood 1" bore master cylinder. They were not has hard as i initially thought, a little fiddly but not hard. i still need to button up the clamps and add a few. I also got the windows/frames in with a lot of cussing. The battery is now mounted along with 4 of the 7 gauges. The other three are going to take a bit more fabrication with some plastic sheet i have not yet received. Should be easy after that though. I am still trying to figure out the best place to tap my tachometer wire in. I also mounted the shift light in the driver side vent pocket next to the tach, im happy with that location, i should be able to see it well enough there.
8-7-2012
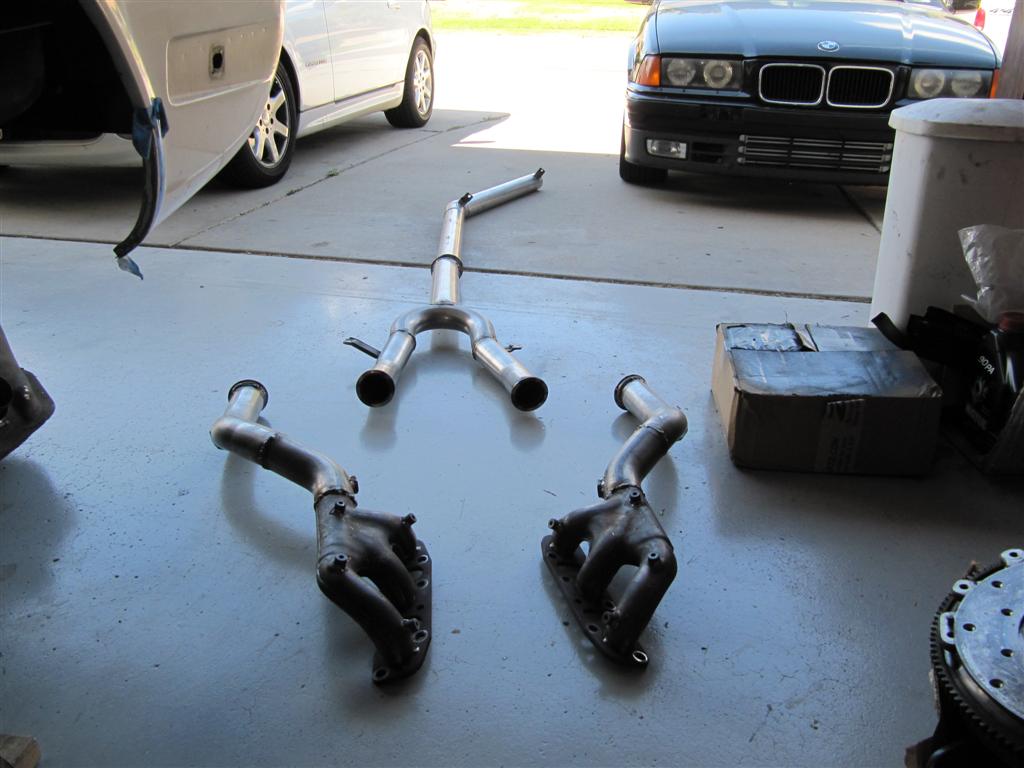
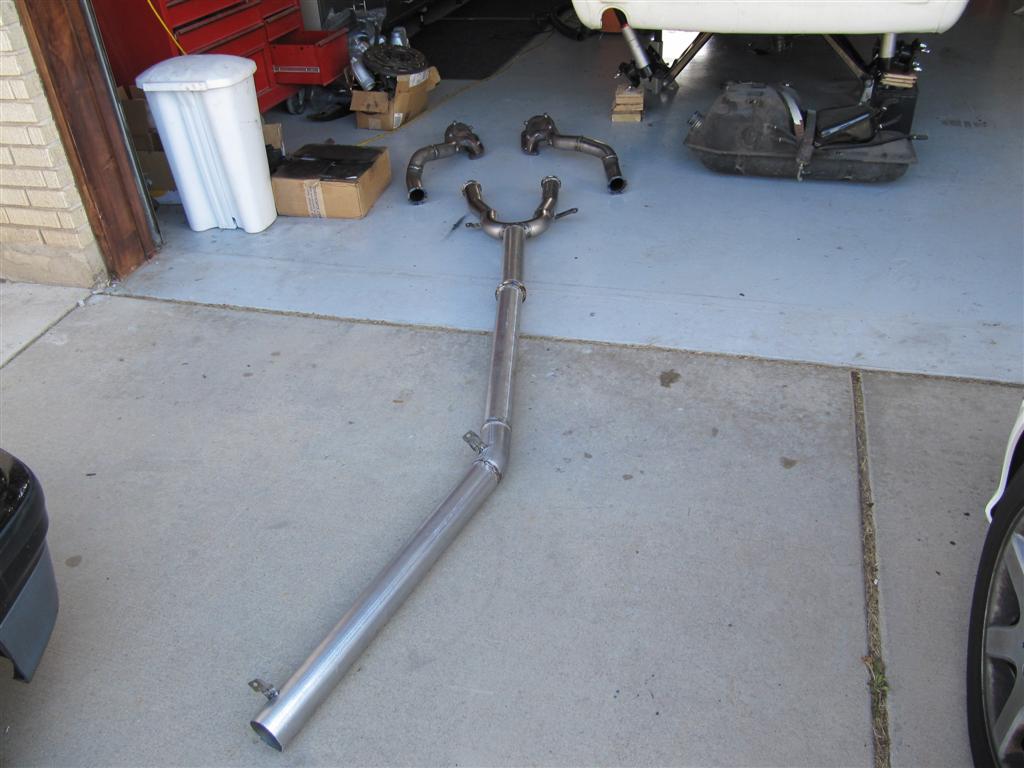
I plan on signing up for the September HPDE here at Miller so im trying to get this thing done. I worked most of the last weekend making the exhaust. i used mandrel 2.5" bends, then at the "u" pipe i went to 3", then used v-band flanges at the connection points. im happy with it, some of the welds i can work to pretty them up, but im going to wrap the downpipes in header wrap anyway. Currently the rear section is a straight pipe but i will most likely get a muffler for this section. i did forget to mount up the gas tank before making the exhaust so i may have a problem with my pipe hitting the tank, luckily it would just be the rear pipe and it will be easy to change. the hard part of the exhaust was easily the "u" pipe and downpipes. the u pipe is not really ideal for flow the way i have it plumbed but i think it will be good enough. I wasted a few hours trying to make a y-pipe and failed miserably, so the u was the next best thing. i may one day be motivated to buy a y-pipe and re-do the exhaust from y-pipe back, but that will probably never happen. ill be too busy having fun with the car to care about the flow defficiency of my u pipe.
8-13-12
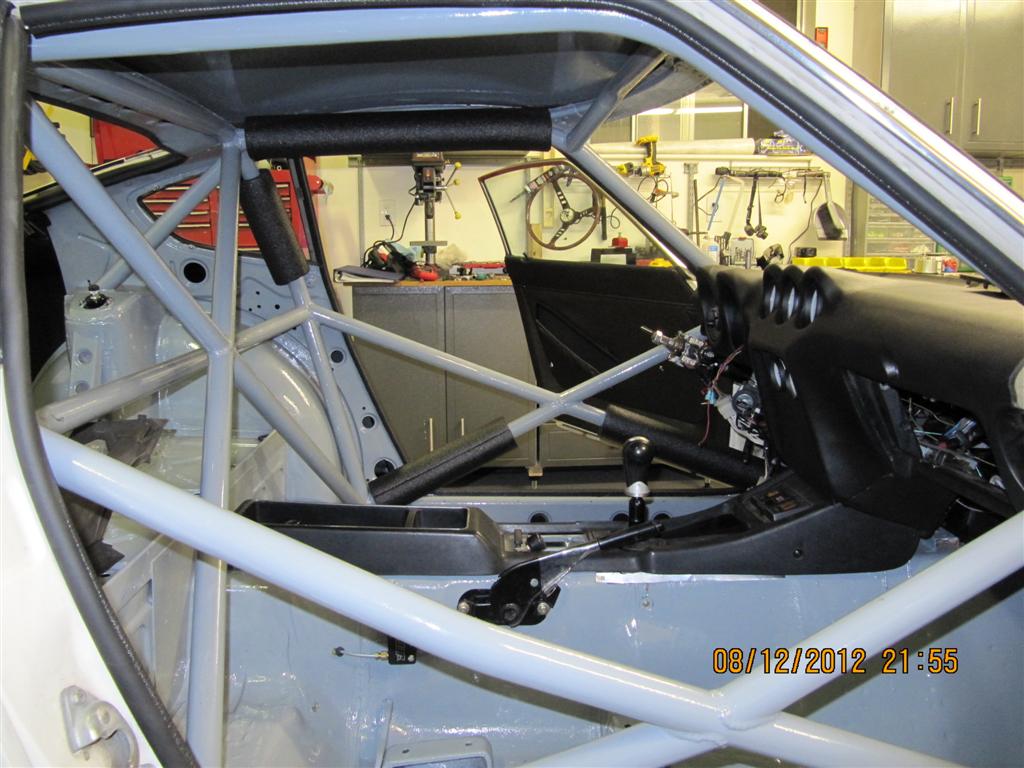
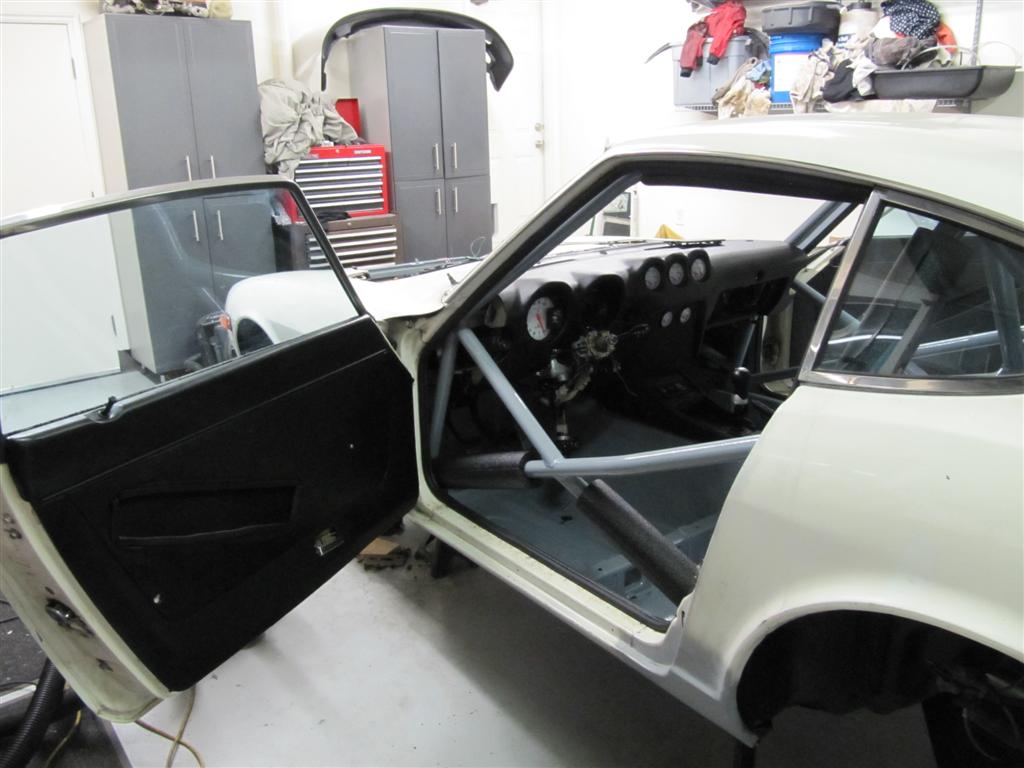
This past weekend was spent doing other things, but i did get a few things done on thrusday/friday. I had to remake the passenger side exhaust downpipe because for some reason the first rev ended up hitting the transmission and blocking one of the starter bolts. i remade the pipe and it all fits great now. The door panels i am not too happy with. i am no interior expert and because of the cage i cut out a large rectangle on each door panel and put some stretchy cloth in the space so the material conforms around the cage as the door closes. the problem is i didnt take into account the cage foam, so i will probably end up having to remove the door panels and POR the doors as well so it will match the interior.
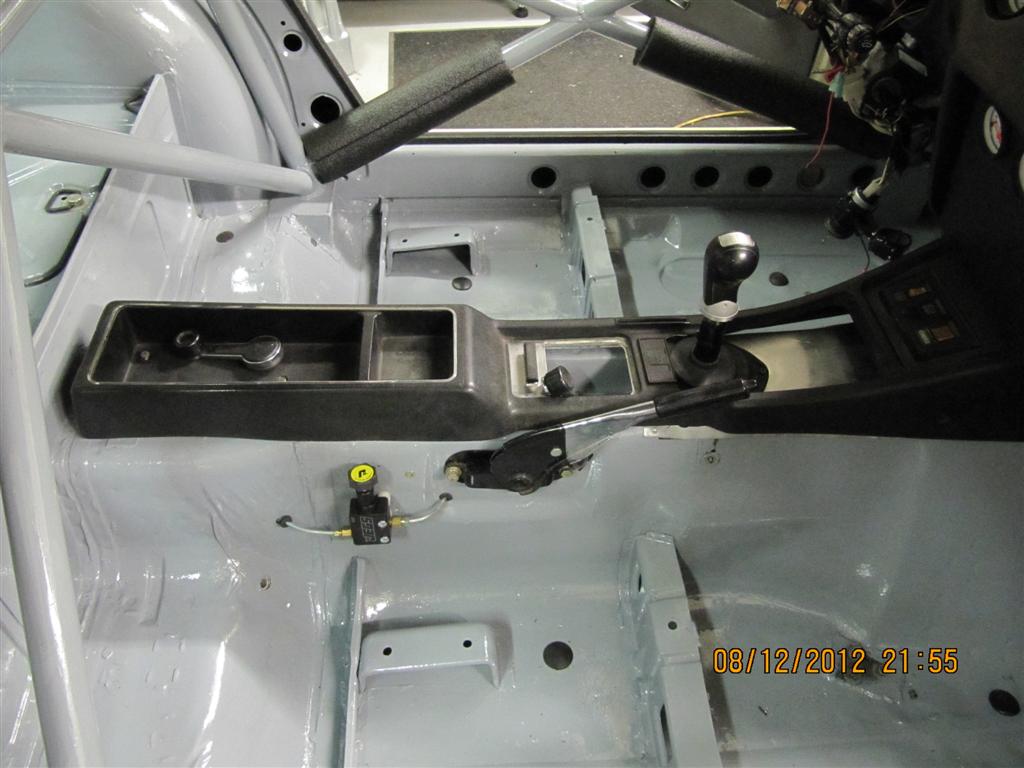
The center console also had to be modified to fit the new shifter location. im thinking of filling the space on the console where the old boot was, but we will see, i dont think it looks horrible the way it is. it is a race car at the end of the day.
The motor is finally permanently mounted with some hearty bolts. i didnt have any silicon isolators so for now i have 3 strips of really hard rubber per engine mount. i think that will work well the way it is.
Gauges are almost done. i made a center panel out of 1/8" plastic sheet to mount the fuel level gauge and the voltmeter. The fuel level gauge is calibrated for a different "universal" sender, so i have to modify what resistance range the gauge sees by adding some resistors in a few different places in the circuit. i am going to hook up two potentiometers to attempt to get the E to F range correct between the gauge and the factory 240z sender, then replace with resistors of whatever value the pots give me.
I also need to finish installing the cage safety foam in any area that i could be in contact with.
8-17-12
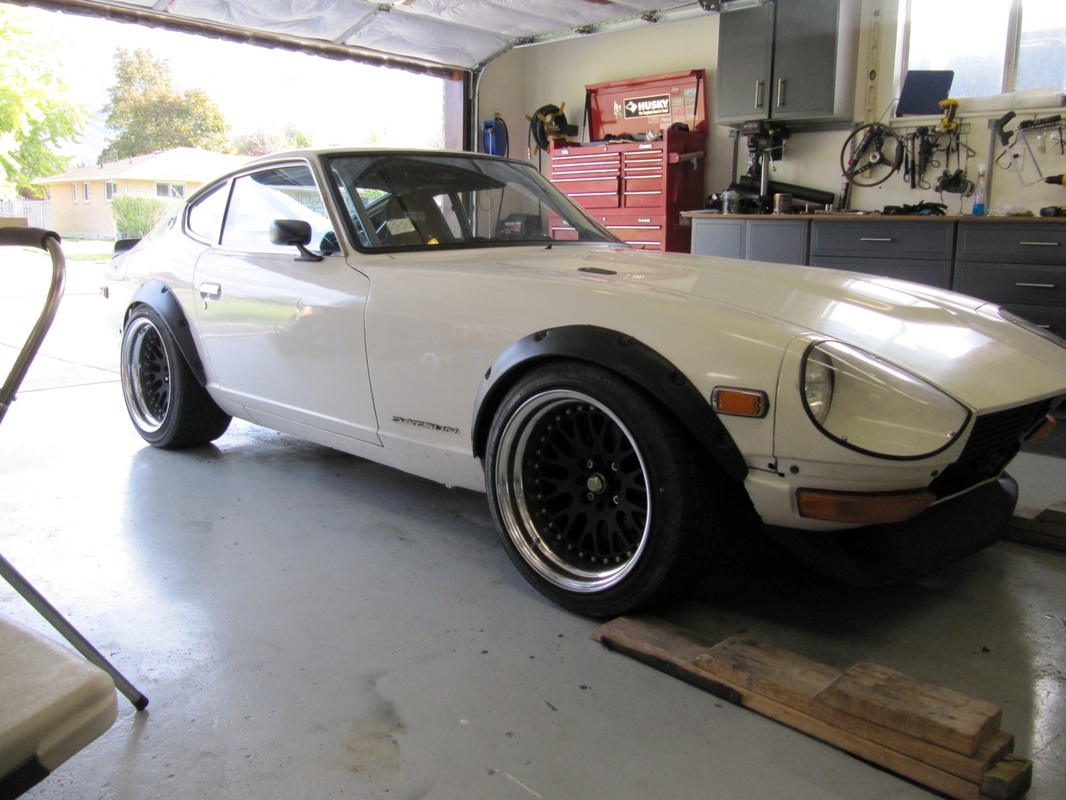
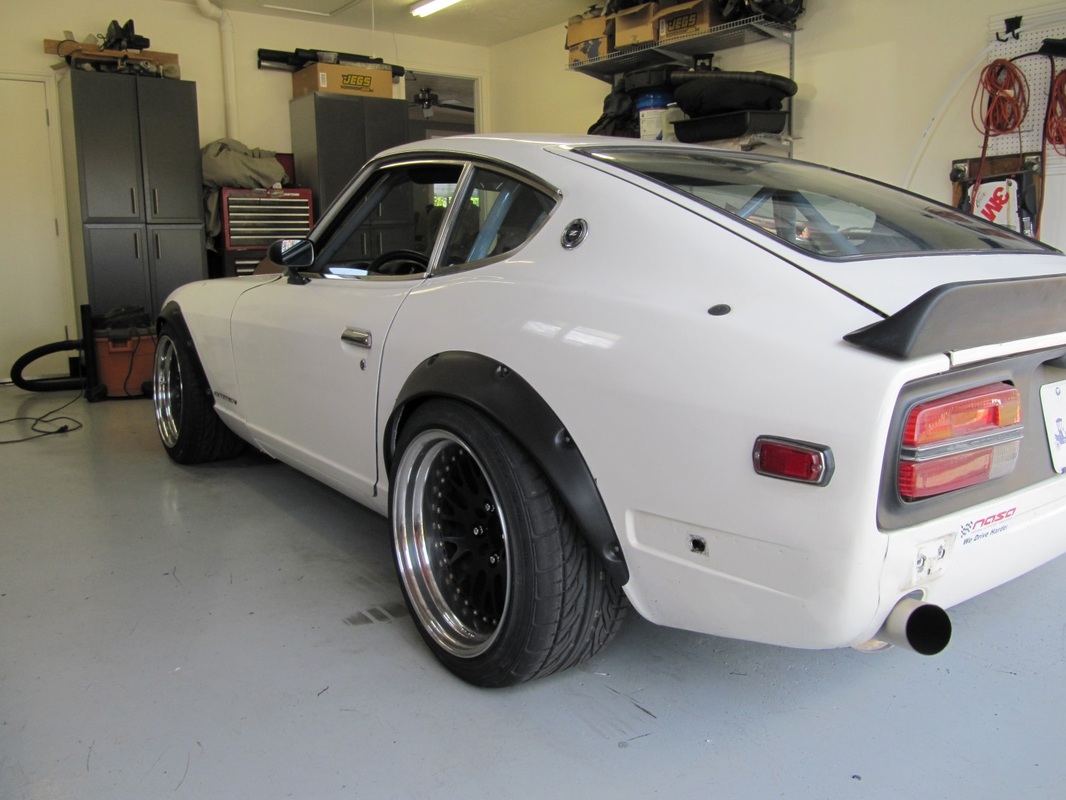
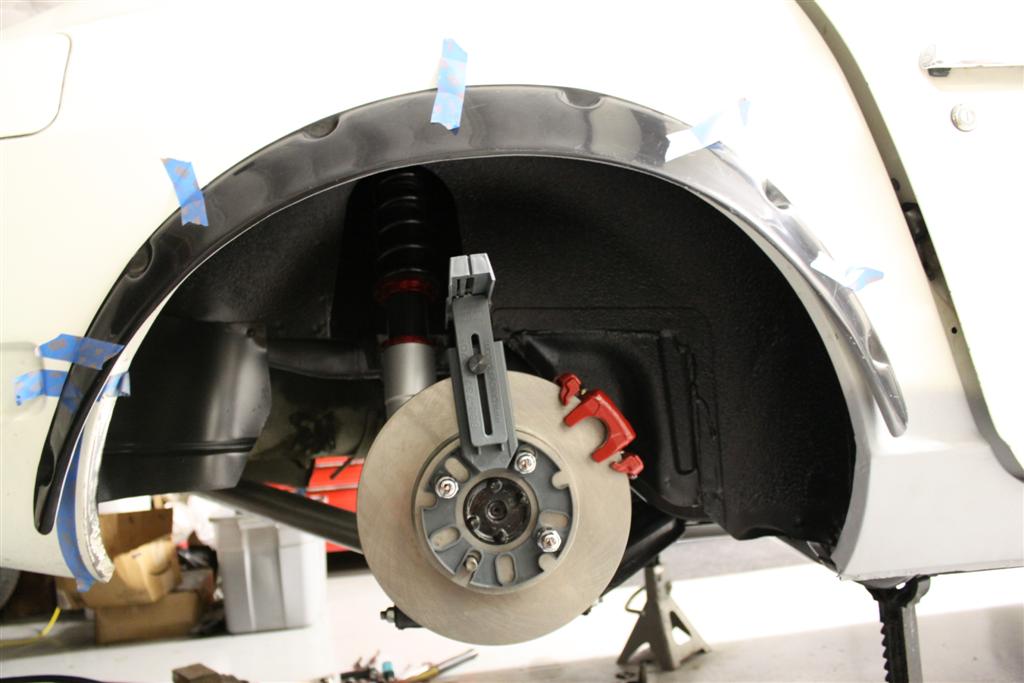
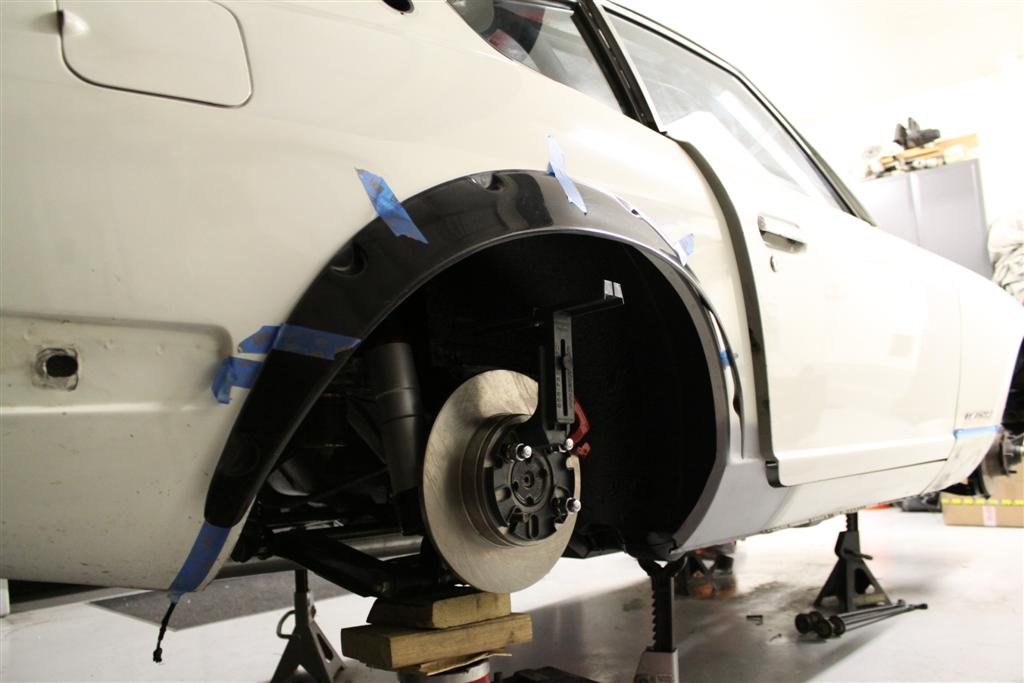
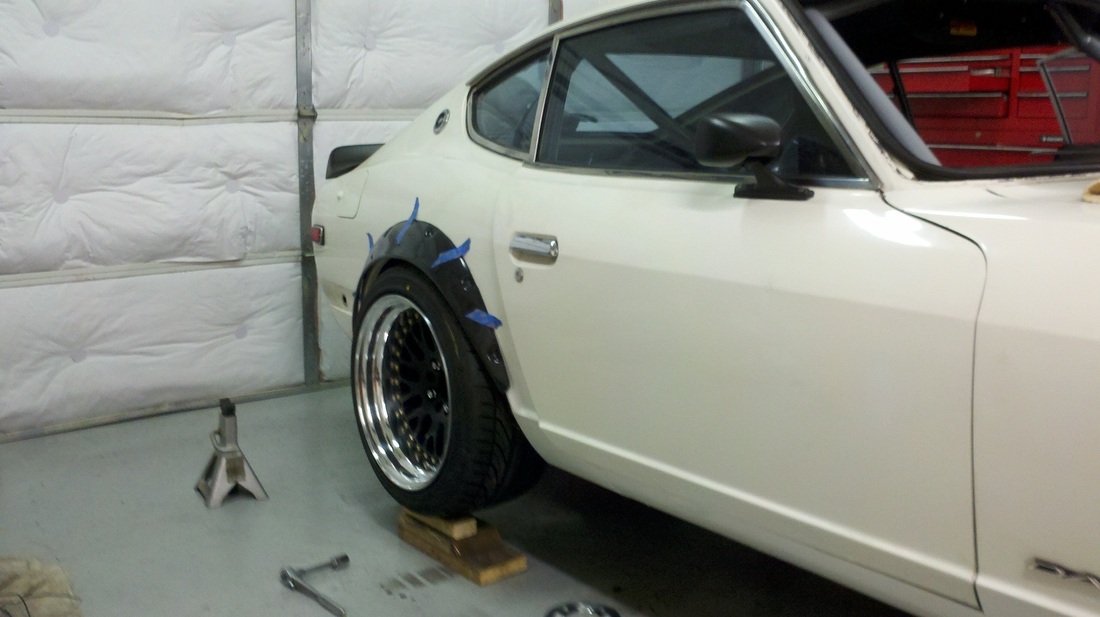
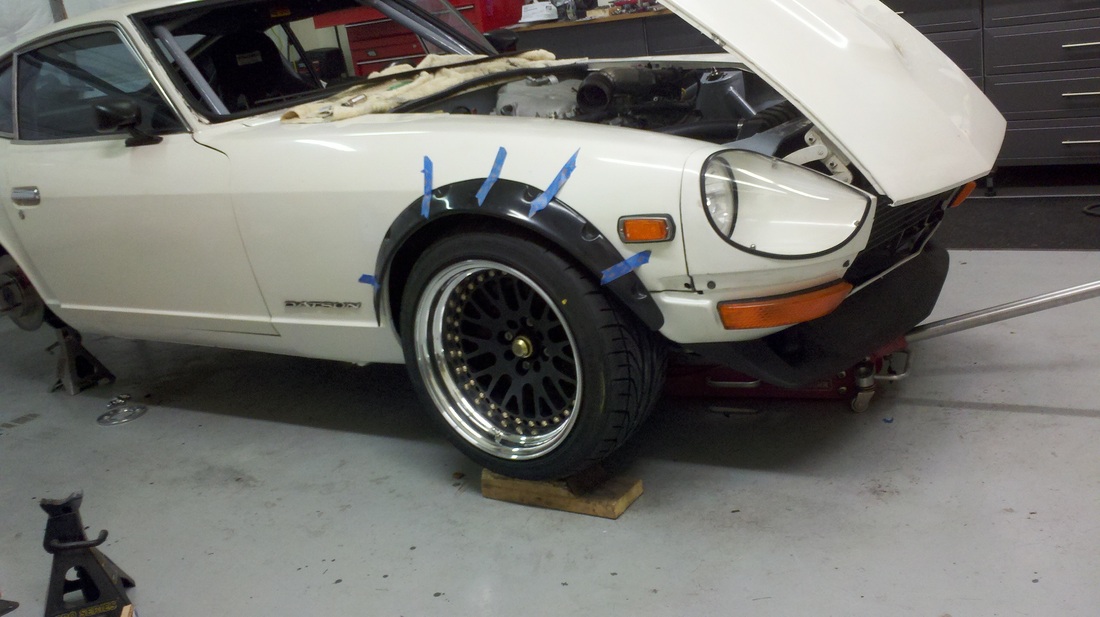
Last night i worked on mocking up the flares and measuring for proper wheel fitment. I have a tool that simulates a certain wheel diameter, width and backspace/offset. i think i zero'd in on the sizes i want. I am running CCW classic 17x10 -19mm (4.75" backspace). A square fitment allows me to be able to possibly rotate the tires if need be which is definitely a convenient option to have that i am not used to.
8-24-12
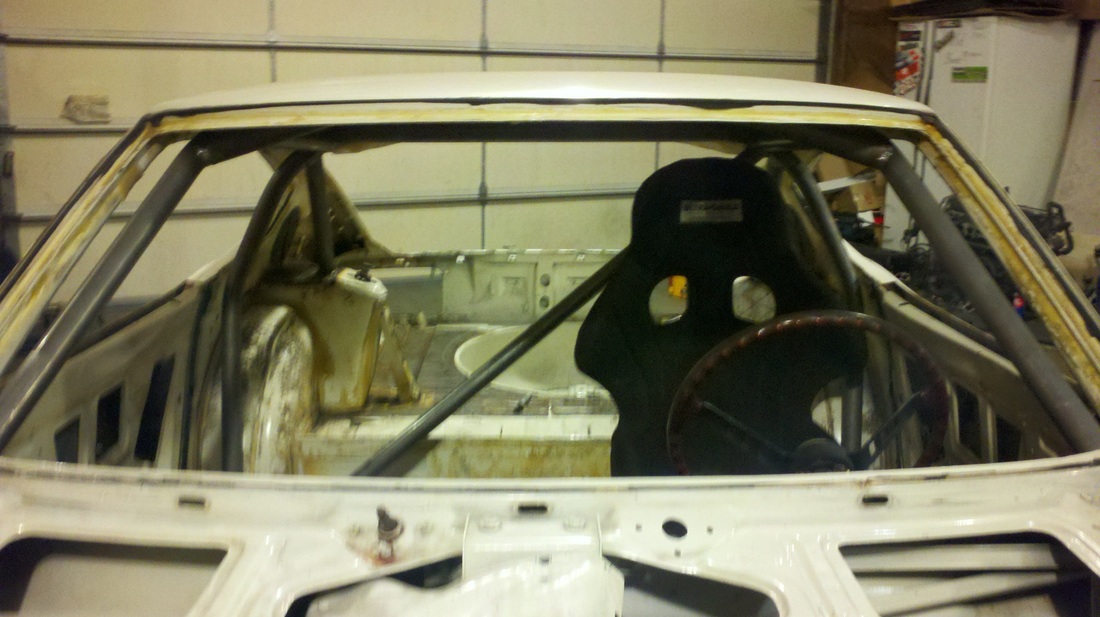
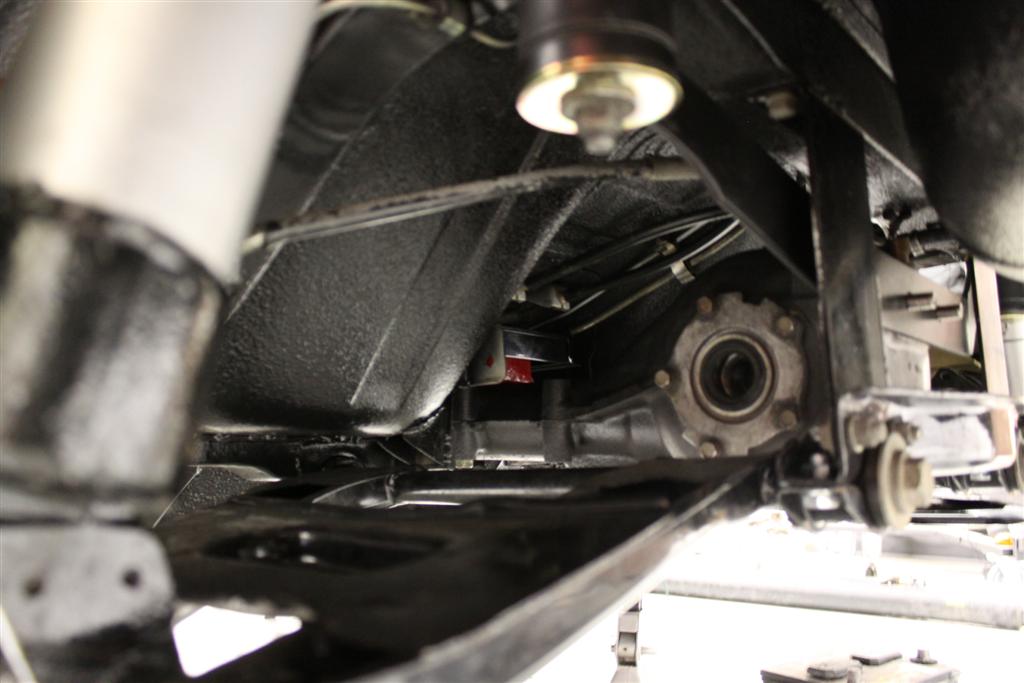
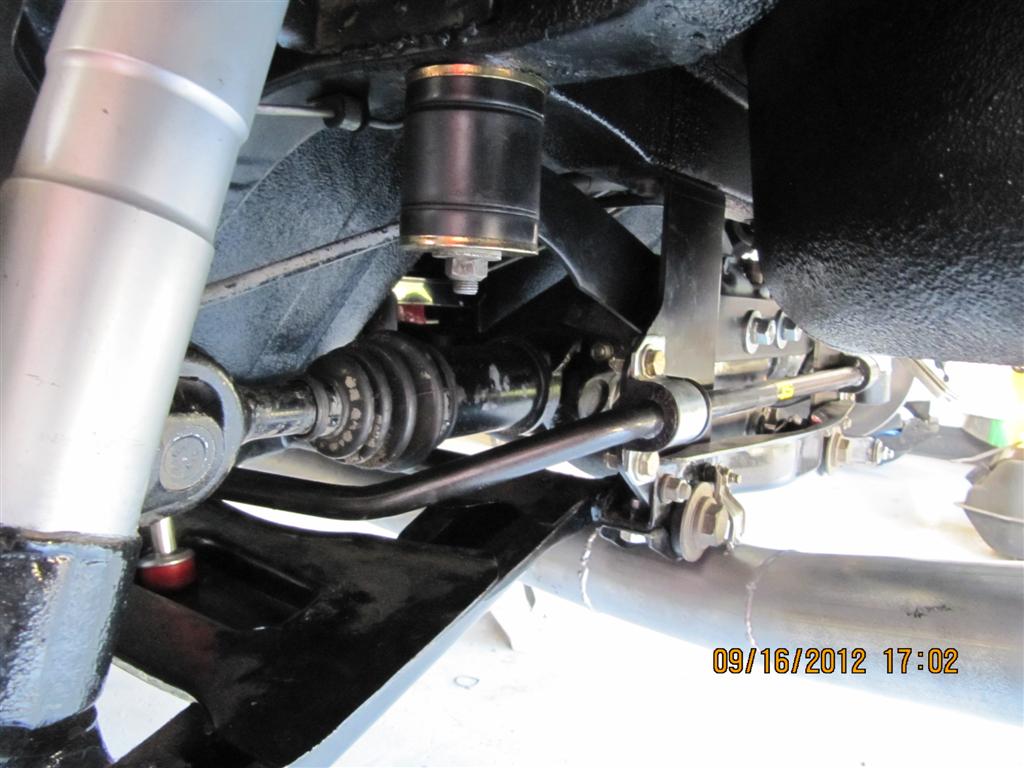
Within the past week i have made some decent progress. I installed the STI LSD differential and upgraded poly "RT" mount, measured for a new driveshaft, modified the radiator, installed the seat and steering wheel/hub, finished wiring the ignition, wired up the autometer tach adapter, and other small things.
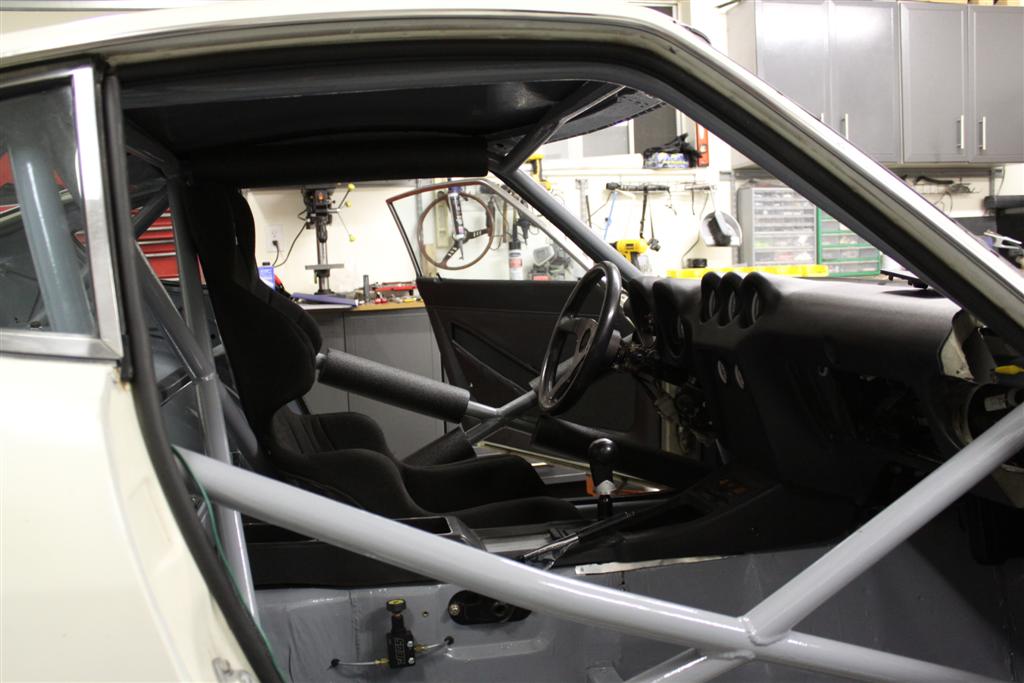
The seat is in a great position, i attempted to use sliders at first but bumped the seat up too high and there was really not much sliding room anyway, so i opted to remove them.
The most exciting thing that happened was starting the engine. I used the stock fuel pump and a small container of gas. All my wiring is correct and there doesnt seem to be any functional issues with any electrical system on the engine or chassis. Engine sounds great! The straight exhaust is too obnoxious so i ordered a muffler that i will install as soon as i get it. Testing in stages was the key to success...
I will post a video after i get my new driveshaft and the exhaust installed.
9/17/12
my testing track day is fast approaching so i have been putting some decent time in. Ive been having a problem with alternators. The original one with the engine may have been damaged in the accident and the new one i bought online was DOA, so my 3rd is on its way, i hope this one works...im fairly certain there are no problems with my electrical system. I ended up painting the lower rocker panels on both sides with paint matched aerosol cans, turned out decent, this is a race car afterall so my paint quality standards are rather low.
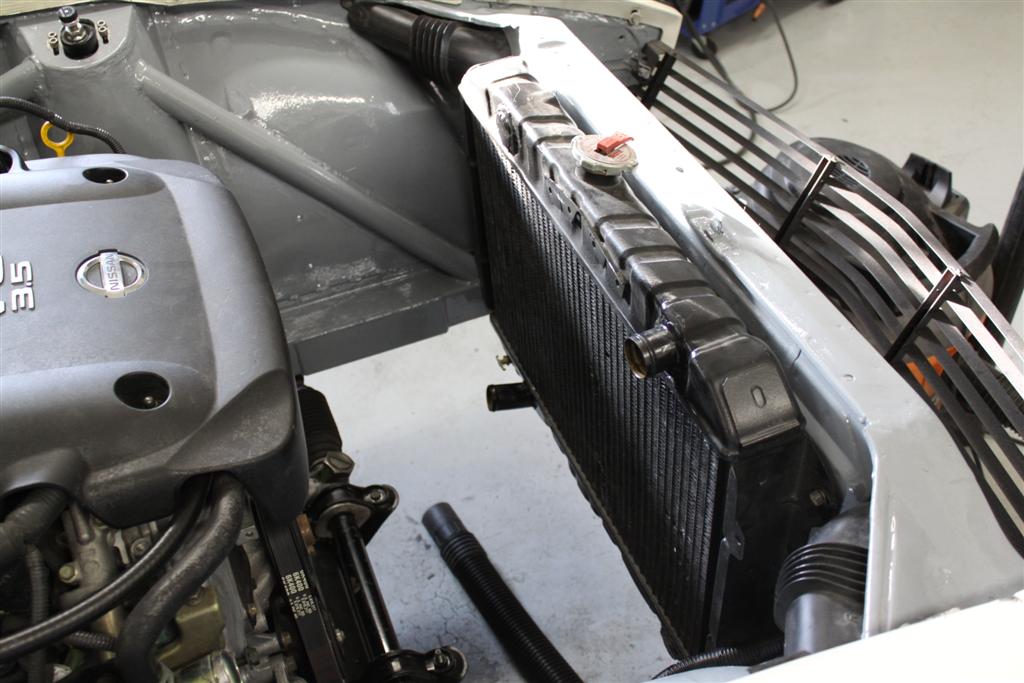
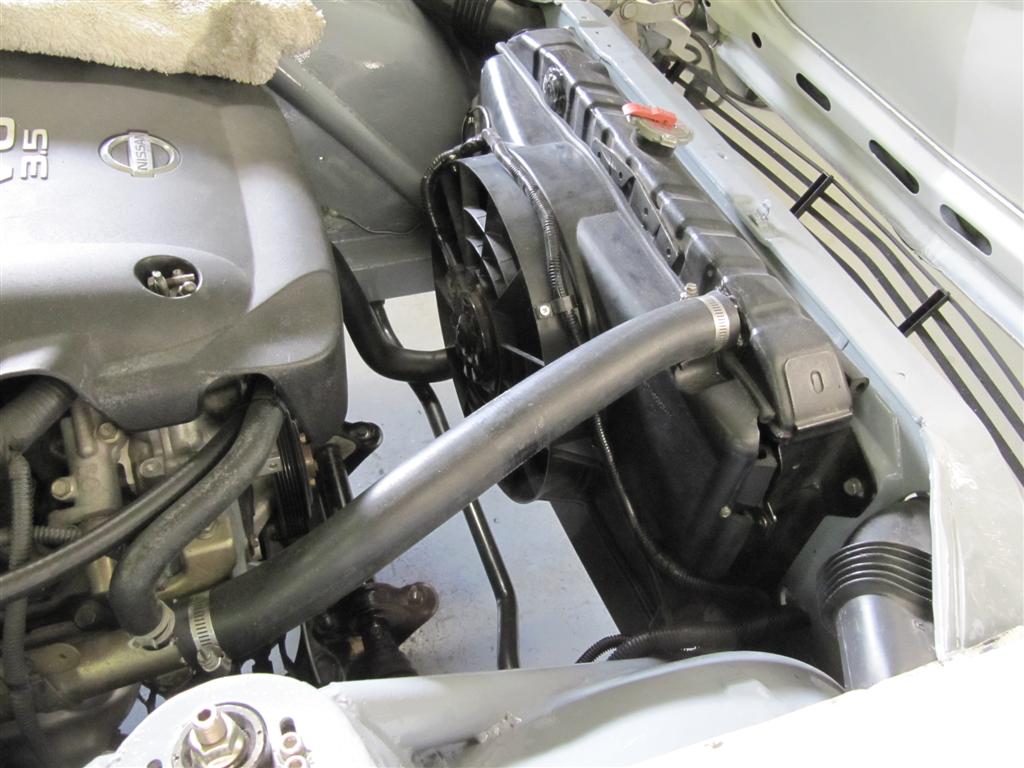
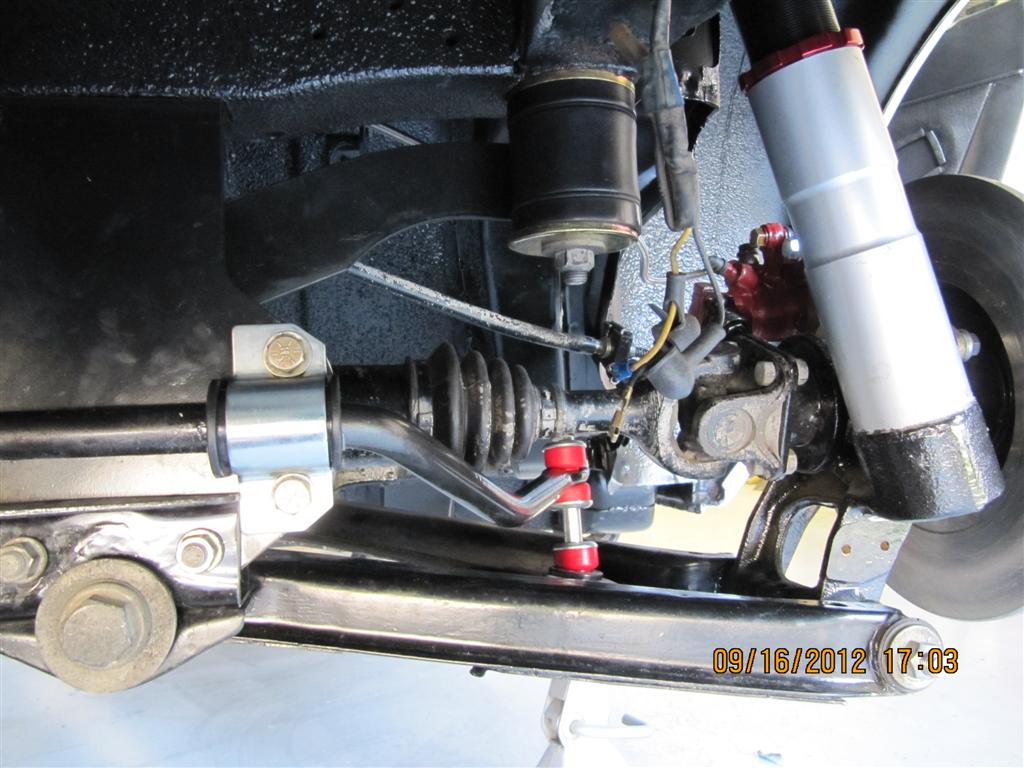
I finished up the radiator fan and hoses along with the rear axles and rear swaybar. the junk yard $13.99 radiator fan works great as do the custom stub axles that adapt my STI rear LSD diff to my stock 240z half shafts.
I did encounter another issue, while running the engine it began overheating, the radiator was cold in the middle so i suspected my thermostat not opening, so i tested the two that i have in a saucer on the stovetop and they both work fine. I suspect a air bubble problem in the cooling system that i may have fixed, but now i need to wait until my new alternator comes in order to start it again and test.
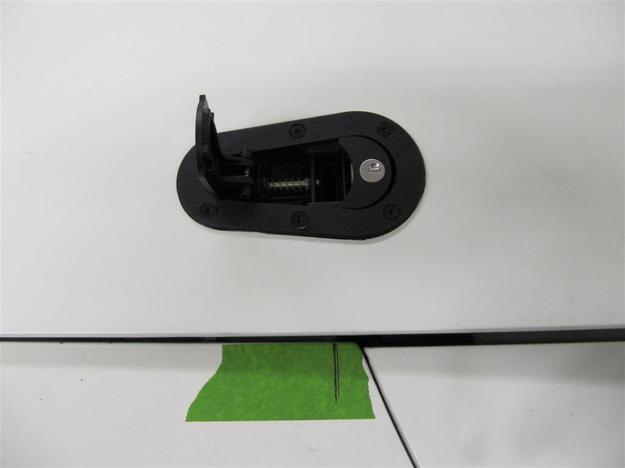
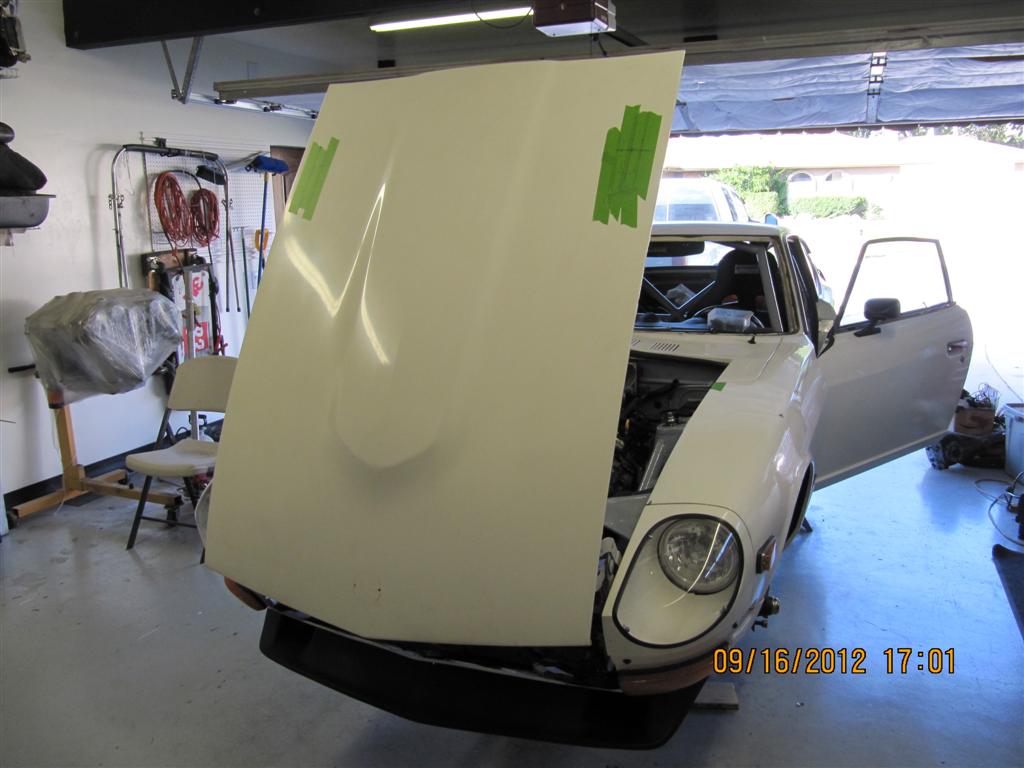
I also started to install the aerocatch hood latches. The factory hood latches were not usable since they were right where the intake manifold on the vq is. i should finish up the latches within the next couple days...
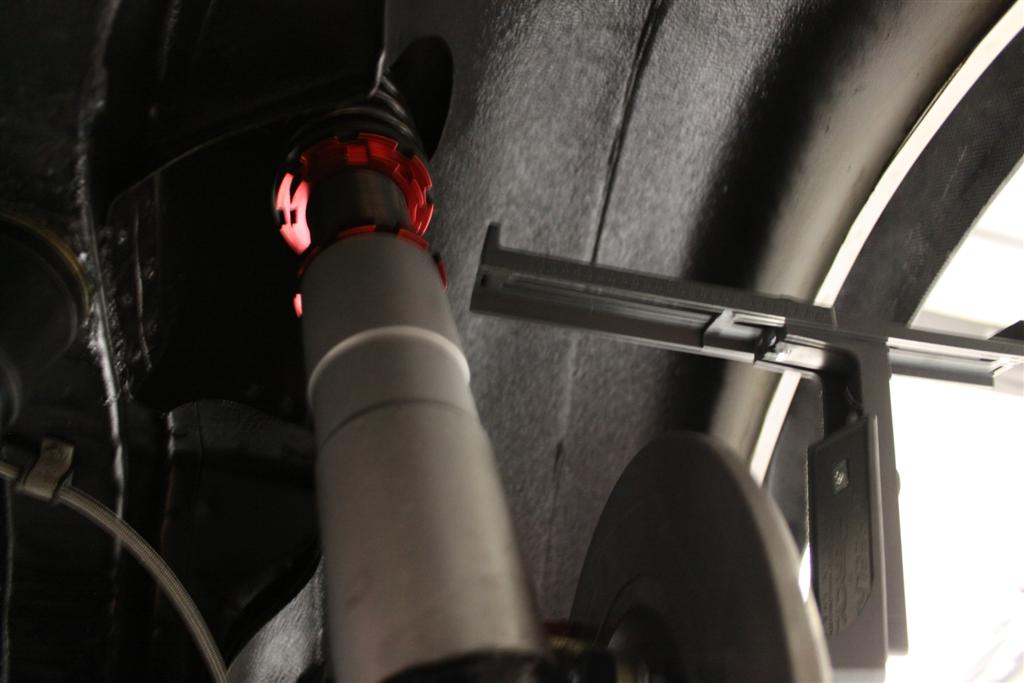
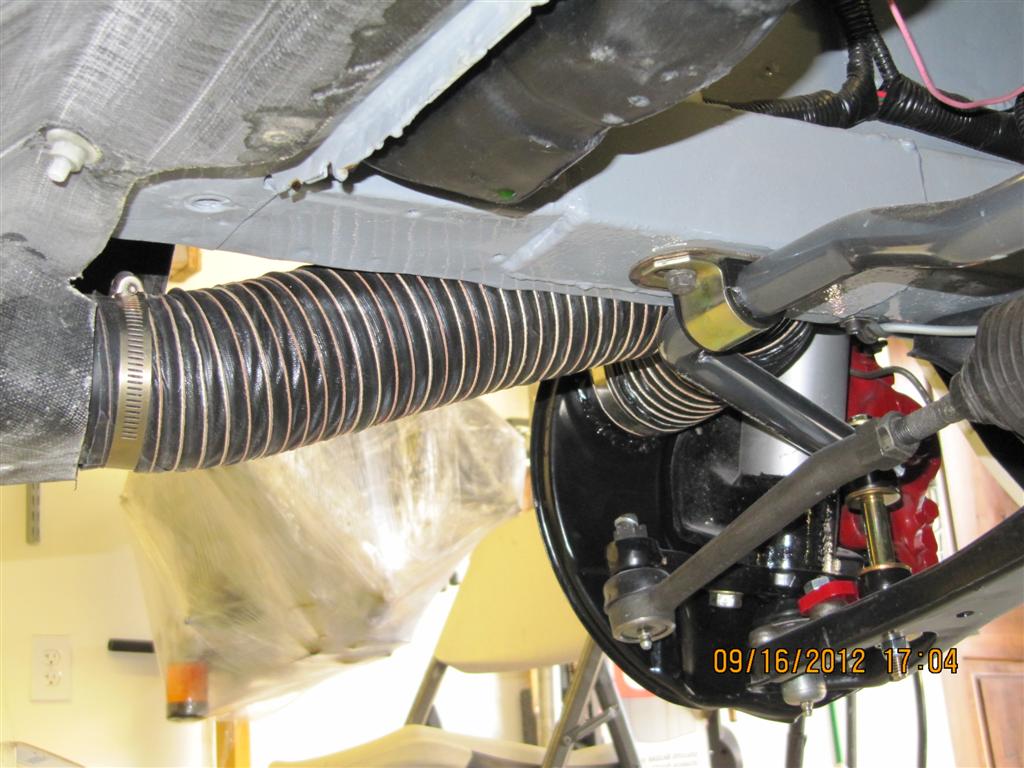
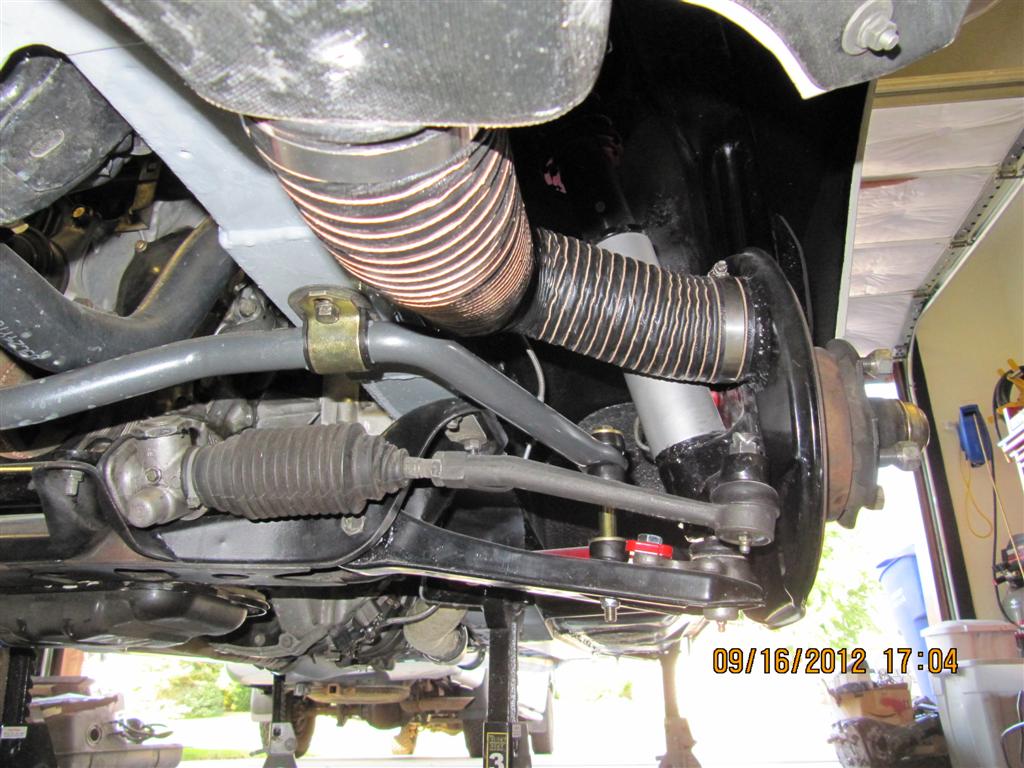
The brake ducts are also done and i am happy with the ways those came out. I am hoping to avoid buying expensive upgraded brake systems by ducting them this way...
I finished up the radiator fan and hoses along with the rear axles and rear swaybar. the junk yard $13.99 radiator fan works great as do the custom stub axles that adapt my STI rear LSD diff to my stock 240z half shafts.
I did encounter another issue, while running the engine it began overheating, the radiator was cold in the middle so i suspected my thermostat not opening, so i tested the two that i have in a saucer on the stovetop and they both work fine. I suspect a air bubble problem in the cooling system that i may have fixed, but now i need to wait until my new alternator comes in order to start it again and test.
I also started to install the aerocatch hood latches. The factory hood latches were not usable since they were right where the intake manifold on the vq is. i should finish up the latches within the next couple days...
The brake ducts are also done and i am happy with the ways those came out. I am hoping to avoid buying expensive upgraded brake systems by ducting them this way...

9-28-12
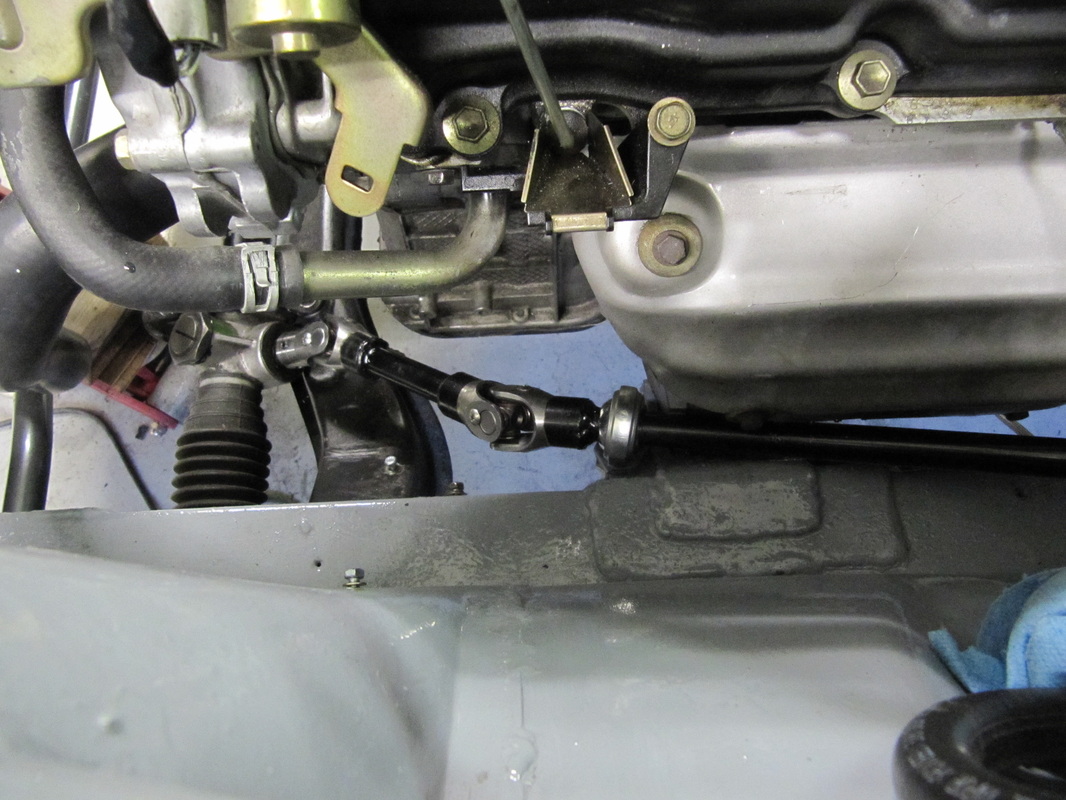
Been making more progress, its going to be really close if i am going to make the october 6th track day. I finally got an alternator that works, my coolant system/fan is working well, hood latches are installed, windshield is in, steering shaft is done, and fuel tank/fuel rail is in the middle of being modified for EFI. I got all the steering parts from wilward steering and they happen to make a splined u joint that installs directly on the rack which was really nice. I had to fabricate the rest out of the parts they supplied, im happy with the result. My heim joint is installed on a welded on tab from my frame rail, its not going anywhere...
i also got a test wheel from CCW. it is a 17x10 "classic" style with a 255/40 r17 tire size. They are one of the best wheels made in my opinion. i test fit it both on the front and rear with the flares mocked up, and i decided that is the size i want to run on all 4 corners in case i ever want to rotate the tires front to back due to irregular wear. i should be getting the wheels early next week, then i need to install the flares or the wheels will stick out goofy.
i did however encounter another major issue, when i went to fill my brake cylinder to bleed the brakes, almost every flared fitting i made was leaking. This was obviously irritating so instead of trying to fix the faulty flares, i ordered all new SS brake lines with -3an fittings. i figure this was not only easier, but about the same price as buying a quality brake flare tool. This should get the job done without any leaks and make me feel a lot better about driving the car at its limits. Brake flare tools are hit and miss. The one i rented from oreillys was not too good and apparently didnt make good enough flares.
10/21/12
This will be my final entry since the car is pretty much complete. There are a few things to add like an oil cooler, but for the most part it is done.
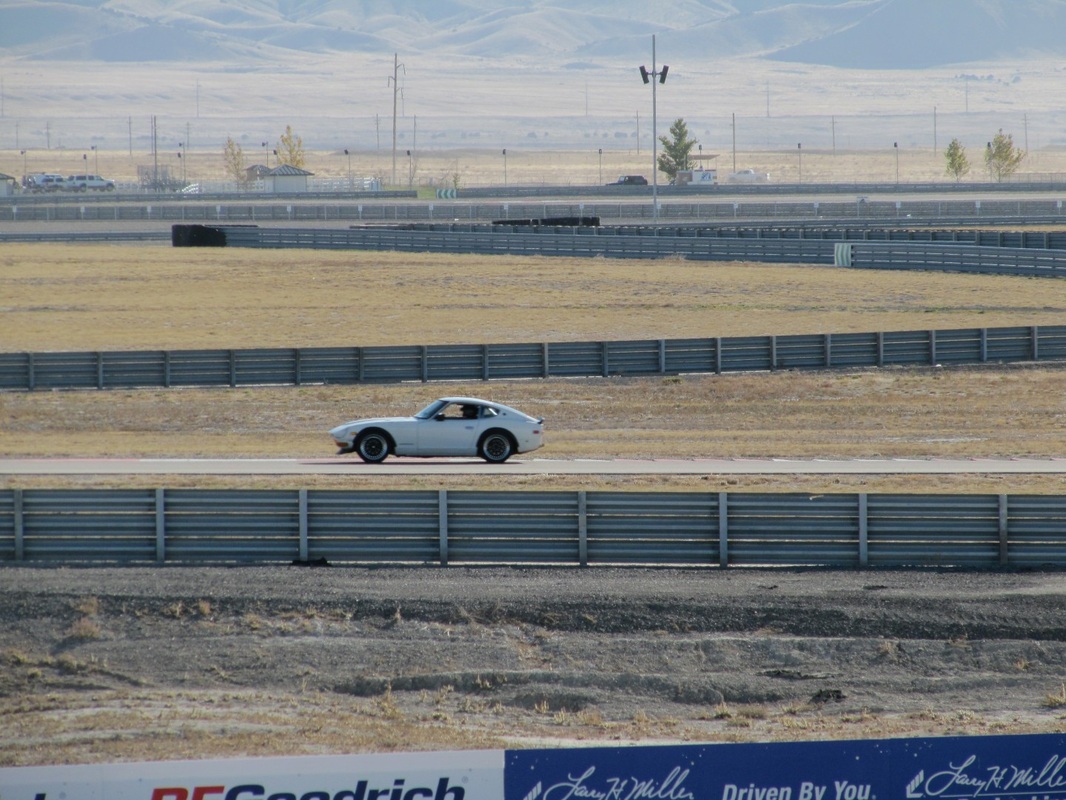
I had my first track day yesterday and the car handled great. i drove it 40 miles out there, raced it, and drove it 40 miles home. no hiccups whatsoever. I ran it low on fuel on purpose so i could see if i would have any starvation issues, which i was happy to discover that only on a few gallons and running on track that i had no issues, not one hiccup. i should review what i did with my fuel system as i did not cover that in the blog.
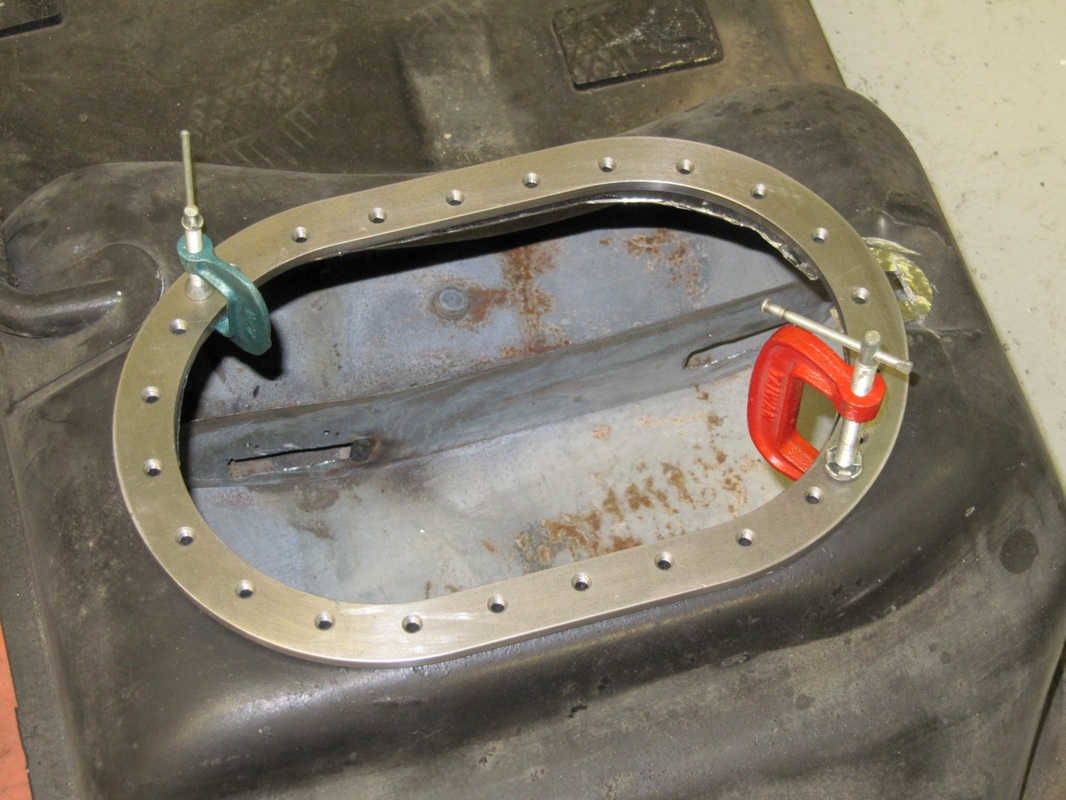
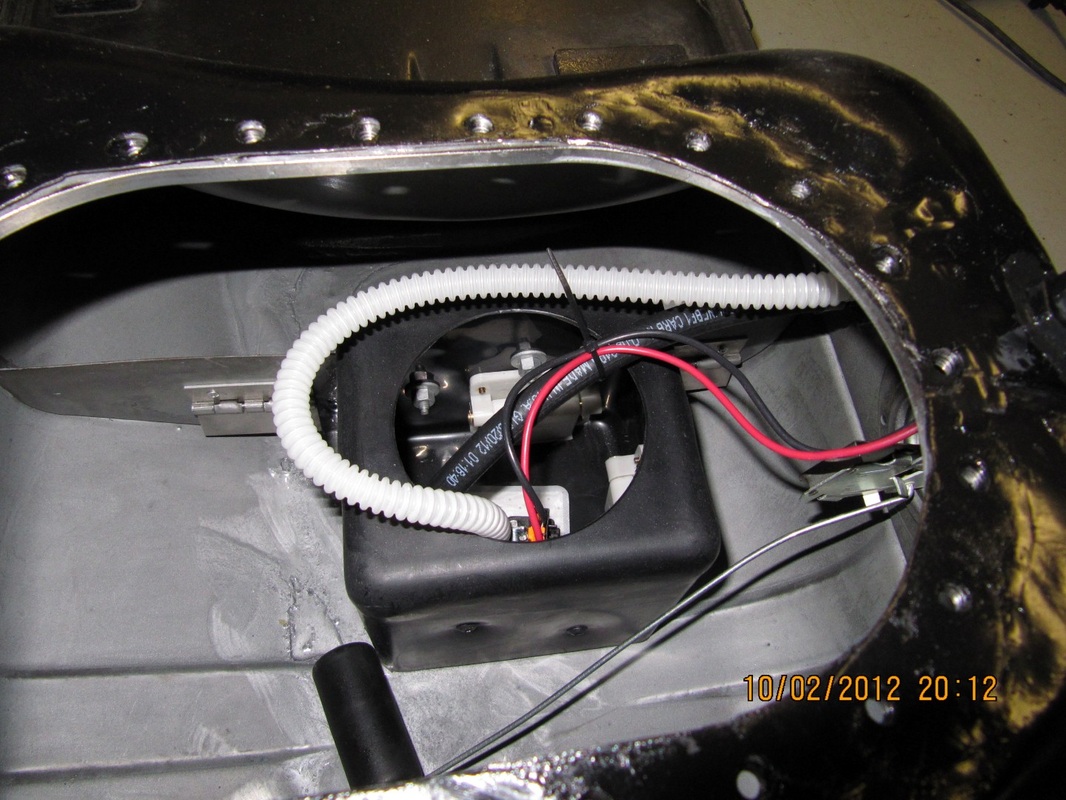
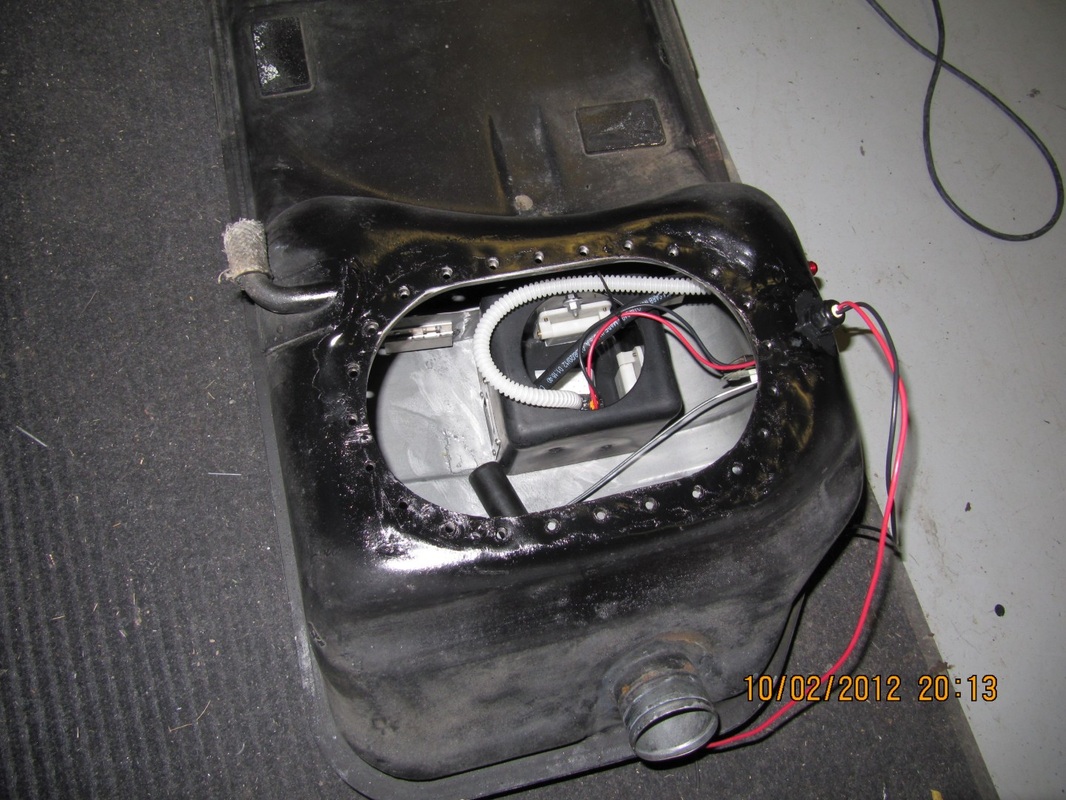
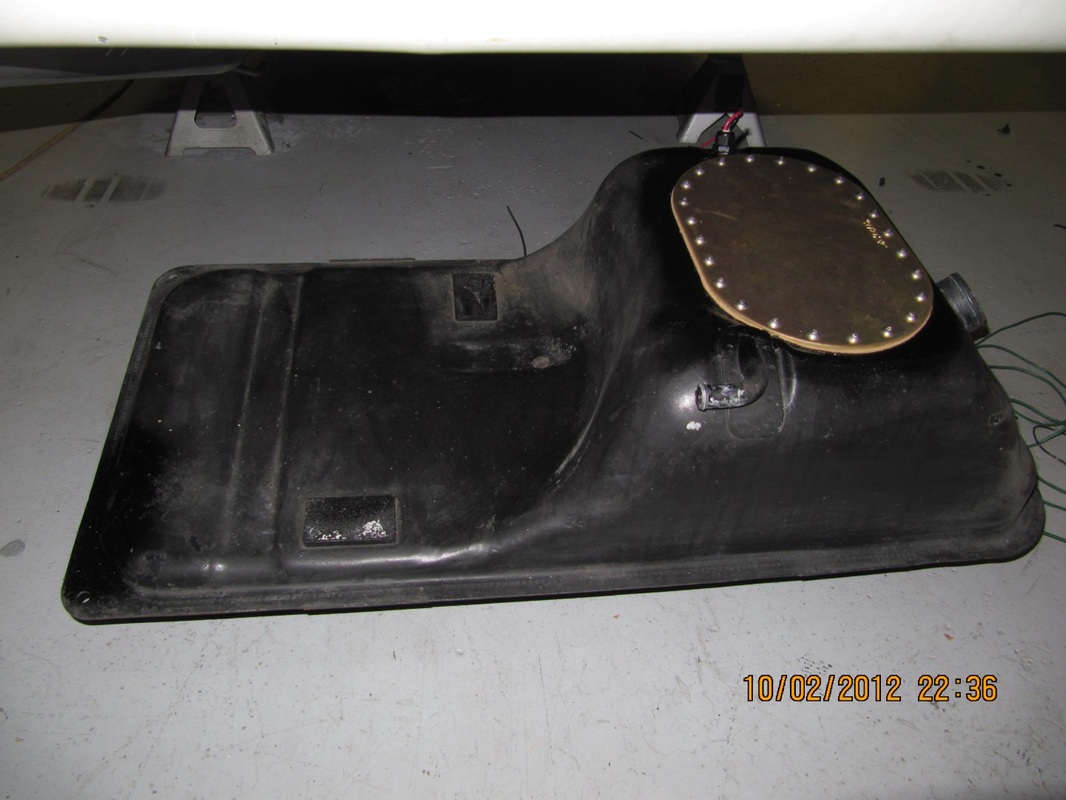
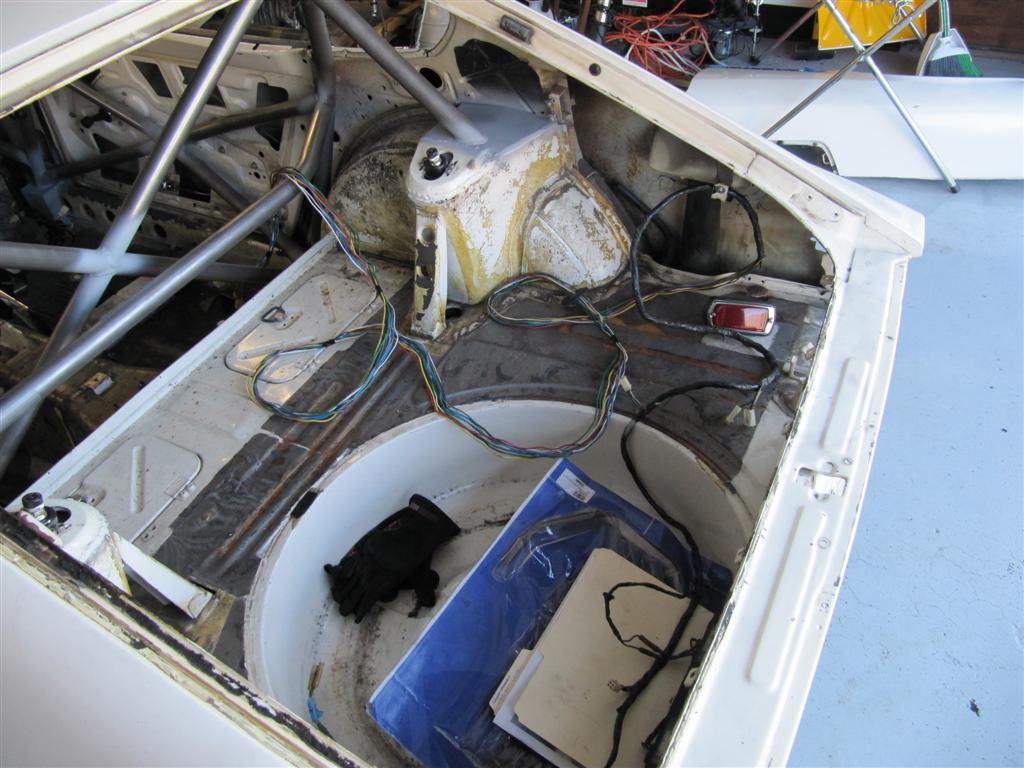
I went with an ATL "black box", and custom blank cap/adapter from ATL as well. i had to weld in the adapter and seal off the inside of the tank as well as block off several useless vents/ports on the tank. I used only the large vent on top to route into the cabin with a rollover check valve. The black box has three trap doors to "trap fuel in, i also used the factory wall in the tank to install 2 more trap doors to attempt to keep fuel on the side where the black box is.
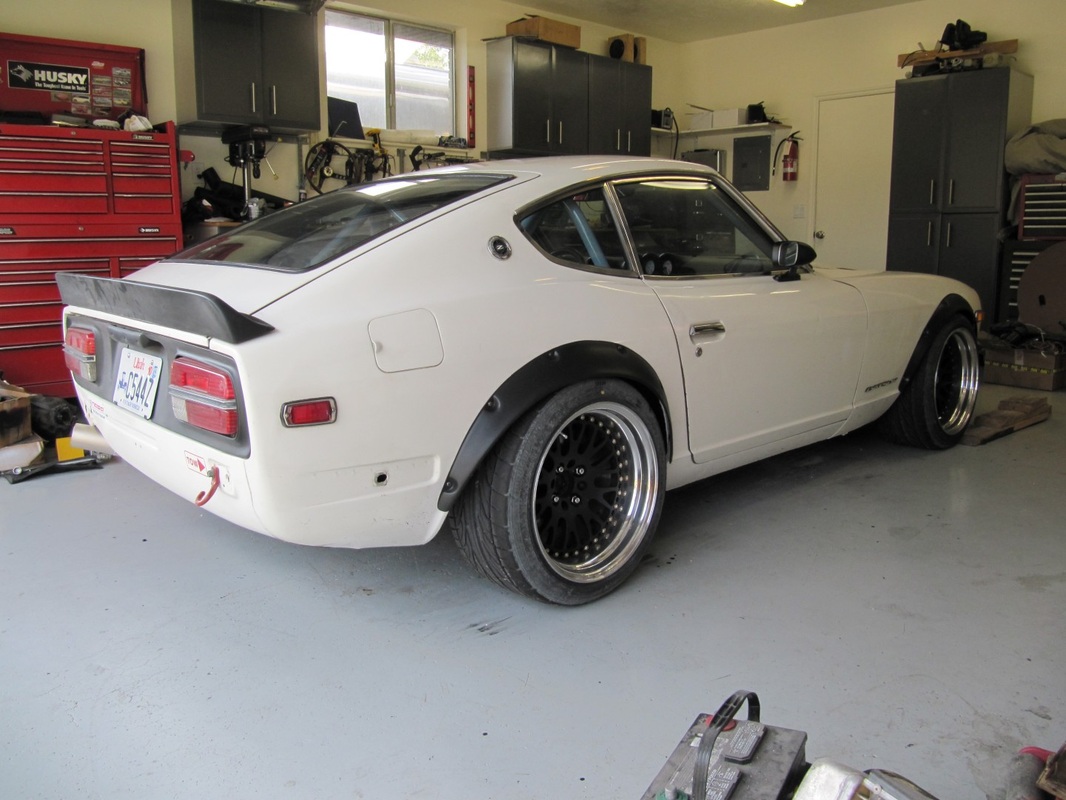
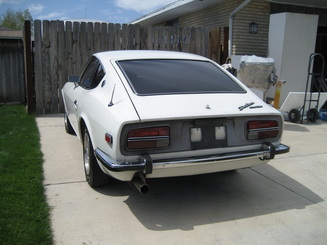
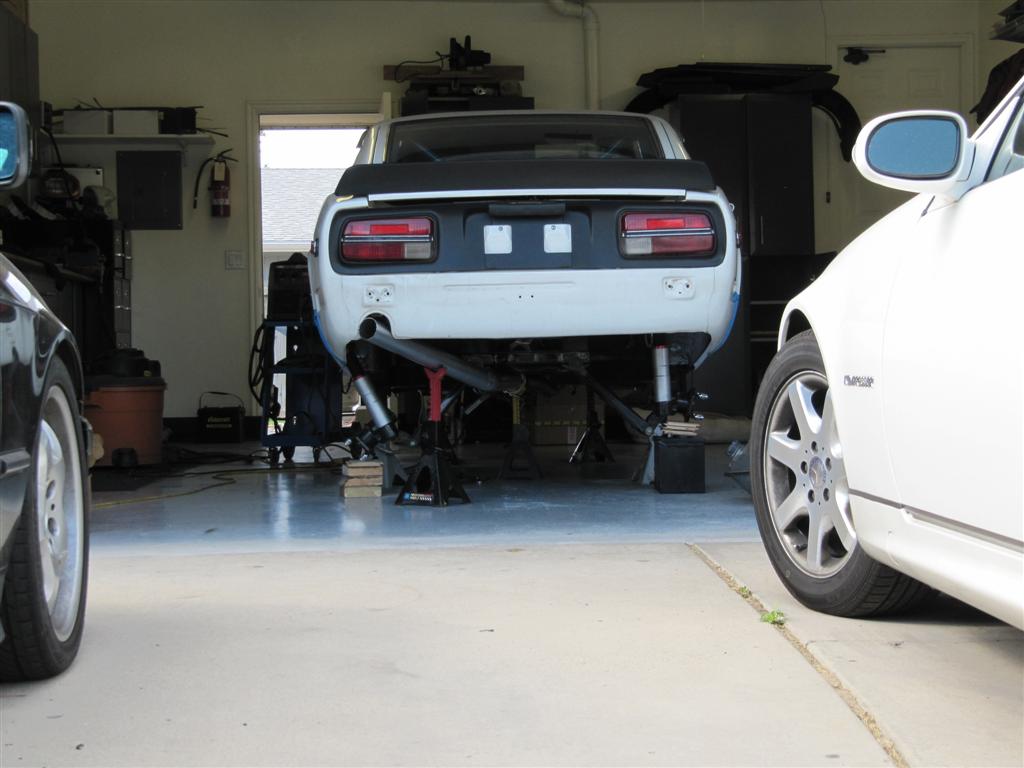
Below the fuel tank setup are final pics of the car, im very happy with the turnout. Its very predictable on track and handles exactly how i figured it would. I would build another one exactly like it but a different color, but i think i would get some resistance on that one...
I had my first track day yesterday and the car handled great. i drove it 40 miles out there, raced it, and drove it 40 miles home. no hiccups whatsoever. I ran it low on fuel on purpose so i could see if i would have any starvation issues, which i was happy to discover that only on a few gallons and running on track that i had no issues, not one hiccup. i should review what i did with my fuel system as i did not cover that in the blog.
I went with an ATL "black box", and custom blank cap/adapter from ATL as well. i had to weld in the adapter and seal off the inside of the tank as well as block off several useless vents/ports on the tank. I used only the large vent on top to route into the cabin with a rollover check valve. The black box has three trap doors to "trap fuel in, i also used the factory wall in the tank to install 2 more trap doors to attempt to keep fuel on the side where the black box is.
Below the fuel tank setup are final pics of the car, im very happy with the turnout. Its very predictable on track and handles exactly how i figured it would. I would build another one exactly like it but a different color, but i think i would get some resistance on that one...